
Watercolor Transparency: A Beginner’s Guide
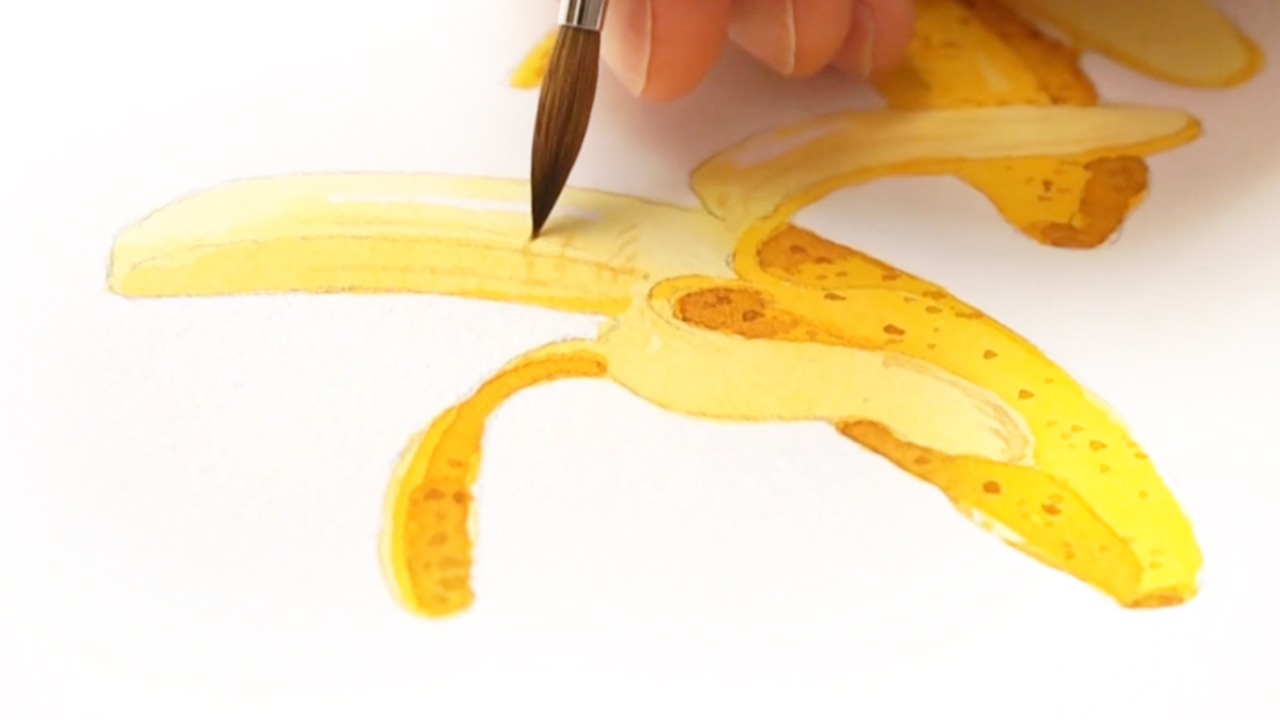
I love the transparency of watercolor…
But at the same time, it’s the very thing that catches a lot of beginners out. A little too much paint, or one layer too many, and that lovely transparent glow turns flat, or worse, muddy.
When I asked my readers what they found hardest about watercolor, “keeping it transparent” was a phrase I kept seeing.
So in this guide, I’ll explain what transparency in watercolor actually is, and how to keep it. Then we’ll put it into practice by painting a simple step-by-step project using transparent glazing techniques.
What is transparency in watercolor?
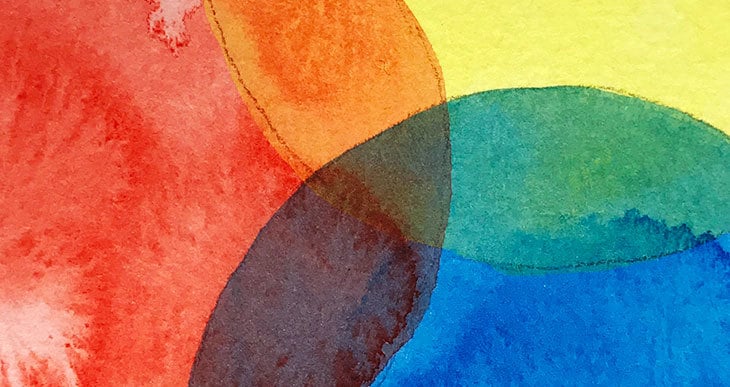
Transparency in watercolor means light passes through the paint, bounces off the white paper underneath, and shines back through the color. That’s what gives watercolor its glow.
So watercolor isn’t supposed to look like a solid layer of paint covering the paper. The trick is learning how to add enough pigment to create the color and depth you want, without covering up that light.
Watercolor has two unique characteristics:
- it’s water-based
- and transparent
Which sounds simple enough – until the paint starts doing its own thing! Those very qualities can often catch people off guard…
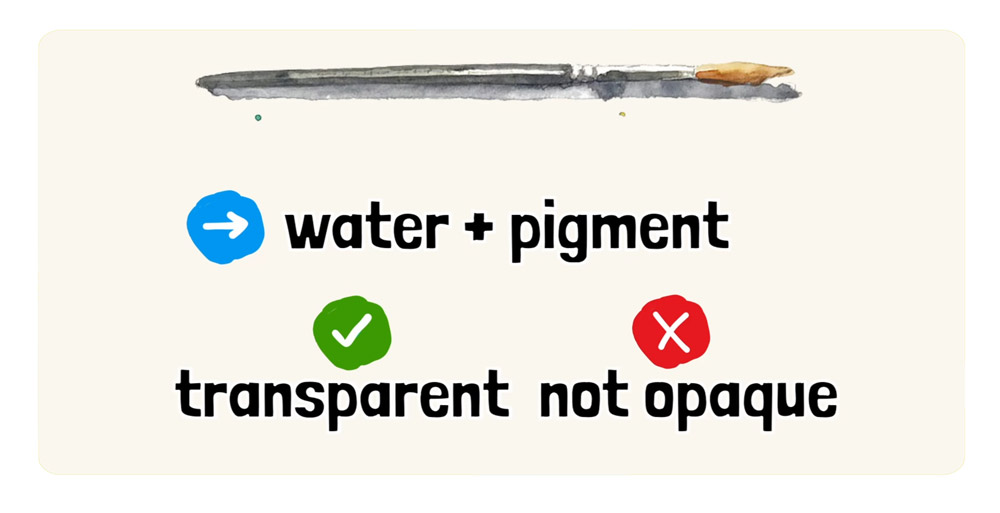
But watercolor isn’t just paint.
It’s water with pigment.
And unlike other paints, it’s transparent, not opaque – so it works in a completely different way.
And I think that’s where most beginners get stuck:
They expect watercolor to behave like other paints…
but it doesn’t.
Because watercolor flows and blends, because of how water moves… and sometimes it surprises us with unexpected blotchy textures (hello, blooms!)
And since it’s transparent, the brush marks you make underneath continue to show through, creating beautiful layers of color (if, of course, you know how to control it).
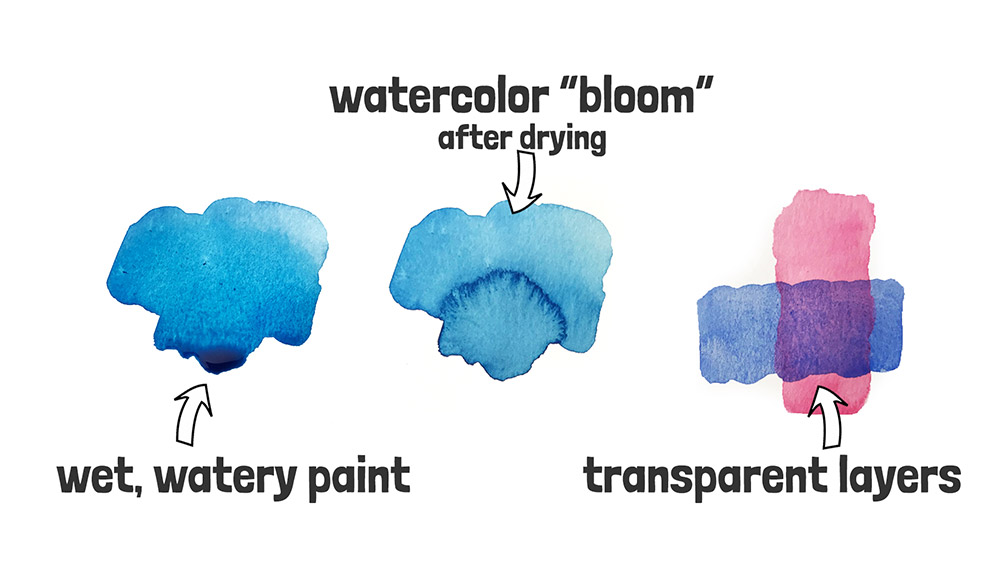
So the real secret to watercolor is about learning how water and transparency behave together on the page.
But in this lesson we’re going to focus on the second one – transparency
Transparent vs opaque watercolor: what’s the difference?
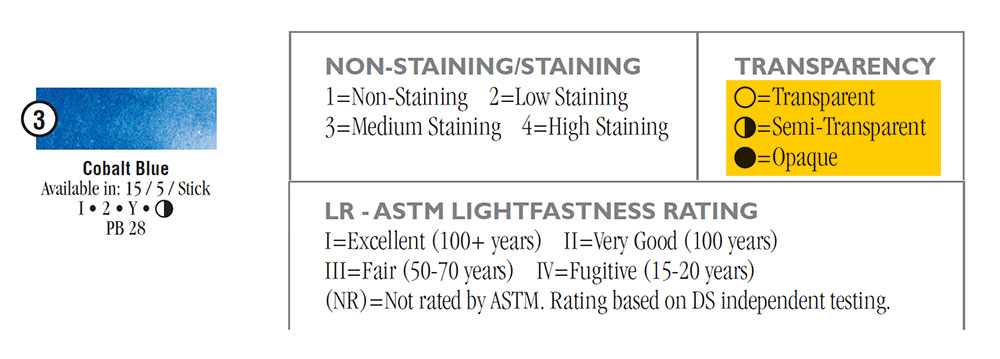
Not every watercolor paint is equally transparent, mind you. Pigments are usually rated transparent, semi-transparent or opaque. A transparent paint lets the light through to the paper, while an opaque one sits on top and blocks more light.
Opaque colors aren’t bad, by the way. They can be handy for small details or highlights.
But here’s the thing… how you use the paint matters far more than the label. Even a fairly opaque color becomes see-through when it’s diluted with enough water.
Which watercolor paints are transparent?
Most brands print a small symbol on the tube or on their color chart to tell you (the symbols vary from brand to brand, so it’s worth checking).
If you’d like a starting point, I’ve listed the colors I recommend here.
You can also test your own paints. Draw a line with a permanent black marker, let it dry, then paint a stripe of each color across it (this is called ‘swatching’) The more clearly the line shows through, the more transparent the paint.
Why watercolor loses its transparency (and turns muddy)
If you don’t know how to use transparency, it’s often the reason a painting ends up looking flat or muddy.
In my experience, it usually comes down to one of four things:
- Too much paint, not enough water: A thick, heavy mix covers the paper instead of letting it shine through, and can leave your colors looking a bit chalky.
- Painting into a layer that isn’t dry: The new paint lifts the old one and the two mix into mud. (This is why you need to use the technique I describe in the step-by-step lesson below).
- Scrubbing: Going back and forth with the brush stirs up the layer underneath.
- Too many layers: Each new layer adds a little more pigment, and eventually the light can’t get through.
The good news? None of this has anything to do with talent or expensive paint. They’re all about how you handle the water, and that’s something you can learn.
Transparent watercolor technique: building depth in layers
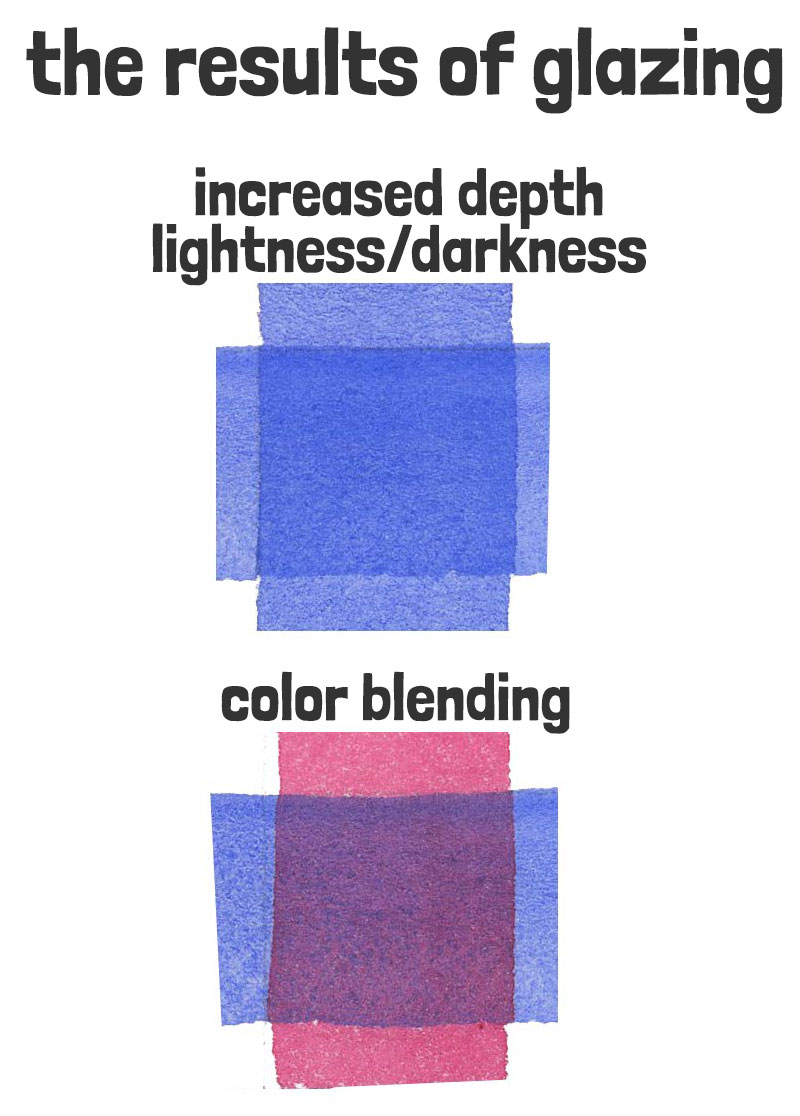
Transparent layering lets you build up color and depth gradually, one see-through layer on top of the other.
So… One of the big challenges beginners face is not knowing how to use watercolor’s transparency to their advantage. As we said early, unlike opaque paints, watercolor is see-through — so each layer leaves the ones underneath still visible.
That’s why watercolor artists often paint in layers using a method called a “glazing technique”
How to keep watercolor transparent
But glazing isn’t just “one layer on top of another.” There are a few basic rules you need to know to make it work well:
- Always let your first layer dry completely before adding another, otherwise you can end up with unwanted watermarks or blotchy stains
- Paintings should be built up progressively, one layer on top of the other (using glazing).
- A good approach is to work from light to dark.
- It also helps to start with larger, softer shapes and move toward smaller, more sharp-edged details as you go.
- Use more water than you think you need, especially in the early layers. You can always add strength later, but you can’t take it away.
- Glaze with light, quick strokes, so you don’t disturb the layer underneath.
Try it: painting bananas in five transparent layers
And to see how it works in practice, we’re going to paint these bananas!
I used only three colors to paint this:
- A warm yellow (Hansa yellow deep)
- A warm red (Pyrrol scarlet)
- A dark brown (Burnt umber)
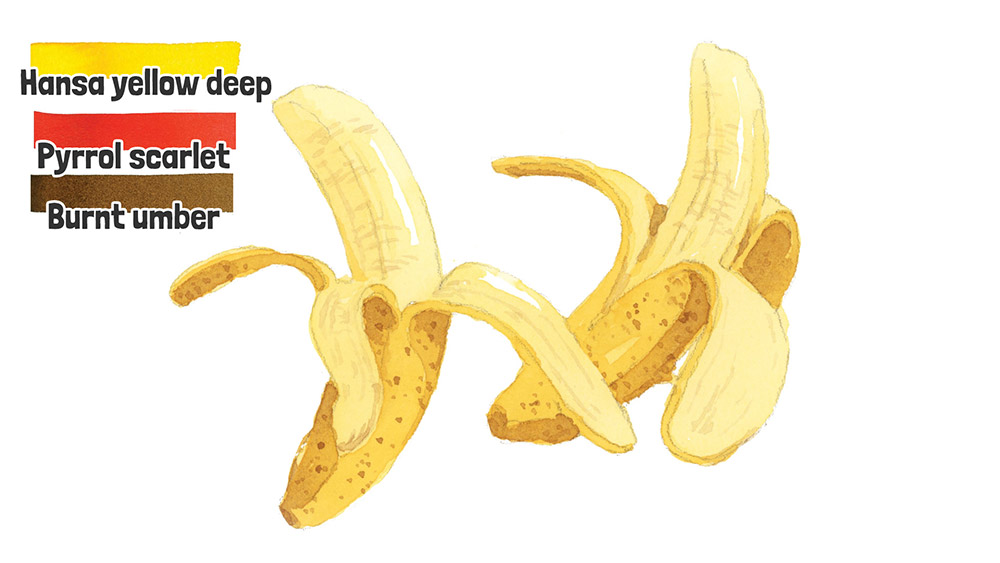
If you want to practice this painting with me, the full step-by-step video lesson, including all reference images, is available on my Patreon – New lessons are free for the first few days!
Layer 1: a pale first wash
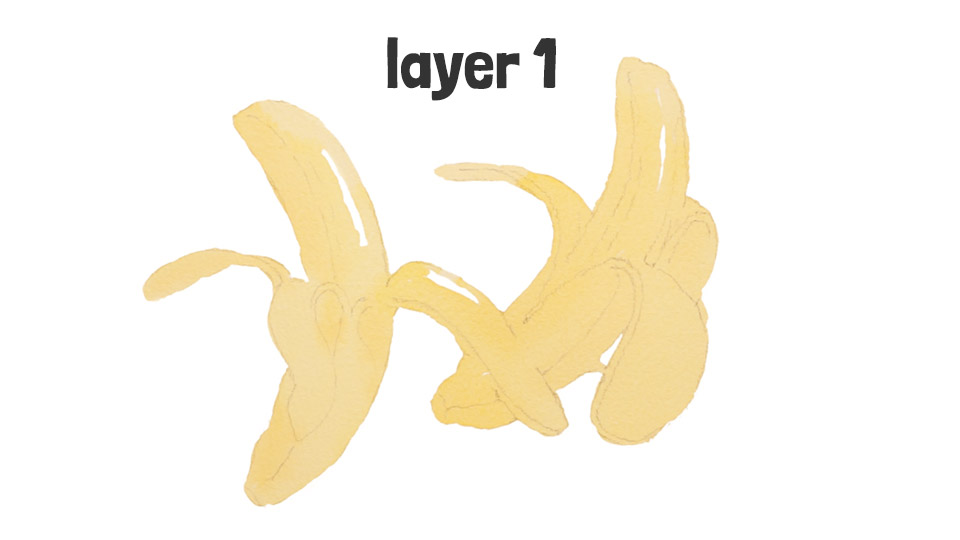
Mix up a very diluted yellow, and start painting the banana with a uniform wash of color.
A quick tip here – you can use a scrap of paper to test your brush marks before putting brush to paper – this gives you a much better idea of the final color appearance than what you can see in the mixing palette.
Notice that I’ve left a couple of white shapes to represent the highlights. Otherwise, paint the whole of the banana as one continuous shape… Once this first banana is done, notice I added a few dabs of stronger color here and there, therefore adding a touch more depth and helping to suggest the rounded form of the banana — even if this is just the first transparent layer.
Then move on to the second banana and do the same thing – paint the whole shape, leaving a small white highlight, and finish by dabbing in a bit more color in the shaded areas.
Don’t worry too much about getting it perfect – just aim to keep the wash smooth, and watch how the water carries the pigment.
Now that the first “glaze”, or layer of the painting is finished, leave the paint to dry completely before moving on.
Layer 2: the first shading
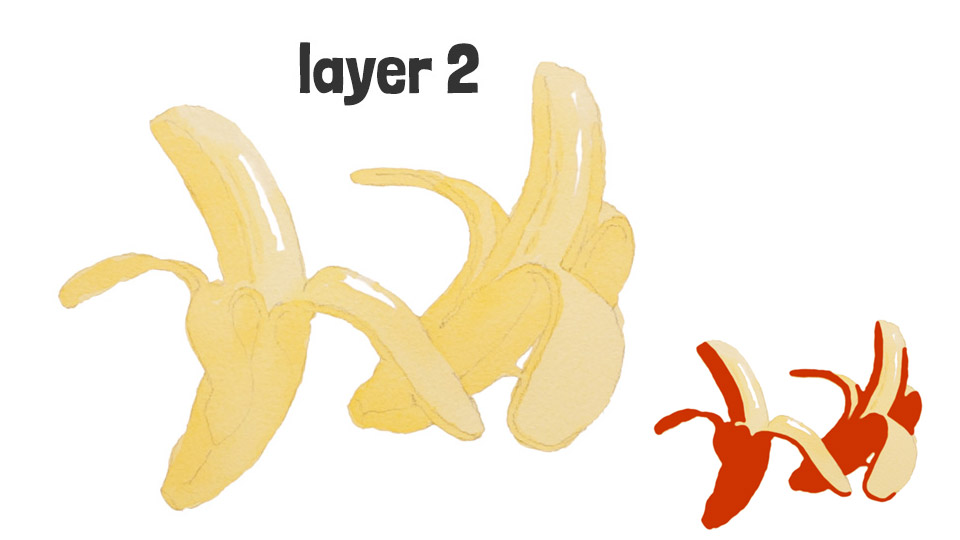
Moving on to layer two – still using a fairly diluted mixture of yellow – start adding a new layer of color, but only in the places where the banana needs a bit more depth. In other words, you’re no longer painting the whole shape, but just the next level of shading – building up the colors gradually. You can follow this example to get a rough idea of where to place this second shape, while still leaving some of that first layer untouched.
This is where a bit of forward thinking really helps – and it’s why watercolor is typically built up from light to dark, and from larger shapes to smaller ones.
Each new layer sits on top of the last slowly building up the illusion of three-dimensions.
Layer 3: the outer skin
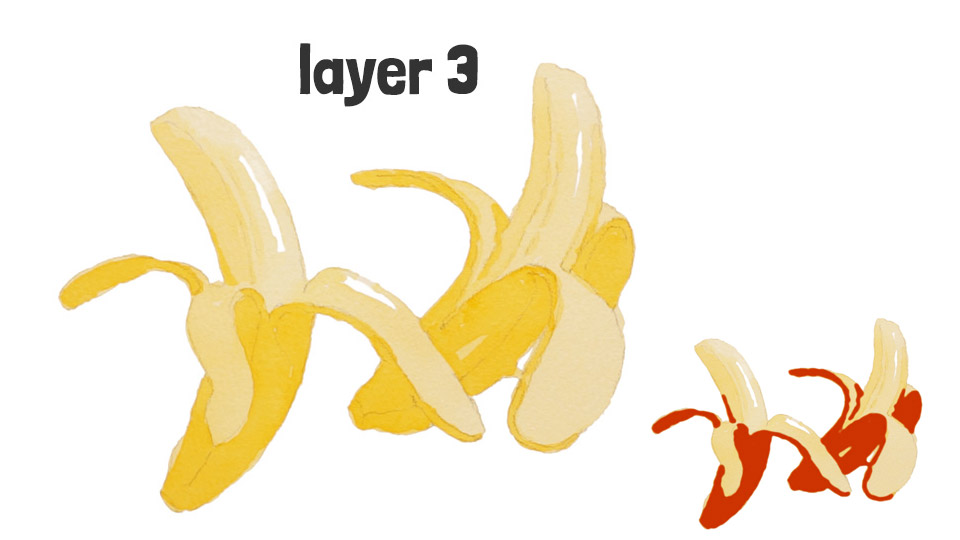
Leave everything to dry again, then start painting layer three.
This time, we’re focusing mostly on the outer skin of the banana – this area is generally deeper and more saturated in color than the inner part of the fruit.
Use a slightly stronger mix of yellow and paint a fairly even layer, leaving the lighter inner part untouched. (The diagram shows you a rough example of how I painted).
By now, you’ll notice how each layer you add gets a bit smaller and more focused — this is exactly how layering in watercolor creates a sense of depth and dimension – by building up translucent color step by step.
Take your time, and enjoy watching it come to life!
Layer 4: shadow shapes
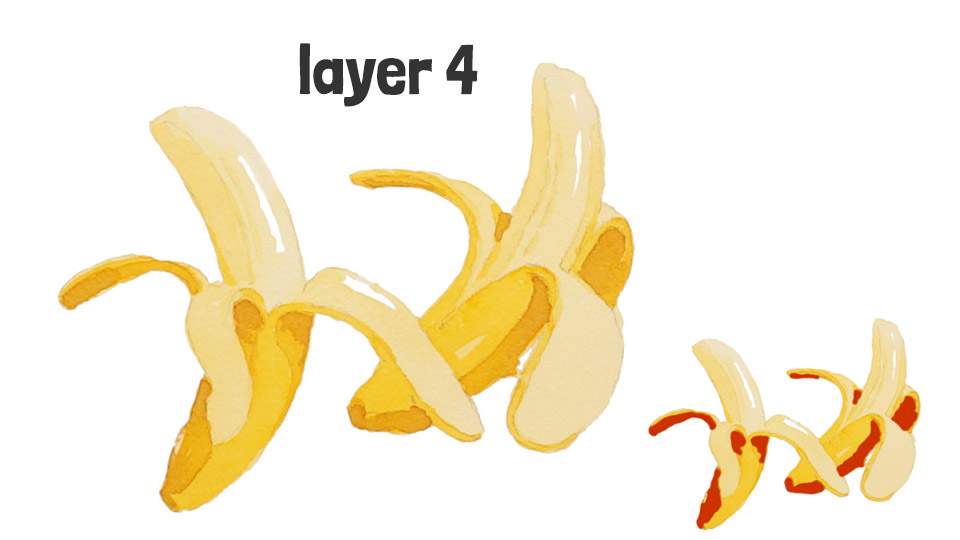
Now on to layer four – and this is really where things start to come together.
At this stage, I started adding more defined shadow shapes to help the bananas look more three-dimensional. The paint mix I’m using is mostly yellow, with just a touch of red and brown – and also quite diluted. This produces a slightly neutral color and helps the shadows feel softer and more natural.
This new layer helps reinforce the direction of the light, making the banana look more rounded, rather than flat.
After painting the shadow shapes, I also dabbed in a little bit of a darker brown in the deepest shadow areas.
As you’ll see, we’re not doing anything fancy here – just slowly layering up transparent color, one step at a time.
I think it’s this gentle, gradual approach that gives watercolor its depth and visual appeal.
Layer 5: finishing touches
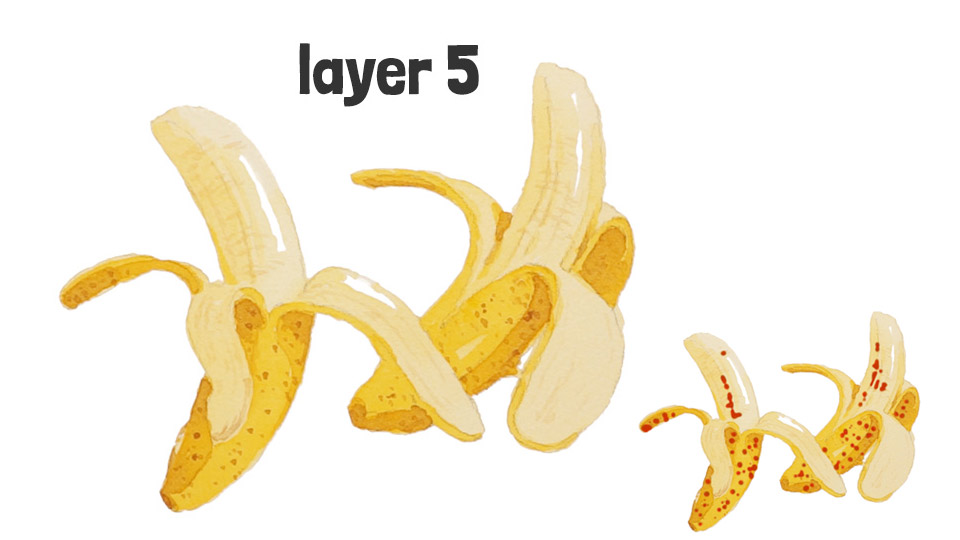
Leave the paint to dry completely before moving on to the final layer.
At this stage, it’s all about adding the finishing touches – for example, adding the speckled texture on the outer skin, and a few faint lines to suggest the textured surface of the banana fruit itself.
These details don’t need to be perfect — just a few well-placed brush marks can go a long way to bring the painting to life. 🙂
And there you go! I hope you enjoyed painting along. This first exercise was all about showing how layering transparent color creates form and depth in watercolors.
Key Takeaway
So… here’s the main thing to remember:
- Watercolor has two unique characteristics: it’s water-based and transparent.
These two quirky little characteristics are behind many of the struggles faced by beginners.
This exercise was all about showing how layering transparent color creates form and depth in watercolors.
It’s true, layering does take a bit of patience (mostly the waiting-for-it-to-dry part). But it’s one of the most useful techniques you can learn, because you’ll use it in almost every watercolor you paint.
Want to Learn More about Watercolors?
So if you’d like to practice your transparency properly, you could try painting this little banana composition with me… You’ll find the full video and all the downloadable resources as a guide:
And I’d love to know… what’s the hardest part about keeping your watercolors transparent? Let me know in the comments 👇

Thank you for this! It’s the best and most clear explanation of transparency that I’ve come across.
Thanks Margaret – Happy to help 🙂
Thank you for this helpful lesson.
Ginger
You’re welcome !
Very helpful!
🙂