How to Start Watercolor Painting – First Steps for Beginners
Have you ever seen a beautiful piece of watercolor art and thought “I want to paint like that”? Many budding artists hold back because they just don’t know how to start painting in watercolors. I think that’s too bad. Because I believe the joy of creating with watercolors is within anybody’s reach. Some people simply don’t know where to begin. Others have fears and frustrations that prevent them from taking the leap.
My first steps in watercolor were far from perfect. I used to be very self conscious about my artwork and I was reticent to show people the results of my paintings. I would spend forever remaking a piece of art. Heck… Even today I sometimes have to start over a few times before I’m happy with my results. But the joy of painting in watercolor keeps you coming back again and again.
I’d like to help you overcome the reasons that are holding you back, and discover the first steps you need to get started with this wonderful art medium.
Watercolor painting is one of the most rewarding and approachable forms of art. Let’s examine a few simple ideas and projects to get you going on your creative journey.
How to Start Learning Watercolor Painting
There are lots of reasons why we have difficulty starting something new like watercolor painting. Maybe you don’t understand how to use watercolors to get the best out of them. Or you don’t know which supplies to buy. Some people are worried about not doing the right things when they paint, and wonder what to practice in order to make progress? And then you have to find the time and the motivation to actually paint.
If you let any of these things prevent you from starting watercolors then you are quite simply missing out on one of the most satisfying and beautiful art practices around.
But it’s not difficult to get over these obstacles.
Lack of confidence
Fear of the unknown is a natural human response to anything new. You’re not alone and it’s not unusual. I wasn’t 100% confident in my painting abilities when I first started. But as soon as you get over that fear you wonder what was preventing you! Watercolor painting is the same.
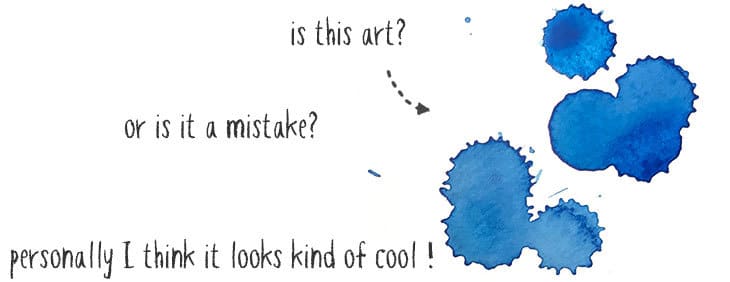
“But what if I make a mistake” I hear you say. So what? Nobody will know it’s a mistake accept yourself. I’ll let you into a secret. I’m a bit of a perfectionist! But I’ve learned to accept the imperfections of watercolor painting. In fact, it’s one of the things that make watercolors so interesting!
You don’t feel creative
As a child you drew without concern. The thing is, you’ve always been creative… You’ve just forgotten this part of yourself.
Every new painting is a step towards improving your skills and finding your creative voice.
I find the best way to overcome doubt is to take action. Practicing watercolors, just a little every day, is a great way to dissipate doubt.
And remember this is supposed to be fun!
Lack of time
Luckily for you, watercolors are highly accessible. Watercolors are very portable, so you can take them just about anywhere. A sketchbook and a portable watercolor palette take up very little space, so you can enjoy painting whenever you take a break from everyday life. In a café, on your lunch break, in the park, on your kitchen table…
The opportunities are there if you look for them.
Understanding watercolor paint
Beginners often don’t know how to use watercolor paints and what to expect from this extraordinary art medium. Maybe you’ve already painted using another type of paint like acrylic. Or this could be the first time you pick up a brush.
Watercolor paint is endlessly rewarding. But it has a very playful nature. Pigment and water often do what they like. They blend together to produce gorgeous patterns of color. But watercolor is also transparent. And transparent paint leaves every brushstroke visible.
For these reasons watercolors have the reputation of being difficult to learn and control. I think that’s a bit unfair. You might have an accident with your brush. But these happy accidents should be seen as an opportunity not a mistake. This way you’ll get greater enjoyment from the painting process.
The fundamental thing to understand about watercolor is hidden in its name.
Water…
The wetness and the flow of water, and the transparent characteristics this creates, are what determine the outcome of your paintings. The rule to remember is this. Water will always flow from wet to less wet. An area of wet paint will seek equilibrium and flow towards the area of lesser wetness. The water carries pigments from one place to another. And water evaporates and dries quickly. So your window of opportunity for playing with the paint is sometimes short (that’s why I try to use plenty of water in my mixes and keep colored washes wet while working).
What you need to Start with Watercolors
You don’t need much to start painting. The basics include a brush, watercolor paper, and a few paints. And you don’t need a huge range of colors to get great results.
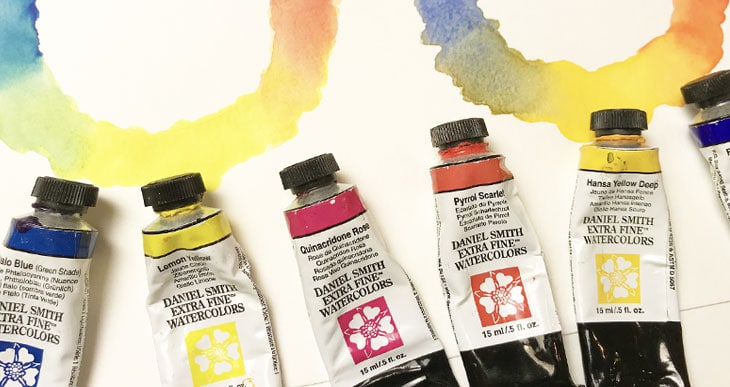
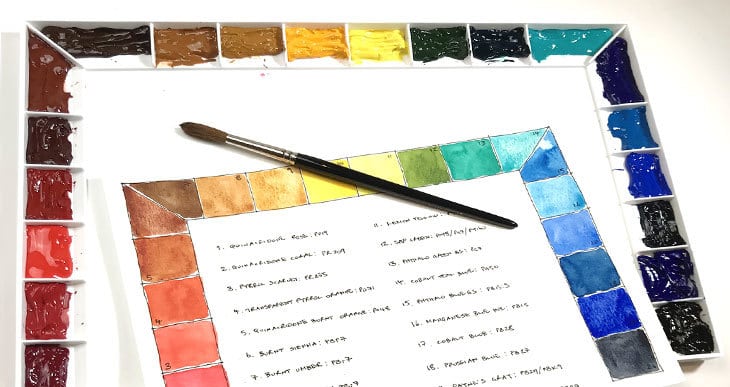
Basic color theory tells us that you can mix any color from just three primary colors: yellow, red, and blue. In reality you need more than just three primary colored paints to mix any desired hue. The smallest palette for the best range of color mixing consists of six colors.
A warm and cool yellow, a warm and cool blue, and a warm and cool red.

In general, you can define warm colors as those that tend towards red and cool colors are those that tend towards blue. Cool paints contain pigments that are more blue, and warm paints use pigments that tend toward red. Unfortunately “pure” primary pigment colors don’t exist, so you need a combination of cool and warm primaries to balance each other, and to get a full range of color variations in your mixes.
A great way to get started with artist quality watercolor paints at a reasonable price is the Daniel Smith Essentials introductory set. (Check the reviews for yourself on Amazon. I recommend you choose the best quality paint you can afford and this set includes fine quality watercolors of all the warm and cool primary hues).
Next you need a brush. Watercolor brushes are designed to work specifically well with water. They have a good pointed tip for accuracy, and they hold a lot of water (they have what is referred to as a good reservoir). The very best type of watercolor brushes are made of natural hair, because they have the best characteristics. But these can be expensive. The most affordable alternative is a mix of natural and synthetic bristles. The “Silver Brush” company make some good brushes of this kind.
Try to find a medium sized round brush to begin with. A size 8 round is a good option. Round brushes are the most versatile and allow a wide range of brushstrokes. And if your brush is too small you’ll waste a lot of time picking up paint, and it will limit your brushwork.
Watercolor paper is a necessity, because any other kind of paper won’t handle the wet paint very well. High quality 100% cotton paper can be pricey. But you can get perfectly good student grade paper which is sufficient to begin with. Just make sure the paper is reasonably thick. A good minimum weight is 140 lb / 300 gsm. This is the paper I use for sketching.
What to paint to get started?
This isn’t a tutorial about every possible watercolor technique available. That would take a long time to explain. But the idea here is to get started with watercolor paints. Hopefully, you’ll find the projects below are a good way to start exploring the nature of watercolors, and at the same time discover that it’s possible to create appealing artwork with simple ideas.
You don’t need to be a naturally talented artist to enjoy this art medium.
Watercolor Feathering Starter Tutorial
This little painting uses a technique called feathering. It’s a fun way to discover the way paints behave in relation to water. It combines wet paint on dry paper, and wet paint over wet paper, which are both typical techniques in watercolor painting.
Set yourself up with your supplies and two jars of water. This isn’t essential, but it’s a good idea to have two sources of water: one for rinsing your brush, and one with clean water for mixing. You’ll also need a mixing palette for preparing your colors. Some watercolor box sets have built-in palettes. Otherwise you can just use a white plate (white is best because otherwise you can’t make out the colors properly).
Before you start painting you need to mix some paint. Choose any color you like. Begin by getting your brush nice and wet so that it soaks up plenty of liquid. Then load it with water and press it against you mixing palette to release a puddle of water. Make a nice big puddle.
If you’re using tubes, squeeze out some paint onto the palette. Now stroke your moist brush across the paint and load it with pigment.
Gently mix the pigment into the puddle of water. Mix well to create a smooth blend. You can test the strength of your color on a spare sheet of paper. If it’s too strong add more water. If it’s too light, add more pigment (keep in mind that when watercolor paint dries it has a lighter toned appearance than when it’s wet). Try to get a medium strength mixture, not too dark and not too light.
- Now clean your brush to remove all the colored paint. Begin the painting by loading your brush with clear water and paint 4 or 5 parallel lines onto the paper, leaving a gap between each line. You’ll see why you’re doing this in a minute. You don’t want these lines to be soaking wet, but just damp (wait a minute if you think it’s too moist).
- Once the paper has been wetted with linear brushstrokes, load your brush with colored paint. Now apply linear strokes at right angles to your damp lines. Repeatedly paint a pattern of lines, one under the other, leaving a space between each.
- As you paint the colored lines you’ll see the pigments of your watercolors dispersing sideways into the wet paper lines, creating a feather-like texture.
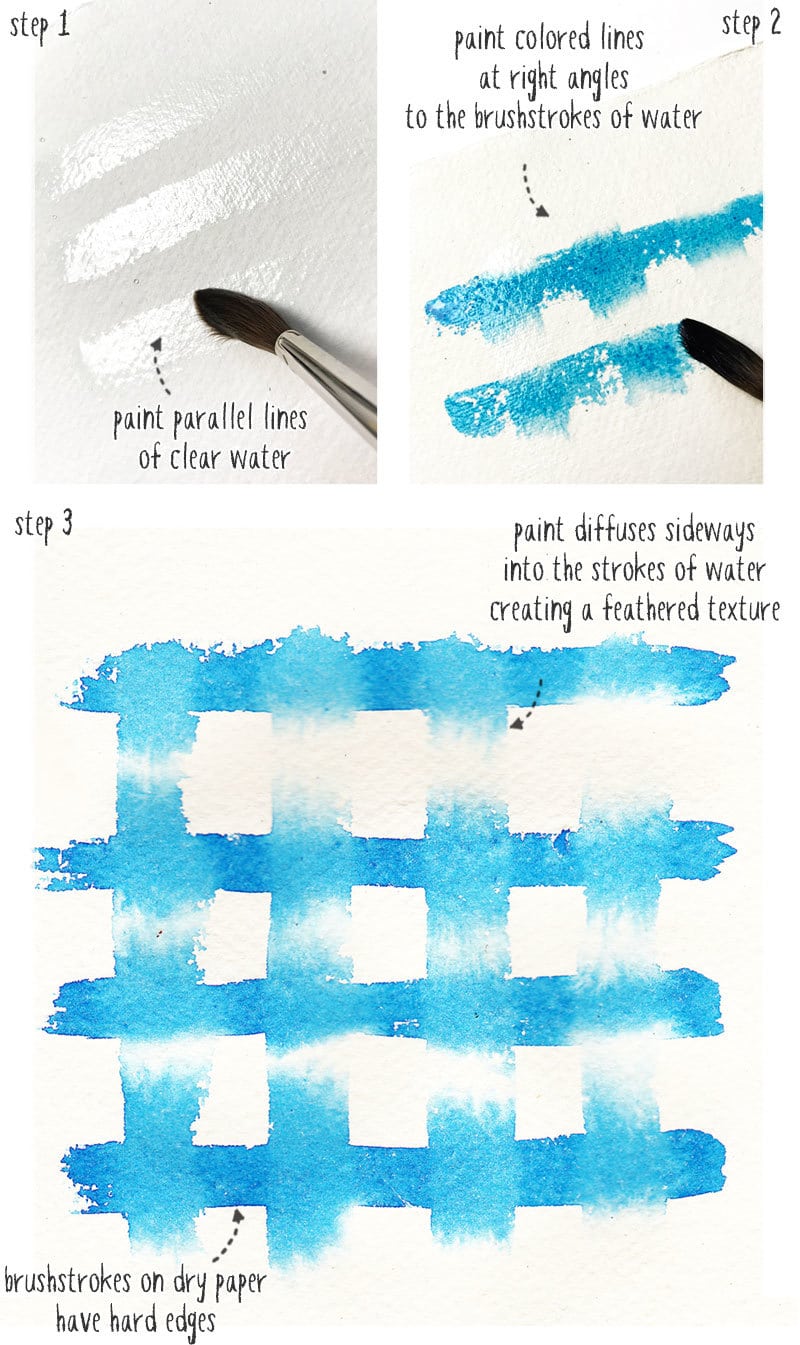
Notice how your paint lines have crisp, hard edges where you applied them to dry paper. Painting strokes in this way is known as a wet on dry technique. It’s a method of painting in watercolor which gives you the most control over your brushwork.
Each time the wet paint stroke passes over the damper lines, the wet paint flows into the damp paper, producing a diffused effect (If you remember from the description above, water always flows from a wet wash towards a less wet wash). Because the clear water lines are damp, but not soaking wet, your juicy wet paint flows into the moist lines.
Simple watercolor flowers with layered paint
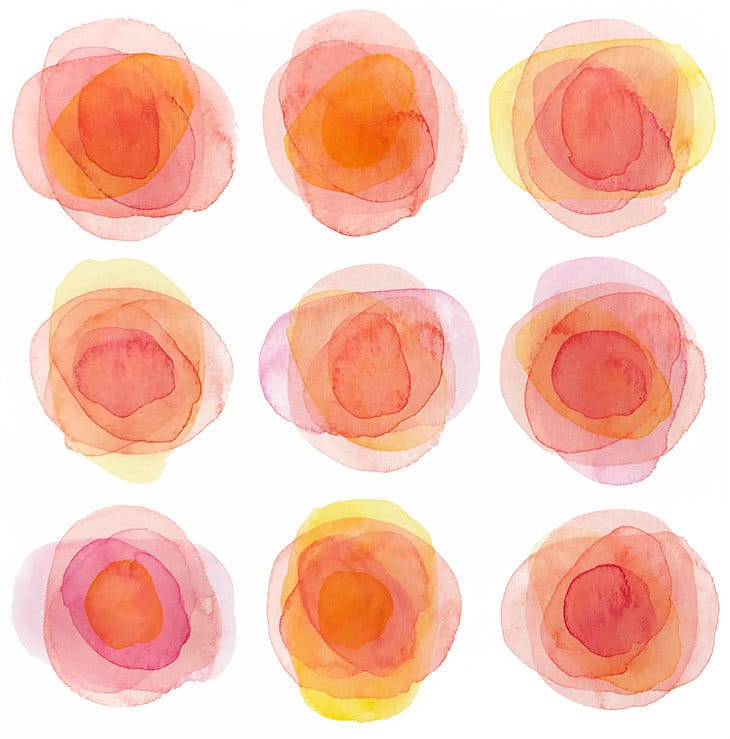
For this next project I’m using a limited palette of three primary colors and to keep things simple there’s no mixing. By limiting the number of colors in your paintings you stand a better chance of achieving harmonious results. Too many colors often look confusing and can conflict with each other. I selected a warm yellow, and a warm and cool red. Like this I’m also using colors which are close to each other on the color wheel (a color wheel is a kind of chart which artists use to help them with color mixing and color design). Using hues that are close to each other is known as an analogous color design.
Make your colors quite diluted. Remember, watercolor paints are transparent, and you want to exploit this to your advantage. You’ll see the effects of this transparency in this easy exercise (Some beginners mix very thick paint which defeats the purpose of using watercolor).
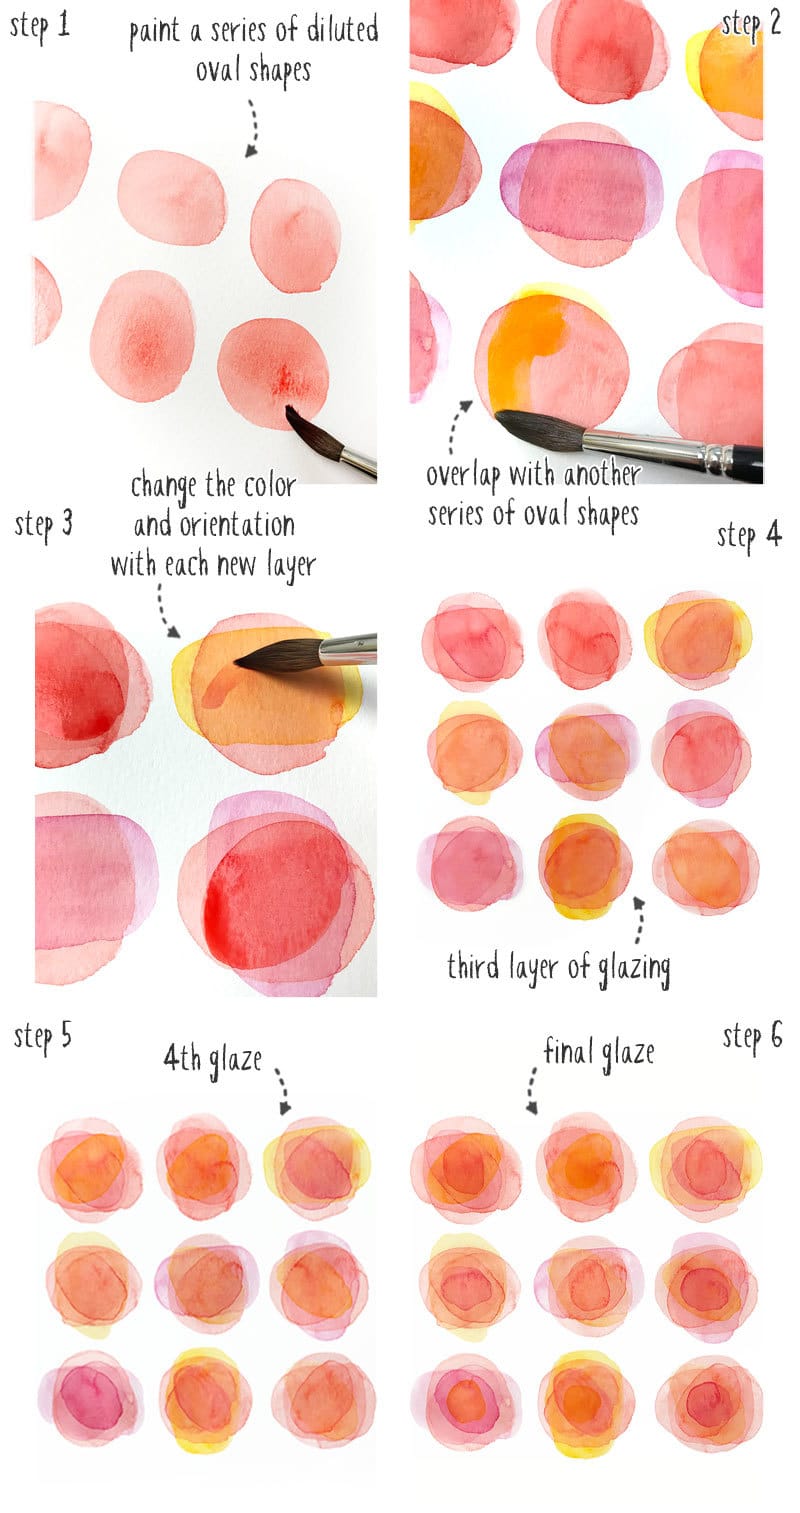
- Begin by painting a series of oval shapes. I’m alternating the orientation of my ovals just to add some variety. Now you need to wait for the oval washes to dry. This is important, because if you start painting over a previously laid wash too soon, the underlying paint will lift and smudge the first shape.
- Now paint a new series of oval shapes over the top of the first. Use different colors, and again you can alternate the orientation of the ovals so that they overlap the edges of the first shapes.
Notice how the underlying oval shape remains visible. Also with each new layer of paint you increase the intensity of the color, and the two colors combine to create a new blended color. This is most noticeable when you overlap yellow on red, resulting in an orange appearance.
The painting technique you are using is called glazing, which basically means layering washes of paint on top of each other after they have dried.
- Let the paint dry again, then paint some new ovals into the existing shapes. Make them slightly smaller, and change the colors and orientation each time.
- Repeat the process again and again until you’re happy with the result You’ll end up with a pattern of abstract watercolor “flowers”.
Cool… Huh?
Beginners color mixing tutorial with warm & cool primary paints
In this simple painting you’re going to discover why you need six primary colored paints to achieve a good range of color mixing.
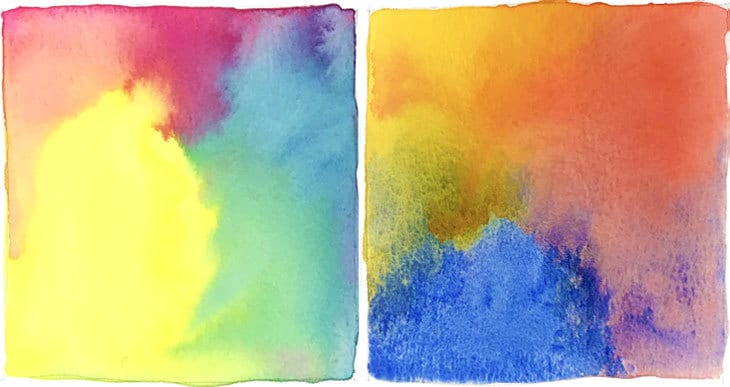
Begin by drawing two squares on your paper. In the first square you’re going to paint washes of cool colors, and in the second you will paint washes of warm colors. Prepare a good wet mixture of all six primary colors in your palette. The idea here is to work quickly, because you want to apply all three primary colors into each square before the first washes start to dry. This is a technique called wet on wet, and as you will see, it produces beautiful diffused blends of color.
- Start by wetting the square with clear water. You want the colors to blend together on the paper, and this is easier if the surface remains wet while you’re working. This is a painting technique known as wet on wet.
- In the first square you will be combining cool yellow, cool blue, and cool red. It’s a good idea to start with your lightest toned colors, which in general is yellow (this is because yellow gets easily contaminated with darker colors from your brush or on your palette). Fill in one corner of the square.
- Next add some cool blue on the other side of the square. Let the paints diffuse and mix together on the paper.
- Finally add some cool red to complete the square. You can encourage the paints to blend together by tilting the paper slightly, or by dabbing color into the wet wash to create mixes on the surface.
- Go through the same process with the other square, only this time you will use only Warm yellow, warm blue, and warm red.
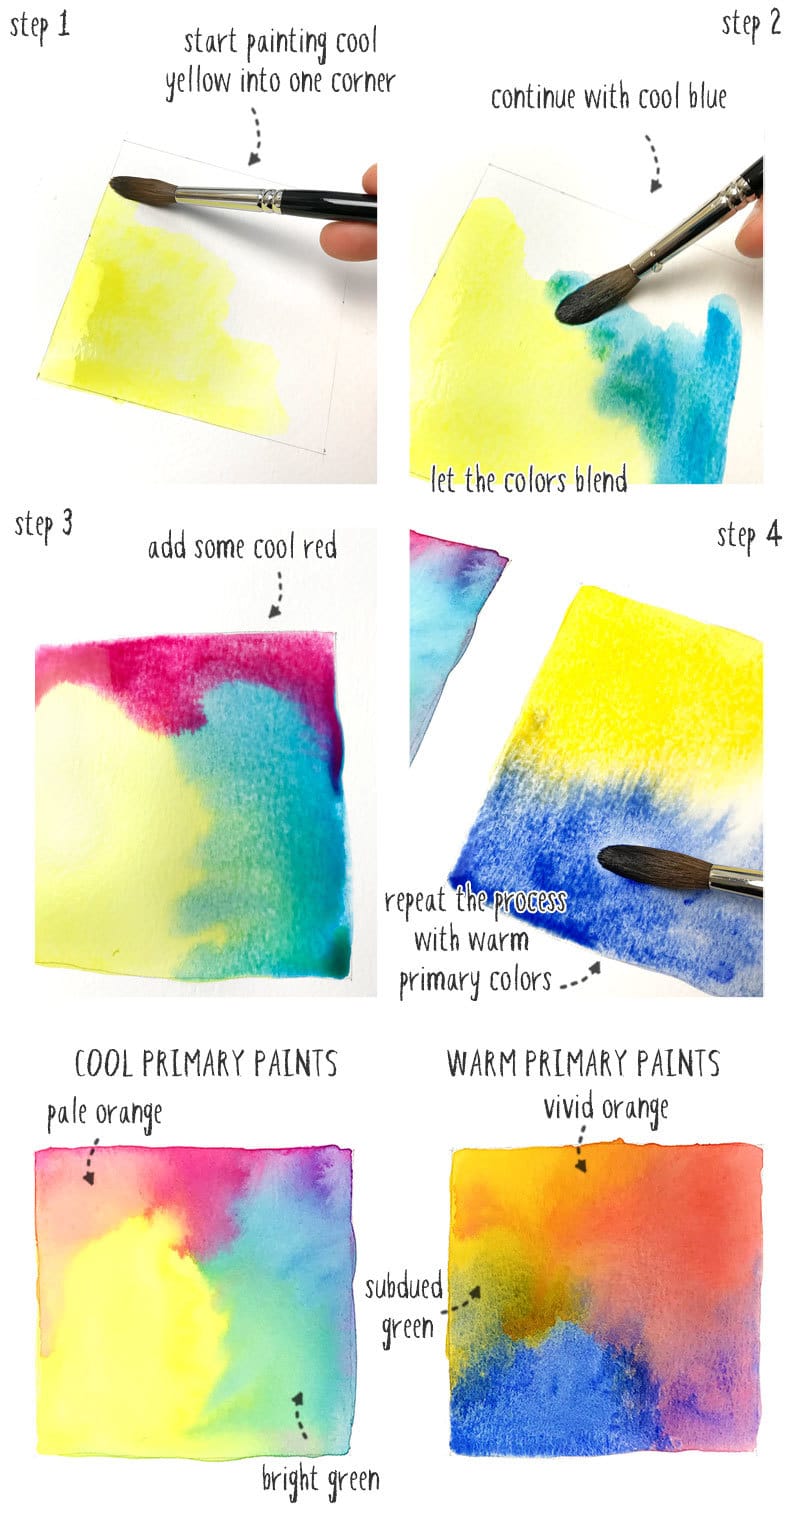
Notice the difference between the two squares. Even though we used primary colors for each, the color appearance is completely different. For example, cool yellow and cool blue blend to make a nice bright green. On the other hand, warm yellow and warm blue produce a more subdued olive green mixture. The resulting purples and oranges are also very different.
Color mixing is an important skill in watercolor painting, but as you can see, it’s possible to produce a huge range of fabulous colors even with a limited paint palette. Just imagine all the color variations you can create!
I hope this gives you some insight into the wonderful world of watercolors. But keep in mind, the secret to watercolor painting is practice!
The more you paint, the more competent you become, and the faster you grow as an artist.
Go grab those brushes!

this was good to see ,some free advise, i started without your words of advice, with many mistakes,.
Anthony, well done. I love your article. Thanks!
Thanks YehoshuaK!
I have been painting for years and this is the very best not video for a beginner I have ever seen. Good job.
Thanks Carol 🙂
that was great thanks im off to get some paint
Go for it Malcolm 🙂
I just saw your two painting tutorials and can’t wait to try them later. They are exactly what I was looking for. Brilliant!
Thank you! Your post was comforting. Being a perfectionist myself as well, I often find myself holding back on things for fear of incompetence or failure. I feel watercolor painting will become a therapy to be easier on me and to start embracing mistakes, imperfections and flaws.
Yes… progressing with watercolor is a good way to learn to “let go”.
this helps A LOT!
This is very very helpful for self taught artists: detailed enough to replicate & open minded KY presented to not sound so Pendant ich as some tutorials. Thank you very much for the depth of detail in explaining & encouraging these experiments!!
You’re welcome Margaret
I really enjoyed your tips/techniques and exercises.
just bought a set of watercolor paints for my son, for school. I got one for me as well. never took painting classes, but I have used acrylics. this is so intimidating, therefore a great challenge. thank you for explaining this so easily understandable. let’s do this!
Hi Anthony. Thank you so much for such a great post. I have wanted to learn watercolor for as long as I can remember to no avail. Your article is fabulous and easy to understand. I have finally started to learn watercolor and so happy.
With smiles
Laine K
Good to know the site’s helping Laine !
Thank you very much! I’m practicing a little bit every day. I would like to get some help with the brushstrokes because i can’t get good transitions between 2 colors in “wet on dry”. For example, from a kind of green to another one in an apple.
Thank a lot
María
Aha! Now I know how to start! Thank you for the great and clear instructions and pictures to follow along. Super-excited to start “arting”!!
Enjoy your first steps with watercolors Heather !
This is just what I was looking for. Thanks so much, Anthony, for these lessons. Very much appreciate your efforts and so grateful to you for sharing your knowledge.
I have set up my palette and now ready to do these exercises. Looking forward to making progress.
Brenda
The clearest, easiest to understand explanation of wet on dry, wet on wet, and color mixing I have seen. You’ve inspired me to try watercolors once more! Would love to know more – do you have videos or books, online classes?
Thanks Debbie… Should have some online classes available soon!
I’m enrolled in a beginner Watercolor Painting class and have spent so much money on brushes, paint and paper without knowing what I was getting into. I found your website today and wish I’d seen it before I began purchasing the supplies. Your website is very instructive and helpful. I have bookmarked several articles that I know will be good for me to refer to as I learn along the way. Thank you.
Hi, Anthony. Like so many of your commenters, I started trying watercolours a couple of years ago. Bought good materials, inhaled tons of youtube videos, invested in classes, etc. It was only when I realised that instead of actually painting, I was buying new paints, watching yet another video, and using other avoidance tactics. I had no confidence in myself at all, and my stuff started gathering dust. And then I found your site, and it’s … comforting. You explain in detail where books, videos and classes merely assumed that something was obvious or got too technical for me. I’m going to try again, because I really do love the medium. If you ever decide to offer notifications or memberships, I would definitely be interested. Thank you.
Thanks for your kind words Marianette – don’t give up! Watercolors can be frustrating but they’re also so rewarding!
I am so happy right now. You have made watercolor painting something I will do. Thank you so much for sharing your talent with all of us. I will tell others of your great site!
Thank you for sharing your talents.Will be stopping by again.
I have read soooo many sites, to teach myself and friends, watercoloring. Your site is, by far, the absolute best. Thank you for putting this together and sharing !
.
Thank you Vikki ! I’m just happy to know you’re enjoying your watercolors
A clearly written and easily understood website. It has a reassuring effect on beginners like me. Thanks!
Thank you for this. I have started out with all good intentions – got all the materials etc and paid for an online course. But I have thrown away more than I have painted and feel very discouraged. Like why did I ever think I could Paint? By just reading this it’s likely that I will try again another day, but with smaller steps. I will try your tips. Thanks
Don’t give up Clare – try some abstract painting or watercolor doodling. Focus on composition and color harmonies – and just have fun!
I have been hesitant to pick up brush, collected supplies, felt paralyzed. Thanks for what you do. Going to dive in today.
Fantastic ! – so glad you’re getting started !
I’m an intermediate watercolor artist but I’m always learning something new here – this site is AWESOME! I’m wondering if you have a newsletter or offer “membership”? Thanks for all the great content!
Hi Susette – I’m working on setting up a newsletter soon – stay tuned 🙂
I have a question about the primary colour mixing chart. How do I know where to put the warm tones and where to put the cool tones?
Hi Jessica – I’ve added a new link in the article above about how to make color wheels. You’ll also find more about how artists use color wheels in this article (click here)
All good stuff to know and try. The layering technique really comes to great use in your painting a pear lesson. I’d love to see more of those. Doing one object at a time is very helpful for me as a beginner; not too overwhelming! Please, please do more of these.
Thanks Abi – Nice to know…
More stuff coming soon!
Such a fabulous help to me
I have worked in many mediums but have avoided watercolor because it seems so unforgiving and demand so much planning. It is so beautiful when done well. I picked up a little set and have started sketching at our community garden. iffy results so far but I am encouraged by your posts.
Keep painting Kristine – watercolor can be very rewarding!
Thank you, Anthony, for your sharing of knowledge and experience. Your passion for watercolor is contagious! I am waiting on my starter set of paints to arrive next week, and look forward to completing the exercises you have suggested. I am grateful for you and your generosity!
Wonderful to know you’re getting started with watercolors Jen!
I just bought water color paint again to try painting again with this paint. I was so frustrated last time..I paint with acrylics and that was easy! But I love the softness of water color painting. So thankful I found your website..thank you so much for sharing your wisdom!
Hi Jodie – I’m sure you’ll be painting beautiful watercolors in no time ! Have fun!
Great help for a “newbie” of advanced age. Needed this basic info on mixing and cool/warm colors. Will practice today. It’s wonderful to see a tutorial from the year 2019. I am finding more sites that are anywhere from 2001 to 2016. I need up to date info. Thanks again.
Happy to help Diane!
Hi Anthony,
I’m blessed to have found you. I’ve looked at numerous tutorials about watercolours, and none provided a practical demonstration as you have shown. I thoroughly enjoyed your site, which has provided much needed inspiration and knowledge.
Hi Chrisoula – I’m happy to know this helps with your watercolors!
Thanks so much for this it was very very helpful.because I don’t know where to start now I can try and see where I go thanks again.
Glad to help Emelly – enjoy your painting!
Thank you! I need this!
No problem Liz! Happy to help.