Simple Spooky Watercolor Bats!
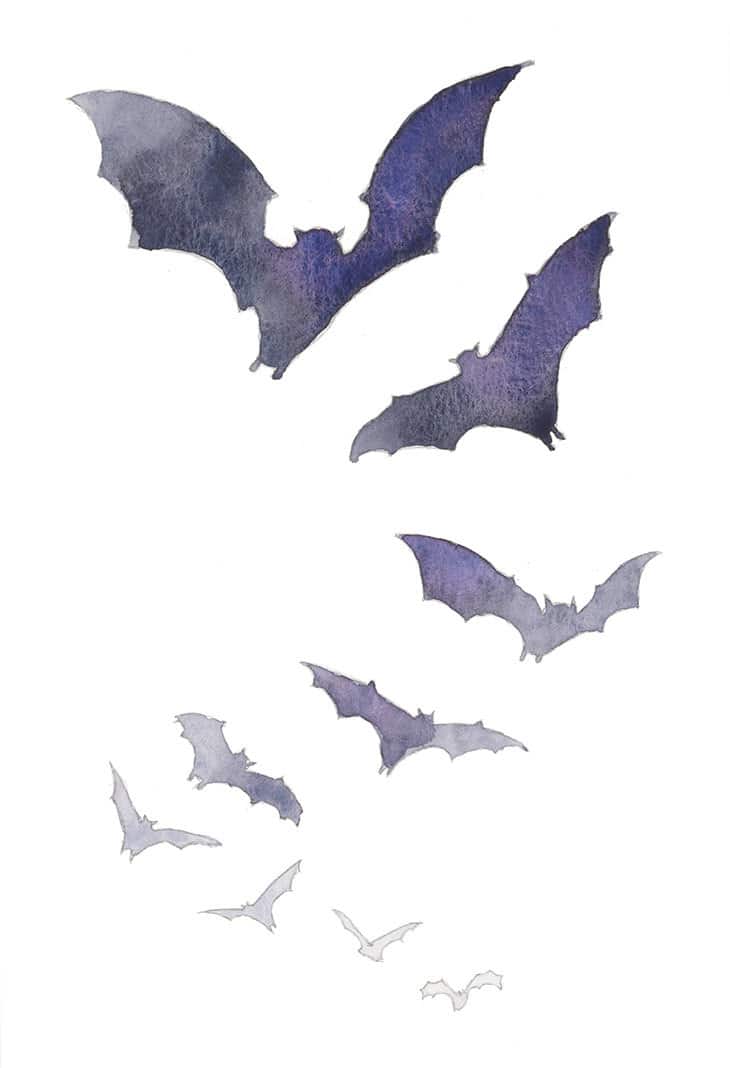
Hi everybody, welcome to another Halloween watercolor lesson, and today I’m going to show you how to paint these spooky bats that look like they’re flying right out of the paper!
The tricky part is that each bat is really just a dark silhouette, so there isn’t much detail to work with. If you paint them all the same, you end up with a few shapes that just look flat!
But if you think about where you place each bat, and how light or dark you paint it, you can create a sense of movement that makes the bats look like they’re swooping out of the page.
For reference here’s a list of all the colors used in this painting (Please note, these are affiliate links):
- Phthalo blue GS – Pigment number: PB15:3
- French ultramarine – Pigment number: PB29
- Paynes gray – Pigment number: Pb29/PBk9
Halloween Special – Watercolor Bats
Ok, so before we start I just wanted to point out a couple of things about the composition of this painting…
Notice that I arranged the flying bats so that they describe an “S” shape. Artists discovered long ago that this type of S shaped curve generates a kind of leading line which adds a sense of movement to a painting. This works particularly well on vertical compositions like the one I used here.
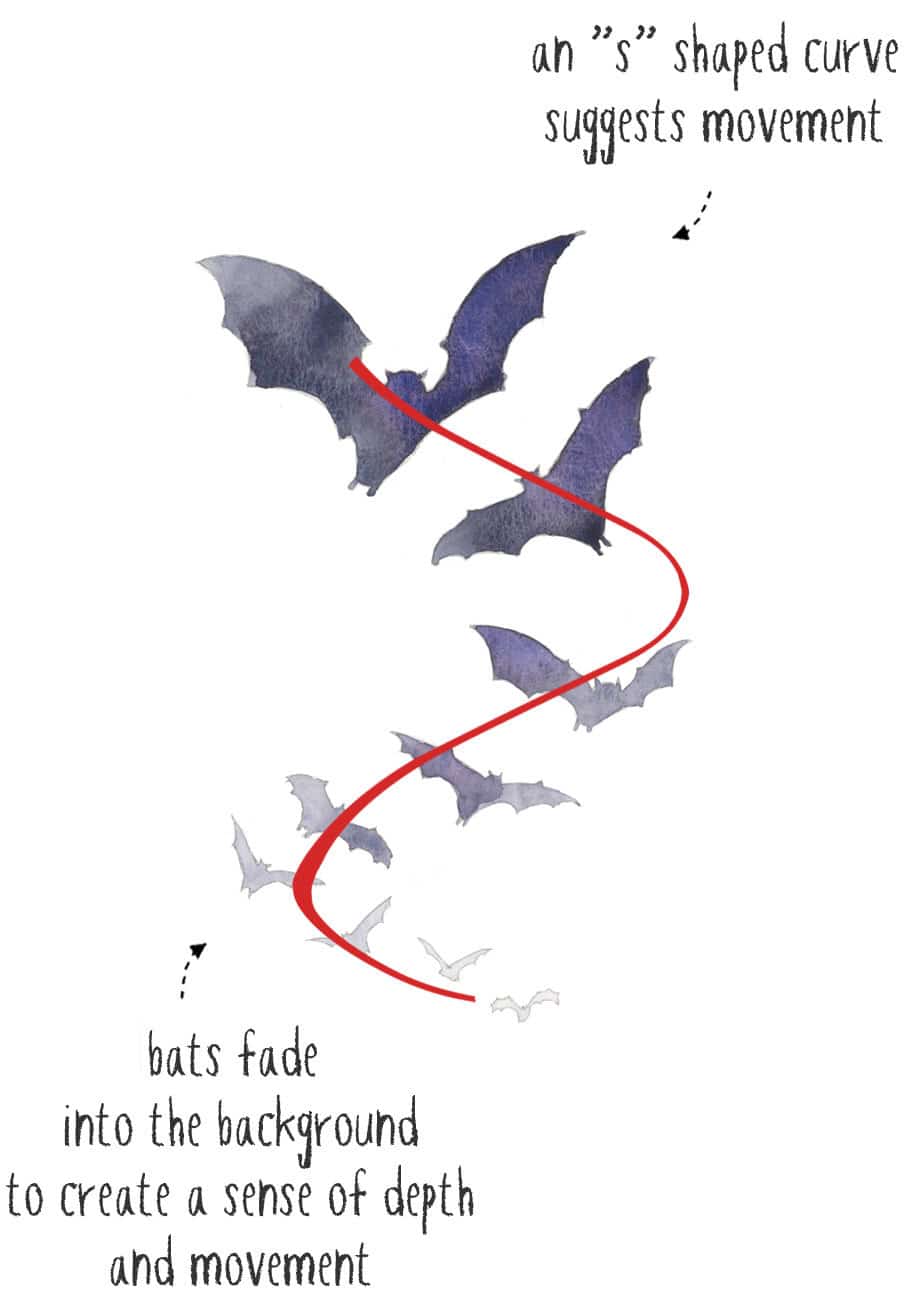
To increase the sense of movement of the bats I also gradually decreased the tonal value of each bat shape so that as they get smaller and smaller they fade into the background. This creates a sense of depth which reinforces the impression that the bats are flying out of the paper !
As before, begin by tracing the outline of the bats onto watercolor paper then fix your paper down to a board.
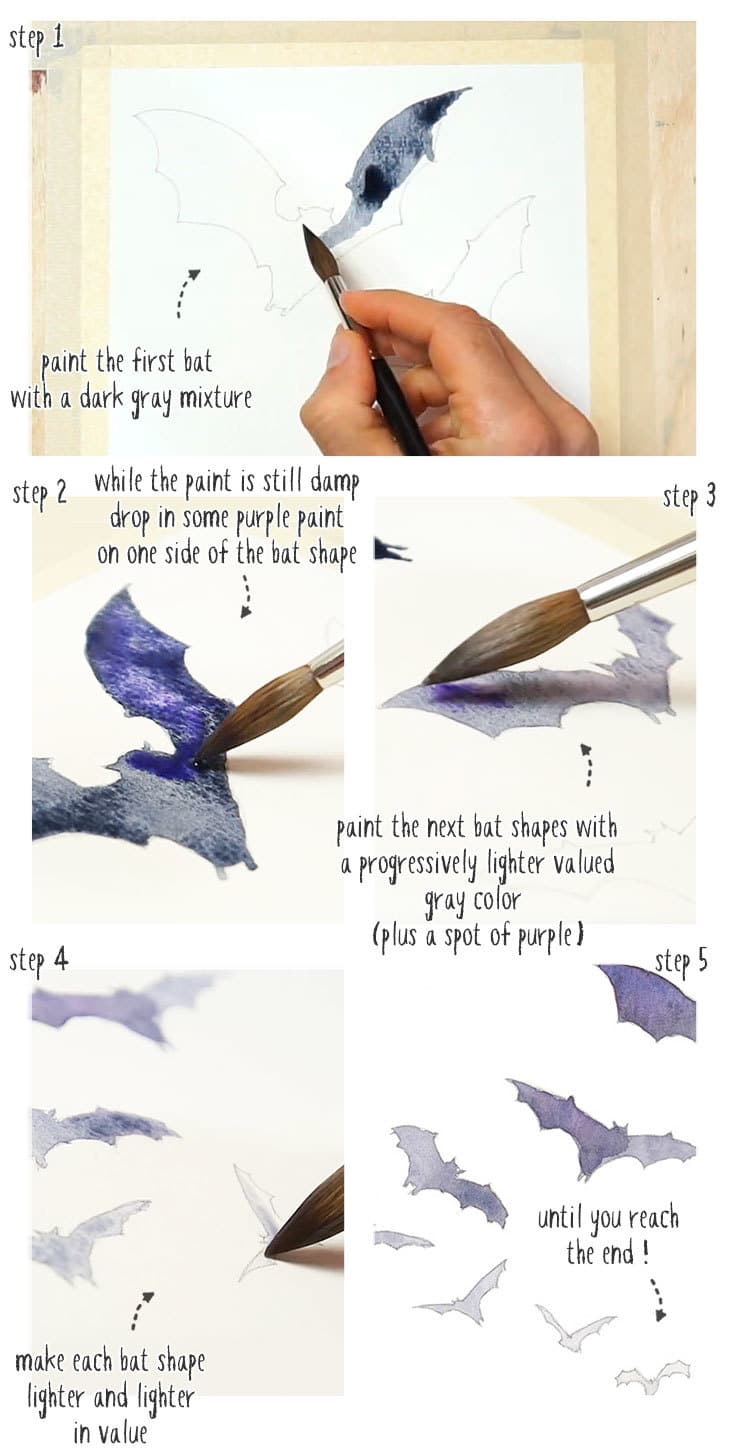
Begin by mixing a fairly strong mixture of gray paint. A good way to do this if you use paint tubes is to put a spot of paint onto your mixing palette and add only a small amount of water at a time. I used Payne’s gray as the main color for the bats, but to make the painting a bit more interesting I also charged in a hint of purple as well.
While the paint is still wet, drop in some purple color to one side of the bat shape. The color will blend evenly into the first wash of paint.
Paint the second bat with a slightly diluted gray mixture. Add a small amount of water to your puddle of gray paint to dilute the color and make it lighter. Do this a small amount at a time. You want the change from dark to light to be progressive.
Then charge-in some purple while the shape is still damp to create a bit of color variation.
Do the same thing for the next bat down. Add a small amount of water to dilute the paint, fill in the bat shape with the gray color, then drop in some purple wherever you like.
Keep moving down the page, making your paint lighter and lighter in value until you’ve painted the final bat at the bottom of the composition.
Try this painting for yourself ! Click the button below to download the worksheet for this painting.
Happy painting, and I’ll see you in the next lesson.
(P.S. If you missed any of the other lessons in this Halloween painting series, and you’d like to follow along with the full series, you can sign up here!)