
Easy Watercolor Koi Fish (Step by Step Tutorial)
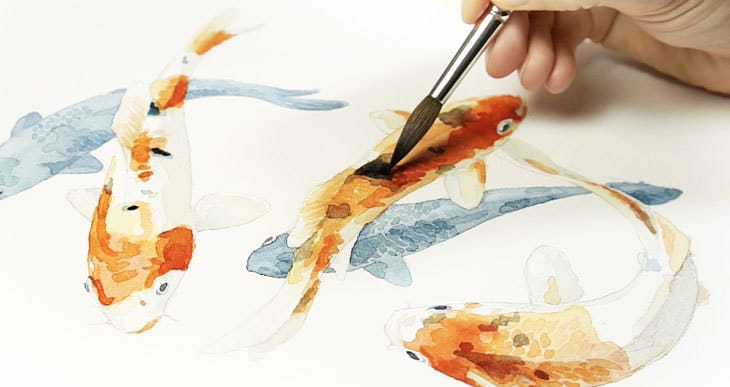
In this tutorial I’m going to show you how to paint koi fish in watercolor by building up transparent layers of paint using a glazing technique.
One of the amazing characteristics of watercolor is its transparency. When you paint transparent washes of color on top of each other the underlying brush marks remain visible. This produces beautiful multi-layered effects that are unique to watercolors.
Painting in this way is a technique known as glazing.
Koi fish are incredibly decorative Japanese fish and are well known for their variety of colors and markings. The delicate patterns on these fish are perfect for painting in watercolor using a glazing technique.
How to Paint Koi Fish in Watercolor

For the purposes of this painting I put together several different photos of koi fish and positioned them to create an interesting composition. You can download a sketch template for this painting below if you want to try this watercolor project for yourself.
Try this painting for yourself ! Click the button below to download the worksheet for this painting.

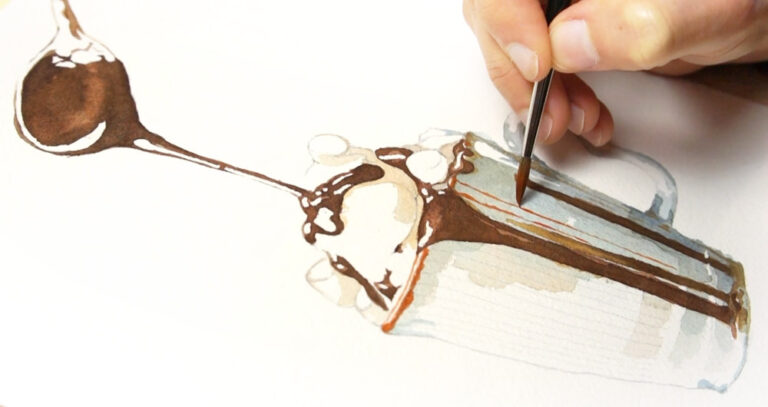
Start by transferring the outlines of the fish to a sheet of watercolor paper then tape it down onto a board. This helps to keep the paper flat during the painting process.
I began by painting the shadow shapes using a diluted mix of gray paint. I’m imagining the light coming from above, so I add shading to the underside of the fish to begin establishing the three-dimensional forms.
From time to time you can see me blending edges, but mostly I’m painting wet on dry and leaving the sharp edges to my brush strokes.
This might look like a very diluted layer of paint, but remember the objective with a glazing technique is to build up transparent layers of color a bit at a time. This will gradually increase the intensity and values of your painting.
Next I made a diluted mixture of orange to fill in the pattern shapes on the fish. Remember to let the first layer of paint dry completely before adding this new color. The method when applying a glazing technique is that you paint subsequent layers of color, each time leaving the previous layer to dry.
This doesn’t mean that each new layer has to be a flat uniform color. For example you can see me dropping in some stronger paint while the shape is still damp to create a variety of color intensity to the patterns.
Continue painting the orange markings on the top three fish in the composition. Use the reference photo as a guide for the pattern shapes. The advantage with organic forms like this is that you don’t have to be very accurate.
Vary the color intensity of the orange shapes by charging in some stronger paint here and there to create a bit of variety.
When you’ve finished painting the last fish at the bottom, leave the paint to dry again before moving on to the next stage.
I decided to make the two underlying fish a different color. I think these blue fish help the composition in a couple of ways.
For a start the blue color is in contrast with the orange fish on top. This helps the viewer distinguish between the top level of fish and the ones that are swimming at a lower level. This trick helps give an impression of depth as if the koi fish are at different heights.
Secondly the two colors, orange and blue, set up a complementary color harmony. Complementary colors are opposite each other on the color wheel and they tend to create a lively, dynamic appearance.

Paint the whole of the koi fish in blue, but leave the upper sides slightly lighter toned where they’re turned towards the light. I used a lifting technique to blot up some of the wet paint and lighten the upper half of the fish shape.
Next I turned my attention back to the orange fish. I used a very diluted mixture of neutral orange to add more shadow shapes to the undersides, to give more definition to the fins and add a few details.
You can begin to see how the multiple layers of transparent paint produce complex and interesting textures.
Now I want to start adding more texture, as a way to imitate the blotchy patterns on the skin of the koi fish, and to give an impression of scales.
To do this paint smaller random shapes with a medium strength mixture of paint. And don’t worry about overlapping the edges of the underlying brush marks. This will help produce a more interesting multi-layered appearance.
For the scales use the tip of your brush to add small diamond shapes in a few areas. And add some quick linear brush marks to create texture on the fins.
Again you can refer to the reference photo for this stage to help you figure out the shapes you need to paint.

Now do a similar operation for the blue fish underneath. Using a fairly diluted puddle of paint, add a few blotchy patterns here and there. You’re just trying to add some texture and detail so don’t worry too much where you paint.
Don’t forget to add some detail to the eyes by painting a gray contour around the outside, then fill the pupils with a darker valued gray color. To make them look a bit more three-dimensional, add a curved brush stroke to the underside as if this part of the eye is in shadow.
Now I’m going to apply the last layer of paint to finalize the patterns on the surface of the skin. This is similar to the step before only I’m adding smaller shapes to just a few places to intensify the color and add an extra layer of texture. This includes adding some more diamond shaped scales in a couple of areas. Don’t over-do this step. It’s easy to get carried away and put down too many brush marks which risk hiding the base layers and you’ll wind up with something that looks over-worked.
Notice that I’m applying this final layer mostly on the shaded side of the fish so that the upper side which is turned towards the light remains light toned. By intensifying the colors on the underside I’m also increasing the sense of light and dark and trying to give a better illusion of three-dimensions.

I’m going to apply a similar method to the blue fish underneath by adding a few brush marks of additional texture. Some closely spaced dots are enough to suggest the idea of a scaly skin.
Now I’m going to start painting the final gray and black patterns on the skin of the orange fish. You can see in the reference photo this is another typical characteristic of the markings found on koi fish. I’m going to do these dark marks with two glazes, or if you prefer in two layers. So using the reference as a guide I started laying down some fairly diluted gray shapes on each of the three orange fish. Once these are dry I can go back and add some brush marks with a stronger mix of gray paint. The combination of the two washes of gray, one on top of the other, produces a more interesting graphic appearance.
The painting is almost finished so we can start adding some final touches. Using a brush loaded with paint I splashed a few drops of color randomly over the paper. This is a nice way to add a little graphic interest to the painting. The splashes and dots of paint could suggest the idea of bubbles in the surrounding water.
Next I wanted to add some more depth by adding some cast shadows. Adding shadows like this helps improve the perception of distance making it look as if the higher level fish are casting shadows on the koi that are swimming underneath.
At this point I decided that the blue koi fish looked a bit flat. So to make them look slightly more three-dimensional I included some shading to the underside of their bodies making them lighter toned on the side which is turned towards the light.


Thank you so much for this tutorial. I am very excited to try this out. I really like how you present your tutorials. You not only give direction of what we should do but also why it would improve the quality of the piece. I look forward to trying out more of your tutorials.
Thanks Elle
Have fun painting !
I will try it , your YouTube channel is wonderful , it helps me a lot plus this step by step is great when I have some doubts .. big hugs from Chile for you and your family .
Thanks Alexa – stay safe…
Hi Anthony, this was a fun painting to do! Applying the skills I learned in your watercolor course, I was able to relax and really enjoy the process. Thank you so much!
So glad to hear you’re making progress Deb !
Have fun !
I started taking some lessons last September and I fell in love with watercolor. I follow your blog but I have never tried one of your tutorial but yesterday I challenged myself and I painted the koi fishes!
Good for you Ana !
The beginning of a long “watercolor affair” 🙂
Thank you! This looks like fun, and I definitely want to try it. You do some nice tutorials.
Thanks Anne
Have fun with your paints !
Awesome. Thank you for sending this. I’m loving your Watercolor class for beginners.
Thanks Kathleen – Happy to hear you’re enjoying the course !
Thanks for the information. You may have just made a watercolor enthusiast.
Glad to hear it Roger 🙂