
20 Ways to fix watercolor mistakes
Watercolor painting looks so simple. A well executed watercolor can be painted with a few quick brush strokes. Good artists make it look so easy, but as a beginner I remember running into a lot of stumbling blocks and ending up wondering what I’d done wrong !
Of course, with practice you develop better technique. But everyone goes through the frustrating process of learning by their mistakes.
So don’t worry, you’re not alone. There are some common watercolor mistakes that we all encounter at some point or another.
Sometimes the best way to fix an error is to avoid it altogether. A little knowledge about why common mistakes occur will go a long way to help you improve your technique.
And sometimes it may seem too late ! You’ve slipped up and you’re wondering how to fix the mess you just made.
In either case the checklist below will help you recognize everyday blunders, how to avoid them, and how to cover up watercolor mistakes in case you need to correct one of your paintings.
Here’s my checklist of 20 watercolor mistakes and how to fix them:
Common watercolor mistakes
- Streaky watercolor washes
- Hard edged marks
- Thick paint
- Blooms and backruns
- Glazing over a damp wash
- Watercolor paper blotches and blemishes
- Dry brush problems
- How to mix bright secondary watercolors
- How to avoid muddy watercolors
- Watercolor granulation problems
- Staining watercolors
- Overworking watercolor
- Working from light to dark
- Correcting colors
- Wrinkled paper
- Lifting watercolor
- How to cover up watercolor mistakes
- How to recover highlights
- Can you erase watercolor ?
- Can you erase pencil from watercolor ?
In the first part of this watercolor troubleshooting guide I wanted to talk about frequent problems we artists encounter. Understanding why problems occur is the first step to steering clear of them…
Sometimes as your paint starts to dry, you get unexpected blotches and imperfections ! Or maybe you’ve tried to do a watercolor wash and thought “that’s no good “?
Yep… I’ve been there too.
Below are some of the most commonplace problems and frustrations, with hints and tips on how to escape them…
Streaky watercolor washes
Flat and graded washes are tricky techniques to master. It’s the kind of thing we all need to practice over and over to get just right.
It’s not unusual to get a streaked appearance when laying a watercolor wash. Streaks occur because the paint has had time to start drying. Here are some tips on how to avoid streaky watercolor washes:
Be sure to mix up a generous quantity of paint for your wash. Running out of paint during a wash is bound to create problems. A smooth wash requires uninterrupted brush strokes. You can’t stop in the middle of the process.
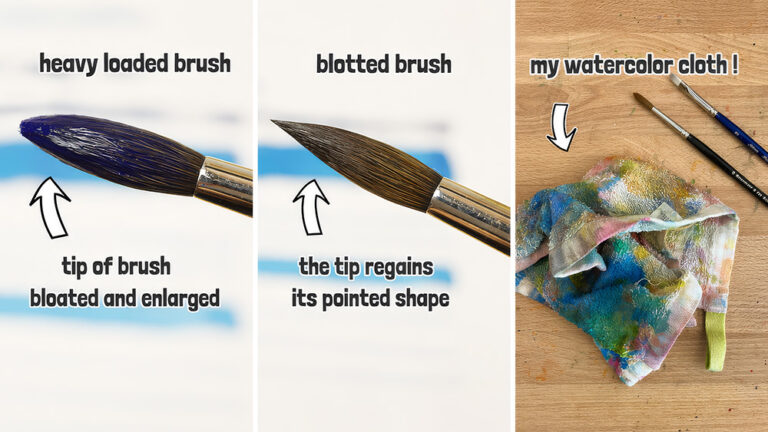
Make sure your brush is well loaded with paint and tilt the paper so it forms a bead at the base of your brush stroke. Use the bead to push paint down the paper with each alternate brush stroke. Continue to load your brush so that there’s always a bead to chase downward.

Use a brush which is big enough for the surface area your painting. For example a number 8 round bush is fine for small work but bigger washes will probably benefit from a 1” flat brush.
Making sure your wash is wet enough to form a bead and working quickly should eliminate streaks.
Hard edged marks
This is another mistake which, as you can guess, they occur when you give the wash time to dry between strokes. If paint dries unevenly it can create unintentional edges.
If you want smooth results try to work fast before an area of paint has time to start drying.
Don’t’ try to soften an edge that has already dried. This will just lead to overworking.
Thick paint
If your paint is too thick and the paint is too sticky it tends to spread unevenly creating streaks or blotches.
When mixing your paint begin by making a puddle of water. Then pick up some color with a moist brush and mix into the clear water. Continue adding pigment in this way until you reach the consistency you’re looking for. This way you get a smooth wash of paint.
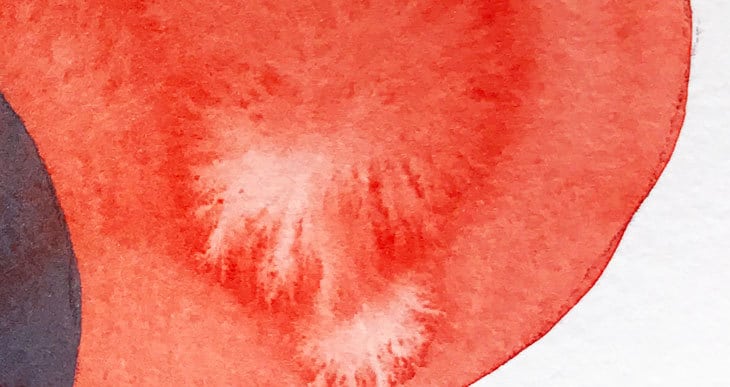
Blooms and backruns
These are another common problem. You have probably experienced these dark feathery patterns that are created when wet paint is introduced to a drier settling wash.
A damp area will draw fluid from an adjoining area of greater wetness which then produces these unwanted flow marks. This will happen for example at the end of your wash if you leave a bead of paint. To avoid this you can absorb the excess bead of fluid using a blotted brush.

In general, to fix this kind of problem, always remove any excess paint before a backrun has time to form.
Glazing over a damp wash
I get it.
You’re impatient to carry on with your painting. You can’t wait to see the end result. If you’re laying glazes then the temptation is to start painting a new layer before the underlying paint is completely dry.
This mistake can cause backruns and blooms and can ruin your first glazing layer.
If you are adding colors on top of each other and building up your watercolor in layers then the correct technique is glazing. This modifies the value and hue of any initial washes. The secret to glazing is to apply your first wash with a quick and decisive brush stroke. Let the paint dry completely then apply your next color without fussing. In this way you obtain vibrant colors.
But if you really can’t stand the waiting, you can always use a hair dryer… So long as you keep it on a low heat setting !
Watercolor paper blotches and blemishes
Ever seen foreign bodies floating around in your washes ?
Dust and hair can be a real nuisance for watercolor artists. Even touching the paper too much can leave greasy fingerprints which alter the flow of paint. To avoid this inconvenience make sure you store your paper correctly and keep your work surface free from dust.
Occasionally you get unexpected blotches when laying a wash of color. All watercolor paper is treated with sizing which alters the absorbency of the paper. If the coating of sizing is irregular you can get spots on the paper where watercolors are more or less absorbed by the paper surface.
To avoid this a lot of watercolorists prep their paper by brushing the sheet with a clean brush loaded with clear water. This smooths out any inconsistencies in the surface sizing and avoids blotchy washes.
Dry brush problems
If you’re having problems with your dry brush technique it’s not a surprise.
It requires quite a bit of skill and practice to get it right.
To start with, make sure you’re using your brush correctly. If you’re using a round brush make sure you use the side of the brush not the tip. Personally I find that a flat brush gives the best results. Fan brushes also work well for this technique. You also need to move your brush quickly across the paper. The speed of your brush effects the resulting dry brush texture.
Most of the time problems with dry brushing arise because of badly judged levels of wetness – wetness of the brush or wetness of the paper.

The amount of paint loaded on your brush needs to be just right. As the name of this technique suggests, your brush should be dry. If you’re brush is too wet, you’ll end up painting a wash. Too dry and the effect is lost. Similarly if your brush hits a damp area on the paper, the paint blends and forms a wash.
Practice makes perfect with this technique so grab some scrap paper and get brushing !
How to mix bright secondary watercolors
I won’t go into detail about color mixing theory in this post, (you’ll find a more comprehensive article here) but a fairly common problem is how to mix bright and vivid secondary and tertiary colors. If you’ve tried to mix a bright green or a bright purple and been disappointed with the results, here is the reason.
As you know, the basis of color mixing is primary colors. In theory all other colors can be produced from just three primary colors. But it’s impossible to find pure red, yellow, and blue watercolor paints with which you can mix vivid secondary colors.
This is because primary paints all have a color bias which is either warm or cold. For example red can contain a hint of yellow, or blue can contain hint of red.
The solution is to use a set of both warm and a cool primary colors, (six colors).
The color wheel below shows how these warm and cool primaries should be mixed to effectively produce bright secondary colors.

How to avoid muddy watercolors
We’ve all been there !
You’ve mixed a few pigments together and the resulting color looks dull and murky. This is what watercolor artists often refer to as mud.
Most of the time this is because of a characteristic of watercolor paint known as transparency. Paints are usually classified as transparent, semi-transparent or opaque.
The more opaque your paints are, the muddier your colors will be. Mixing with transparent paints is a great way to avoid muddy watercolors.
The same problem often appears when you mix several paints containing more than one pigment. The resulting colors are less vibrant. Not all watercolors are single pigment paints.
It’s good practice to get into the habit of reading your labels and check the transparency rating and the number of pigments, (If you can’t find this on the paint label then consult the brand’s website for a color chart). I usually only go for transparent paints or at worst semi-transparent, and as far as possible single pigment paints. It’s not always easy to find colors that match all these criteria but it’s worth the effort. If you need help finding a good palette of transparent, single pigment watercolors you can check out my list of recommended paints here…
Another reason muddy colors appear is when you try to add another color on top of an existing damp layer (see overworking below). To avoid this, you should only paint onto a wash which is completely dry (using a glazing technique) or still very wet (using a charging technique).
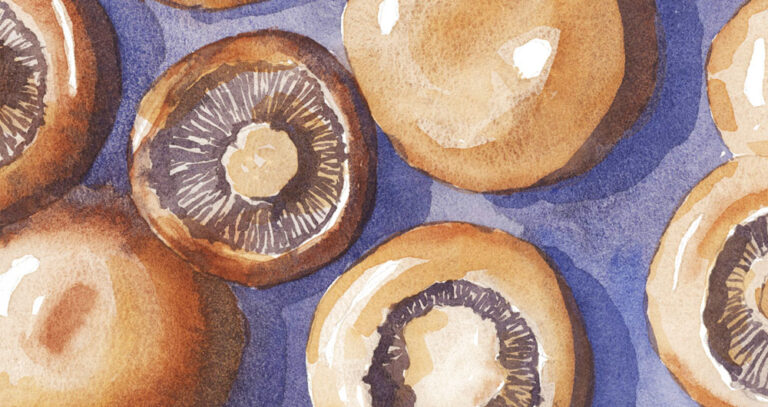
Watercolor granulation problems
Granulation is another property of watercolor paints that you need to be aware of.
Some paints are granulating and others are not.
For some artists granulation is a problem.
Granulation is a quality that is very appreciated by some watercolorists because it adds interesting texture to your artwork. But for those who prefer smooth uniform washes, granulating paints are best avoided.

Check the granulating characteristics of your paint if want to avoid the texture effects created by these kind of watercolors.
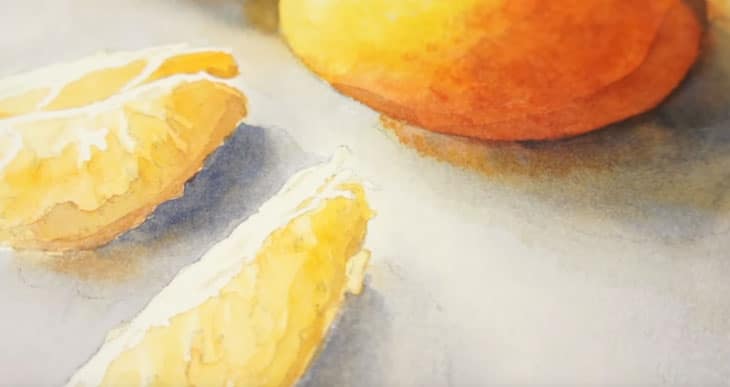
Staining watercolors
This is another attribute of watercolor paints which you can check by looking at your paint labels or a manufacturer’s color chart. Staining (sometimes referred to as permanency) indicates how well a pigment adheres to the surface of the paper.
A non-staining paint is easy to lift off the paper even when it dries. But a heavily staining watercolor will tint the paper durably and is difficult to correct.
Staining can be a good or bad thing… And in some circumstances it they can cause frustration.
A paint which is very non-staining is easy to correct because you can lift pigments off the paper even when the paint is dry. However, working with this kind of paint can be very frustrating because the pigments constantly move around and don’t adhere well to your paper.
At the other end of the scale, a very staining paint is difficult to remove once the paint is dry. It will stain the paper durably (and probably your mixing palette and brushes as well).
Of course these are two extremes and the staining ability of watercolors varies from paint to paint.
To avoid the setbacks created by staining get to know your paints better.
Overworking watercolor
Watercolor is a medium which encourages playing. We constantly feel the need to push the paint around while it’s wet, to fight a backrun of water or to smooth out the discrepancies of a flat wash. Then inevitably we apply more paint or water to adjust a color and end up repeatedly brushing the wet paper.
Continuously reworking an area of a painting produces overworking. The resulting paint can look dull and lifeless.
When you brush the surface of watercolor paper time after time this unravels the paper fibers producing a fuzzy surface texture and pushes the pigments deeper into the paper. The result is dull colors.
The solution is to work quickly. When you paint try to use fast and confident brushstrokes and let them dry between glazes.
You can test the difference for yourself by doing a quick experiment. With a flat brush paint a single brush stroke of color and let it dry. Next to this, paint another brush stroke but this time continue to repeatedly stroke and blend with your brush as the paint dries.

You should see a significant difference in the brightness of the dried watercolor.
Overworking is a problem resulting from attributes of the paper. If you find it difficult to avoid repetitive strokes you can try prepping your watercolor paper beforehand with a dilutedcoating of gum arabic.
This treatment seals the paper surface and helps prevent roughening of the surface texture.
Working from light to dark
The transparent nature of watercolors allows you to build up color intensity with several layers of paint. As a general rule watercolorists begin with light tones and progress to dark.
Unlike other mediums if you start by applying dark intense colors, it’s difficult, and sometimes impossible to recover lighter values.
So as a rule of thumb, and especially if you’re uncertain about the final appearance of your painting, start with light values. Watercolor should be built up using light tones first and reserving white areas if necessary.

Another solution is to begin a project by doing a tonal study of your subject. This gives you a better idea of the final values you’ll be painting.
Correcting colors
Have you ever laid down a wash and been disappointed with the final appearance ?
Judging the correct hue and tone can be tricky with watercolors, especially because the paint dries lighter than when it’s wet.
The technique of glazing helps us adjust colors. If you need a deeper, more intense color then simply add an additional layer of paint.
Alternatively, if a color seems too bright you can tone it down by glazing with a complementary color.

If the tone of your colors appears too dark you can try lifting some of the pigment from the paper. Wet the whole area with clear water and let it sit for a while. Use a clean tissue to blot the moisture and lift some of the color off your painting.
Control the amount of water on your brush
It’s very rare to paint with watercolors using a fully loaded soaking wet brush.
Wrinkled paper
It’s a frustrating problem.
If your paper gets very wet or you lay down heavy washes when painting, inevitably it starts to buckle and warp, forming hills and valleys on the surface. This might not seem so bothersome, but when new layers of paint start to sink into the lower bumps on your wrinkled paper you start to lose control over your painting.
There are two classic solutions to this dilemma.
The first is to prep your watercolor paper by stretching it. The process involves soaking paper so that it expands, then fixing it onto a support before it dries. The paper will contract when dry leaving a drum-like surface which no longer warps during painting. For more information, I’ve written a complete article about stretching paper which you’ll find here…
The second quick solution is to use thicker paper. Watercolor paper exists in various thicknesses, classified by weight. For everyday painting most artists use medium thickness paper which has a weight of 300 gsm / 140 lb. But you can also find thick paper at 640 gsm / 300 lb. This is almost like a board and is much less susceptible to warping.
Obviously you need to use watercolor paper for your paintings. Ordinary or poor quality paper is not designed to handle water based paints. It will wrinkle horribly and doesn’t have the right degree of absorbency. Standard paper will suck paint deep into the paper and the result is very dull colors.
How to fix watercolor mistakes
Ok… So it’s not looking good…
You’ve messed up and you really wish you could go back and do a part of your painting again.
All is not lost ! We tend to think that watercolor paints are difficult to correct, but there are a few ways you can recover errors in your paintings.
So before you tear up your painting and throw it away, take a look at some of your options below…
Lifting watercolor
Lifting is the process of removing pigment from an area of paint on your painting.
The ease of lifting dry watercolors depends mostly on how staining the paint is, and to a certain extent, the type of paper used. This process is also sometimes referred to as scrubbing.
Lifting is not just a technique for correcting mistakes. It can also be used while paint is still wet to adjust the tone of an area of paint. You can use a clean moist brush to blot and area of wet paint. Your brush should have a low liquid content so that it wicks up the paint from the paper surface. Alternatively you can use a clean sponge or tissue to lift color off a larger area.
You can also use lifting after the paint has dried. Dampen the area that you want to correct. Use a good amount of water so that the area remains wet while you work, you don’t want it to dry and cause unintentional watermarks. As described above, use a brush, sponge or tissue to blot the paint.
Be careful if using a brush. If you repeatedly run a brush back and forth you’ll start displacing pigments on the paper and end up creating lines in your wash.
How to cover up watercolor mistakes
Yes… I admit it. Sometimes you just need to start afresh.
If you think a part of your artwork needs repainting you can rescue a watercolor painting using watercolor ground.
I’ve used this before to touch up parts of a painting and it works pretty well.
You can get ground from various manufacturers including QOR, Golden and Daniel Smith. Look closely at the type of ground you buy because some have a texture effect which adds additional roughness to the paper surface.
I’ve used Daniel Smith Titanium White Watercolor Ground before and it lays down smoothly and matches white cotton watercolor paper very well.

How to recover highlights
With watercolor painting, whites need to be reserved, since it’s the paper which provides a white appearance. This is not always easy and occasionally at the end of a project you need to add highlights back to your subject.
You can use white gouache to recover highlights. You can also try white watercolor paint which has a high level of opacity.
Can you erase watercolor ?
We’ve already discussed lifting watercolor off paper. But erasing watercolor no matter what the paint’s staining properties requires a different solution.
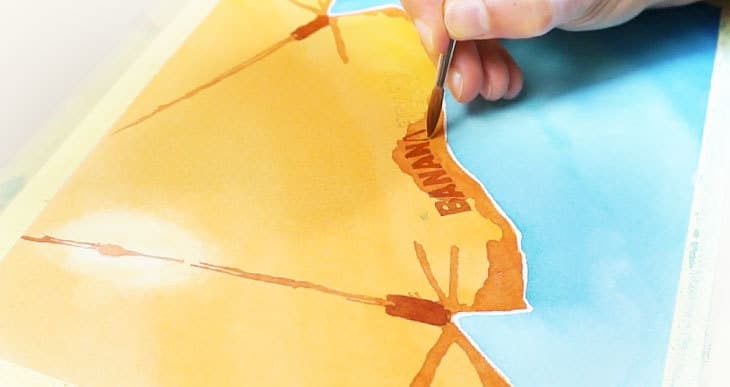
Traditionally, for small corrections, artists tend to use a scraping tool such as a razor blade.
In recent times a lot of articles talk about using a Mr. Clean Magic Eraser. This white foam like material has become popular among watercolor artists for removing paint and fixing errors.
You simply wet the eraser, rinse, then rub the offending part of your artwork.
The advantage is you can cut the foam into small pieces making it easier to handle and good for smaller adjustments.
Be careful with these methods because excessive rubbing will disintegrate your paper (known as watercolor pilling). Scraping the paper also tends to remove the coating of sizing on the paper which will alter the handling and absorption of the surface.
Can you erase pencil from watercolor ?
Once you have covered pencil marks with paint, erasing the lines becomes difficult, especially if the paint is very staining, which seems to set the pencil marks on the paper.
A lot of artists simply leave the pencil marks in place accepting them as part of the artwork.
But if you’re bothered by pencil marks you should make sure you only draw thin pencil lines which usually disappear beneath the paint.
I usually use a kneaded eraser to half-erase the graphite lines so that they are not too obvious.
Another option you can try is to sketch using a watercolor crayon. I’ve heard of artists using these soluble pencils with some success since they blend more with the paint as you apply watercolor washes.
Conclusion
We all slip up from time to time.
But the thing I love about watercolors is that “mistakes” can sometimes look really good ! Imperfections and unique textures add expression and charm to watercolor paintings.
So don’t worry if you end up with unintended paint marks or haphazard patterns… it’s all part of the beauty of watercolors !


Thank you! Great info and pointers.
Thank you! I usually paint 3 versions before I am halfway satisfied with a painting. I appreciate your experience and generosity in sharing it with us.
Thanks CJ 🙂
Thank you so much for your easy-to-understand instructions for avoiding and correcting mistakes! I’ve been painting portraits for many years but watercolors always seemed too intimidating to pursue. Can’t wait to dive back into a portrait I thought was ruined.
Thanks so much for sharing such a great article with important information. I have also worked my painting with magic eraser and pilled my painting, thanks heaps!!! I will try the spoon method and the gum arabic as you suggested.
Hi Clare. Overworking is one of those things we all go through when learning watercolors. I remember this happening to me several times !
Thanks for sharing such pertinent information! I’ve taken many watercolor classes and non of these issues were addressed. I’ve had to learn the hard way with ruined paintings and much frustration. Your visual examples also help with understanding the problem. I look forward to more
tips and techniques!
This is the second of your articles I have read. You are absolutely amazing. The work you put into these articles, well, I just can’t imagine. All I can say is thank you. I have come away with some very useful tips. Your style of writing is easily understood. I have learned about mistakes I didn’t realize I was making so I kept making the same mistakes over and over again. Now, I will stop making the mistakes in the first place, so I don’t have to worry about correcting them. Thank you so much for all of your hard work.
That’s very kind of you to say Karen – More useful stuff to come soon!
Thank you . I will try the spoon.
I have overworked an area of my painting resulting in pilling of the paper. Is there a way to fix this area, if so please help! let me know what to do. Thank you in advance for any assistance.
Hi Janice – pilling happens when you “scrub” an area too much with your brush. At this point you have usually removed all of the “sizing” that covers the surface of watercolor paper. I’ve heard of artists using the back of a spoon to flatten the paper fibers. You could then try re-sizing the paper by applying some diluted Gum Arabic onto the area. Hope that saves your painting !
This is one of the best…..no correct that….this is THE best article that I have ever read on how to fix mistakes in your watercolor. You just have an absolute gift for sourcing out the knowledge a beginner needs at the start of their journey. I am so glad I clicked on the feather image on Pinterest that brought me straight to this website. I guess the Universe is really looking out for me in helping to explore my creativity.
Thanks for your kind words Terri – I hope you enjoy your first steps with watercolor!