
How to Paint Complex Subjects (Surprisingly Easy!)
Often we assume something is difficult to paint, because it looks complicated, so we tend to avoid it.
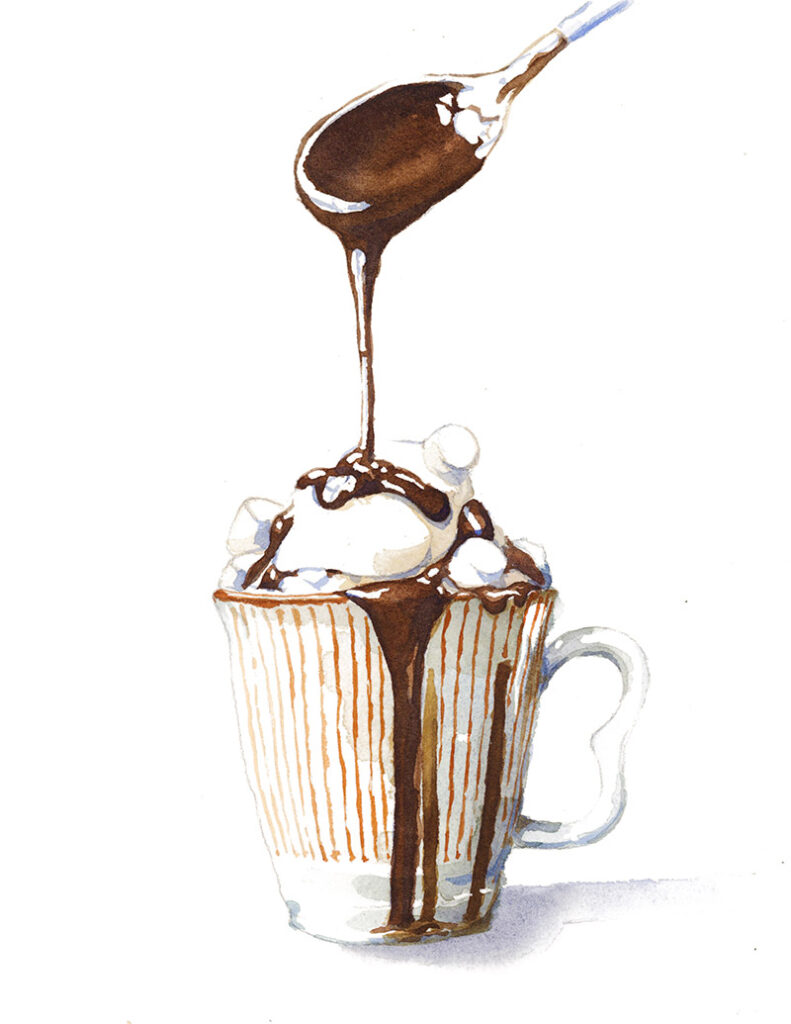
But if you follow the painting process I used for this painting of a mug of hot chocolate, you’ll see that it follows the same basic set of principles I use for simpler looking subjects.
So if you’re up for a bit of a challenge, in this lesson I’ll give you some tips on how you can paint seemingly complex scenes more easily.
Observing the Reference
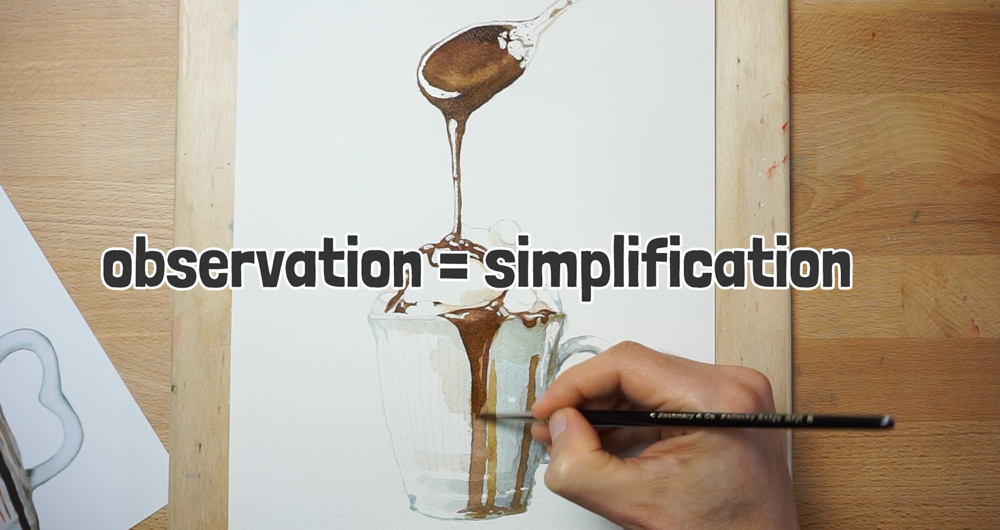
After you’ve decided what you want to paint, the starting point for painting any subject is observation.
And for an artist, simply put, you need to develop observational skills that allow you to see differently. Rather than seeing the object itself (in this case a mug of hot chocolate), you should look for the underlying structure of the subject.
This means trying to perceive it in terms of its shapes, and the different colors and values of those shapes.
So, not a mug…
But lots of component parts that come together to give us the visual impression of a mug.
This is what you want to translate onto the paper.
To do this, the techniques used in observational drawing or painting are all about simplification. The whole idea is to find ways to break down a complex-looking scene or subject into simple parts that are more easily manageable in the painting process.
This applies to anything you paint… even the complicated looking stuff!
Tips for Painting Complex Subjects
1. Sketch First

As part of the simplification process I always begin by sketching a rough outline of the subject. You’re essentially breaking down the subject into its most basic shapes and forms. These guidelines do not need to be very detailed. Instead of getting lost in the complexity of details, you focus on the overall structure.
I consider this a roadmap for the painting process that helps to establish proportions.
Also, by keeping the sketch simple you allow for greater spontaneity in the painting process since you’re not constrained by intricate details.
You could draw this freehand or use a grid drawing method for more accuracy, but I prefer to get started quickly and trace the subject using a light board (like this one).
2. Focus on Values
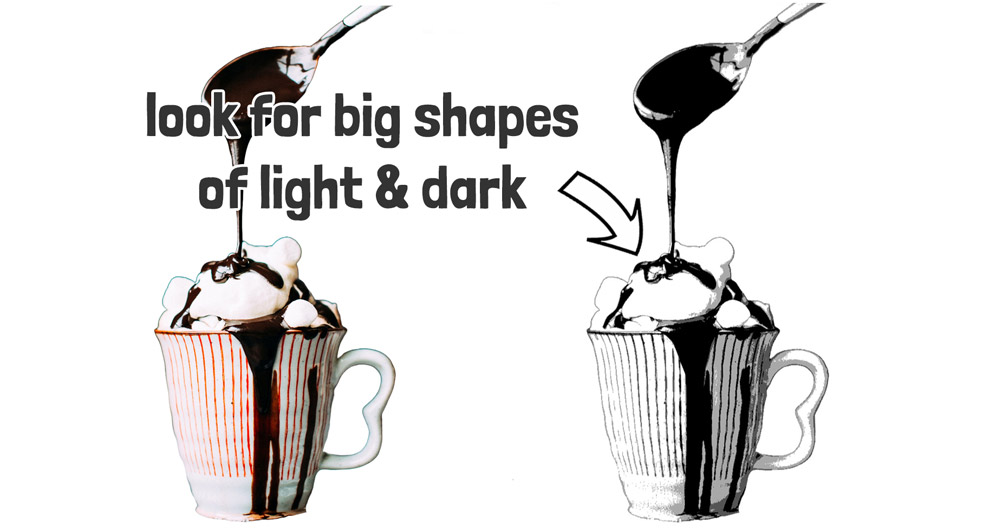
When you observe the subject, pay close attention to the shapes of different values – values meaning “lightness and darkness” of different parts within the subject. Proper values help create depth and a sense of three-dimensions in your painting.
But remember, these shapes don’t have to be perfect.
Begin by looking for big masses of value rather than individual parts. Then go in and pick out smaller shapes and the values and colors of those.
To help with judging values, one handy tool I like to use is a homemade “value finder” like this:
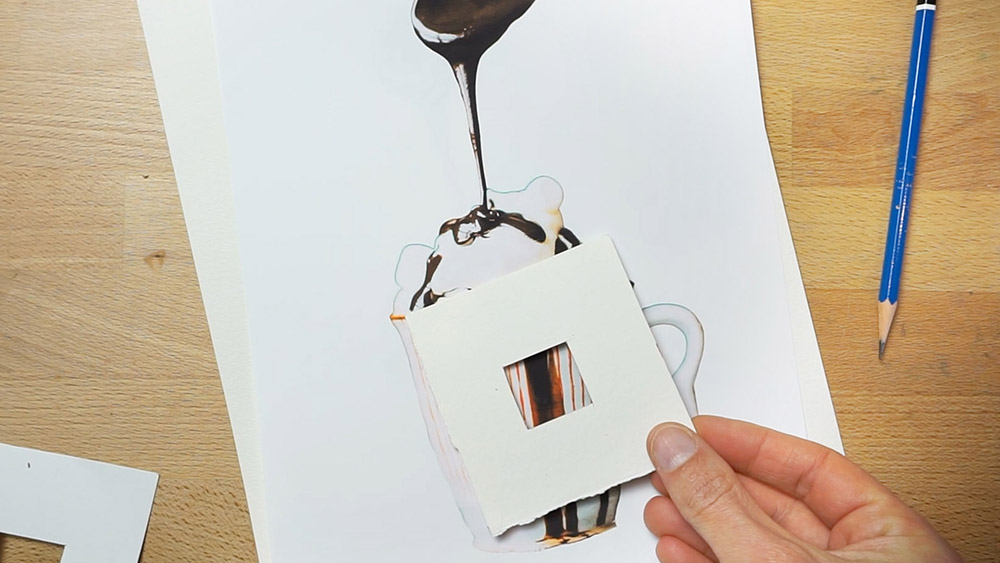
I use this to help me isolate parts of my reference images. It’s basically a small piece of paper or card with a hole cut out of the center. When I hold it up to my reference image, I can look through the hole to single out the part I’m interested in. It helps me see the colors and values of that specific area more clearly in comparison with the wightness of the card.
You can also use various online tools or apps to simplify the values of the subject. Most of these turn the image into a black & white version that has a limited range of value “steps”. Usually you only need 3 or 4 values ranging from light to dark to get a good understanding of the value structure of your reference.
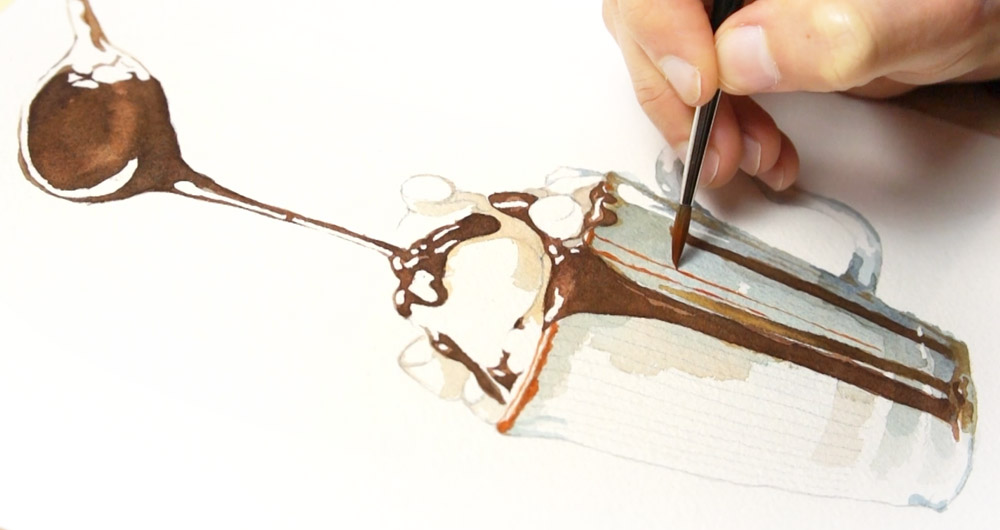
3. Build up with a Layering Technique
Now that I have the basic shapes and proportions of my subject, and an overall idea of the values, I can begin to paint.
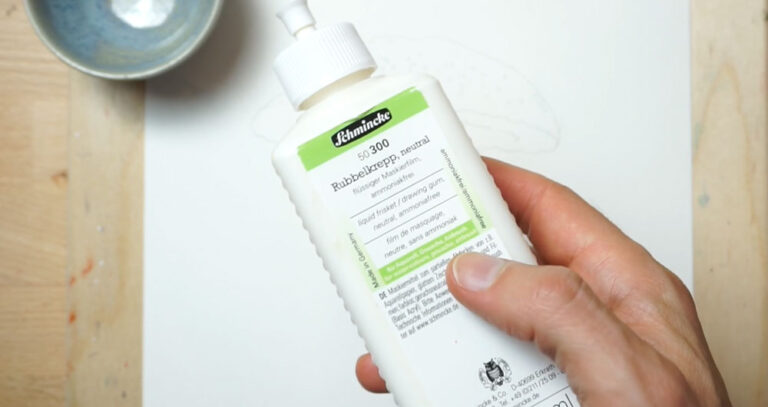
To do this I seek out the lightest values first. This begins with the white highlights which I mask using masking fluid.
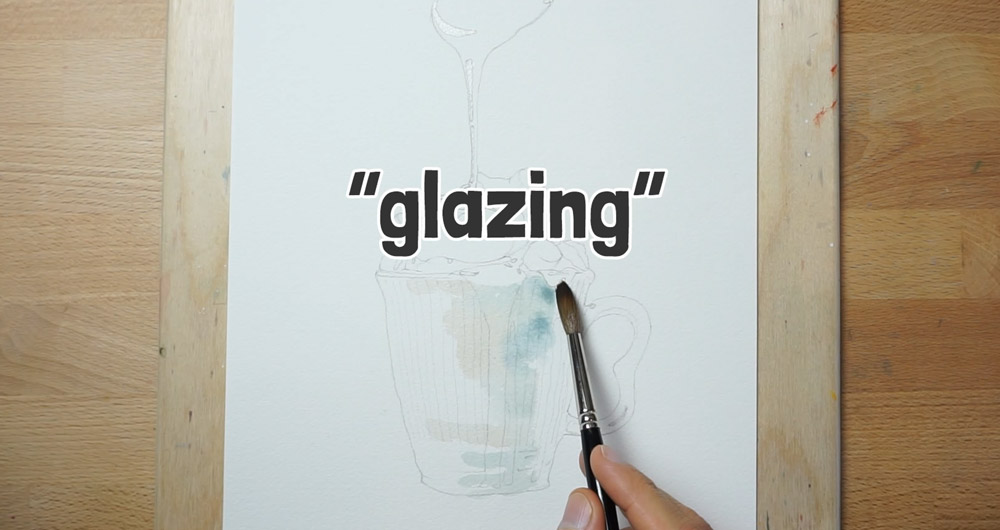
Then I use a layering technique to gradually build up the colors and details of the subject, starting with lighter washes. (This layering technique is known as glazing).
Because I’ve established that the light is coming from the left hand side, I begin painting in the middle of the cup, leaving the left side completely white. But as I progress to the shaded side of the cup on the right, I darken my paint mixture.
This lays the foundations for the painting, and I leave the paint to dry completely before applying another layer. If I go back in too early, I risk creating unwanted watermarks or “blooms”.
The next layers darken the values further. But I only add brush marks to the smaller shapes of darker value that I can distinguish from the reference photo. As before, I begin by using a diluted paint mixture, and then I apply a darker mixture for the areas requiring the darkest values.
4. Work from loose to detailed (big to small)
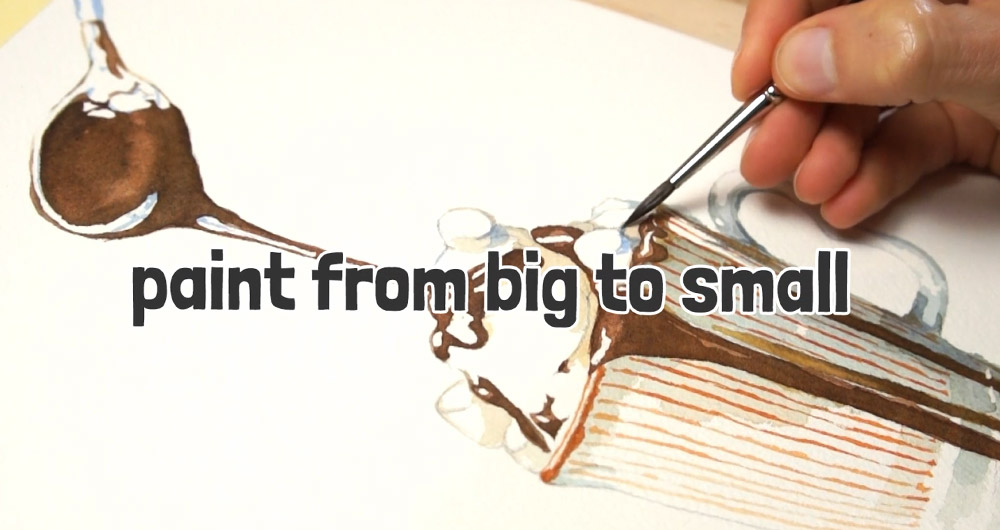
You’ll notice that I also begin with broader strokes and bigger shapes, and gradually refine the details as I go.
For example the shiny liquid chocolate starts as one big brown shape. Once I’ve established the general shapes I then refine. With each new layer the idea is to let the first lighter color show through. The darkest brushstrokes are also the smallest.
Details like the patterned lines on the cup and the small shapes of shading on the marshmallows are applied towards the end of the painting process.
Think about laying down the foundational shapes before adding smaller details.
You want to paint from “big to small”…
Again, the accuracy of the details is not important. Focus on capturing the essence of the subject rather than every tiny detail, especially in areas where it might be overwhelming.
5. Take a Step Back!
Throughout the painting process remember to take a moment to step back from your painting. This lets you assess your progress and make adjustments as needed.
When checking against the reference, you constantly look back and forth between the painting and the reference image. Taking a step away gives you a new perspective for comparison, and allows you to identify areas that may need adjustments in relation to the original subject.
This back-and-forth process helps catch any discrepancies so that the painting captures the essence of the reference image more closely.
6. Enjoy the Process
Lastly, remember to enjoy the process of painting complex subjects.
Embrace the challenge and observe your progress along the way. Each painting is an opportunity to learn and grow as an artist 🙂
If you’d like to try this painting for yourself, all the reference material and the outline sketch can be found on my Patreon.


Many thanks Anthony. Very helpfull tips. Makes me want to give it a go rather than shy away from a complex challenge.
Hi Maureen
Painting “difficult” subjects is a great way to make progress 🙂
I like the idea of the homemade “value finder” . I will try that. Janie
Have fun Jane!
You are a true teacher. i tell you this all the time. I’m always amazed how you break steps apart to make them visual and understandable. Also it encourages the new artist to practice your tips when starting a painting.
Thank you! I so appreciate you making painting doable for beginners.
Bonnie C.
Thanks Bonnie!
I really appreciate the feedback 🙂
Great tips and reminders. Thank you!
Happy to help Barb
Great article -very informative
Thanks Marianne 🙂