
Easy Easter Watercolor Painting (Wet-on-Wet)
Short on time?
This may be the quickest Easter watercolor painting you’ll ever try 🙂
This tiny painting lesson is all about painting these cute Easter chicks in watercolor using a wet-on-wet technique.
If you’re short on time but really want something to paint, give these a try!
Step by step easter watercolor chicks
Step 1
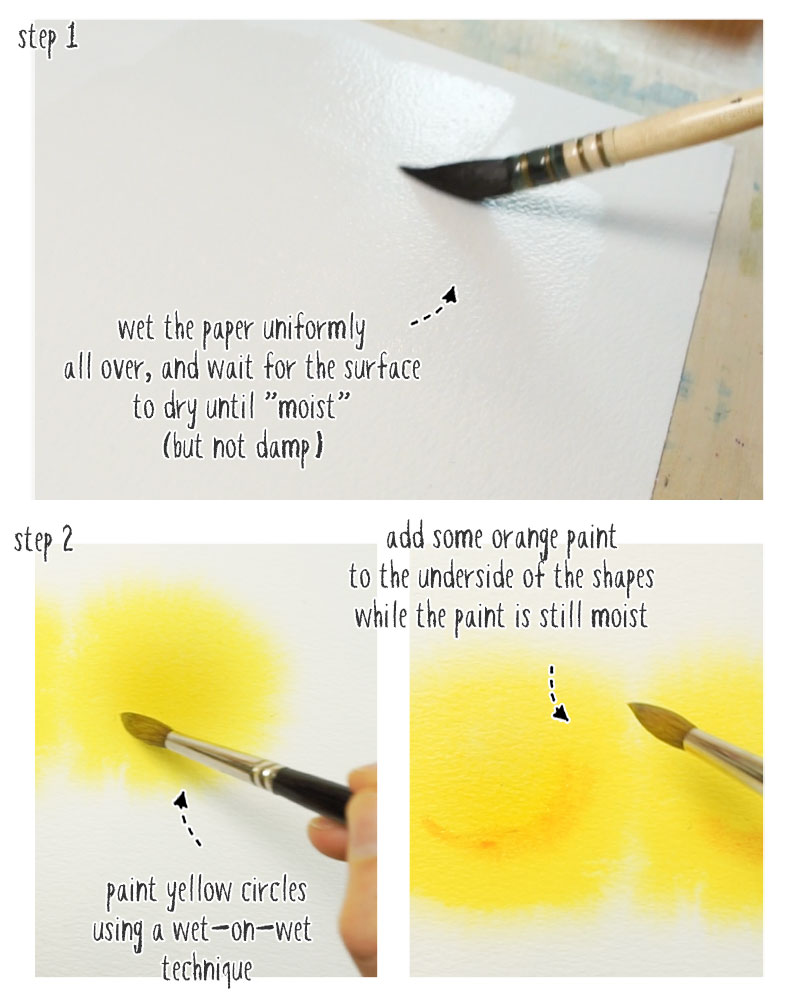
Begin with a sheet of watercolor paper taped down onto a board and using a large brush, wet the surface so that it is evenly moist. I use a mop brush like this because it holds lots of water…
You want the distribution of water to be as uniform as possible. Otherwise you’ll get differences in drying times to different parts of the paper.
And what does that lead to?
Blooms! Those unwanted watermarks that sometimes spoil your paintings…
There is a delicate point where watercolor paper dries and becomes “damp” rather than “moist” (damp being dryer than moist in this example). This can happen unevenly across the surface of the paper, depending on the wetness of your brush strokes.
This is why “timing” in watercolor painting is an important factor.
Step 2
After wetting the paper with clear water, you now need to wait until the paper is moist (but before that delicate “damp” phase of drying).
Don’t paint into the wet paper immediately while the paper is wet. This will mean your paint will spread over a wide area of the paper. We want to limit the spread to a round shape on the paper, not diffuse across the whole sheet.
Use your fingers to touch the paper and judge the wetness of the surface, or turn it into the light to see how it reflects.
A wet surface will be very shiny. But on a moist surface you can start to see the water absorb and some of the paper’s grainy texture is revealed. (A damp surface looks almost dry, with very little shine).
This is great practice for wet-on-wet control 🙂
The better you get at judging stages of drying the more control you have over your painting process.
So… when the paper is “moist” start painting three yellow circles, side by side. Use a medium strength mixture of paint, not a very wet and diluted mixture.
Observe how fast and how far the pigment spreads. If the pigments run away too far, you can rinse and blot your brush, and use it like a sponge to soak up some of the unruly pigments. Then wait a little longer to try again.
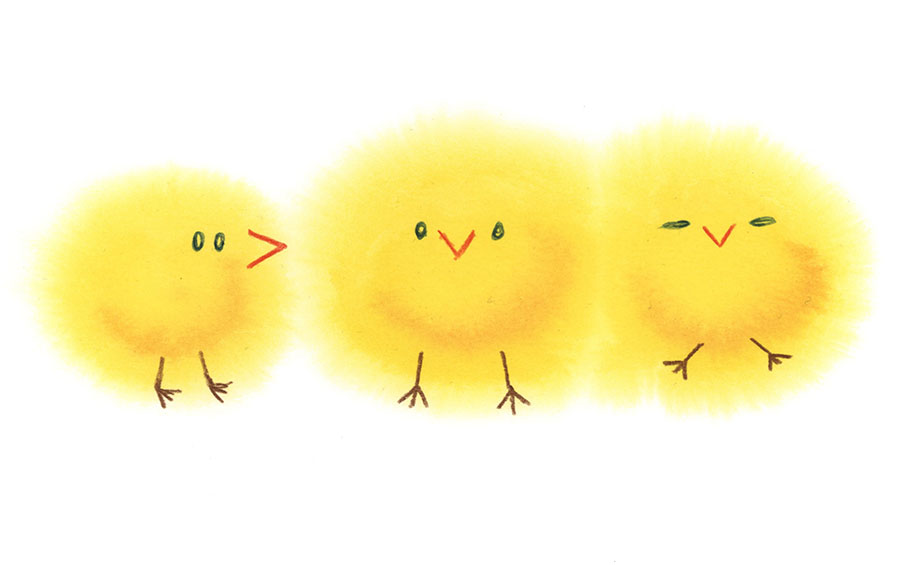
You should have three nice round circles with sift diffuse edges.
While the painted shapes are still moist, mix up a slightly orange color and add some curved shapes to the underbelly of the chicks, just to give them a little bit of depth.
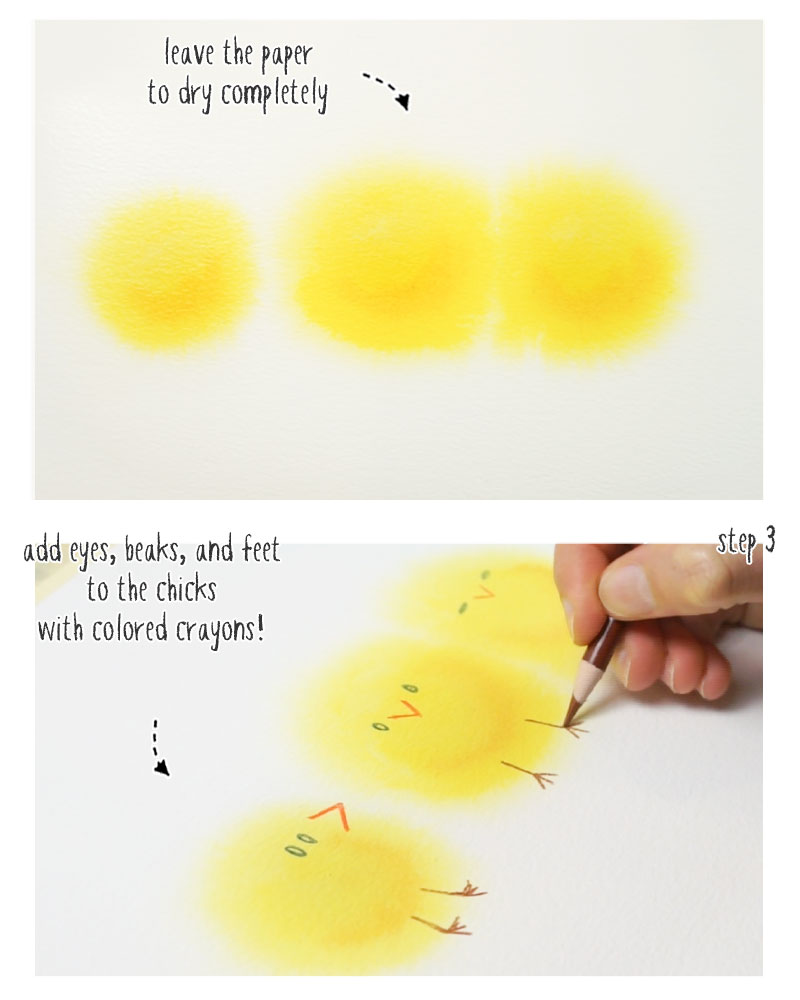
Now let the shapes dry completely!
Step 3
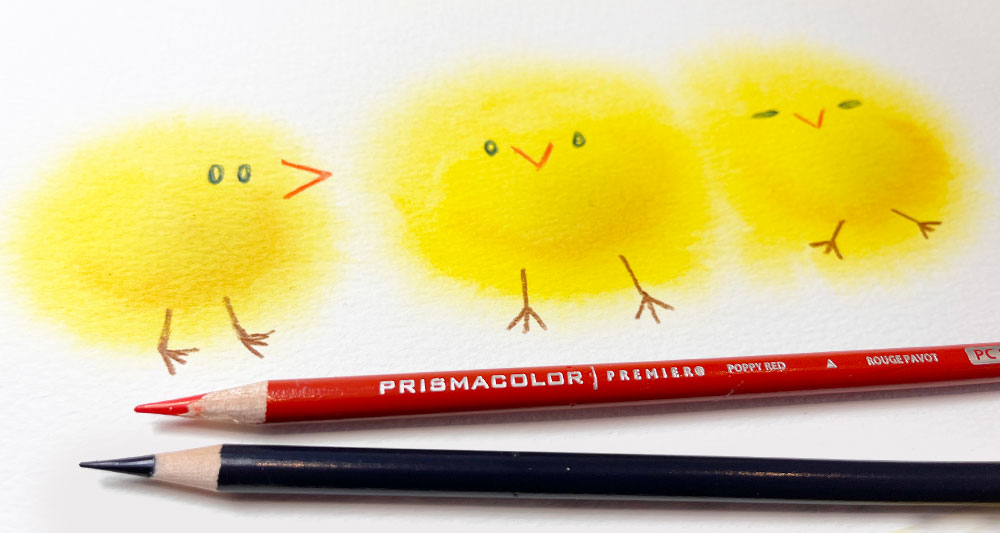
When the chick shapes are nice and dry, You can use colored pencils to dry beaks, eyes, and feet on each of the cute easter chicks!
I’m using Prismacolor pencils – they lay down nice rich colors and are pleasantly “chalky” to draw with.
And that’s it!
Told you this would be quick 🙂
Hope you have a wonderfully creative Easter…


Painted these today. Such a useful wet-on-wet learning experience! And fun! And quick! Thanks Anthony. 🐥
Glad you enjoyed it Anne 🙂
The chicks are so cute! Thankyou so much for the clear step by step instructions!!!
Can you teach more animals?
Hi Tova
More animals to coming… 🙂
Hi Anthony.
Love the little chicks I did paint them
Thank you, have a nice day.
Glad you liked them 🙂
Soooo CUTE! I am sharing this with my Grands ASAP! But not until I’ve had a minute to try myself!
Have fun 🙂
Thanks. Informative tutorial. It will improve my fundamentals.
Happy to help 🙂
Thanks Anthony,
That is the painting we were wainting for.
Nice, simple (?) and funny.
A beautiful Easter day to you and family.
Thanks Anthony,
,I will draw 2 paintings of the chicks and include each one with the eggs hidden in the garden for my 2 young granddaughters to find and I am sure will love them.
Happy Easter,
Warm regards
Peggy.
Have fun Peggy 🙂