What is Watercolor Glazing (And How to Master it!)
Watercolor glazing is the most fundamental technique you need to understand about this art medium.
But don’t worry… It’s not as complicated as it sounds.
In fact, chances are you’re already using a glazing technique without even thinking about it 🙂
A bit of knowledge about this painting method will help you better understand how watercolors really work and how to plan your paintings to avoid mistakes.
What is glazing in watercolor?
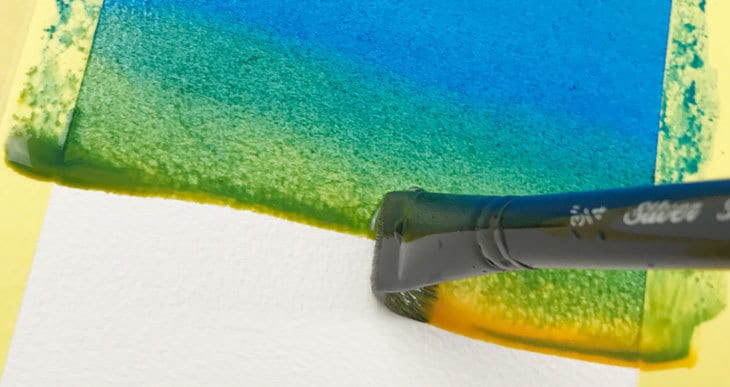
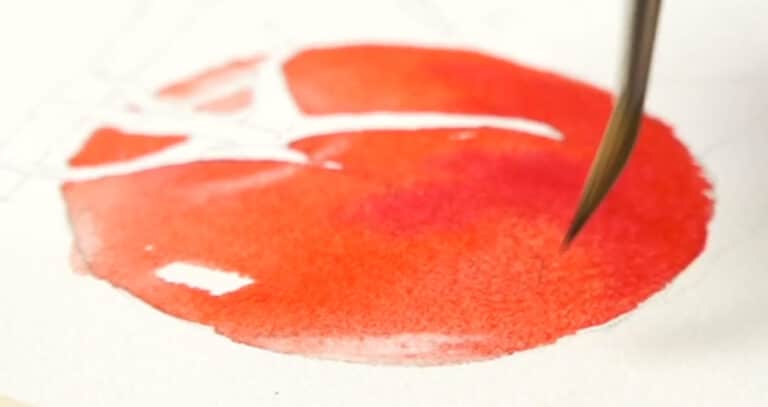
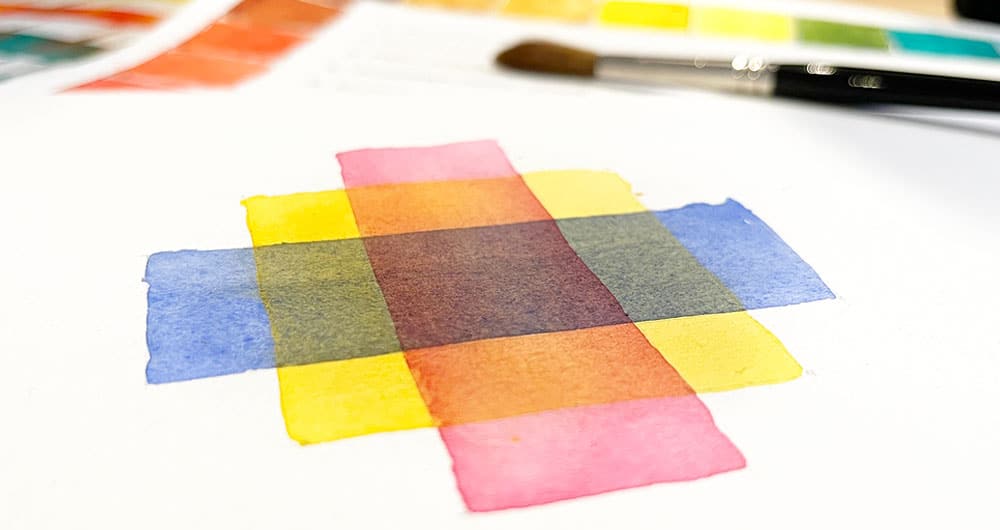
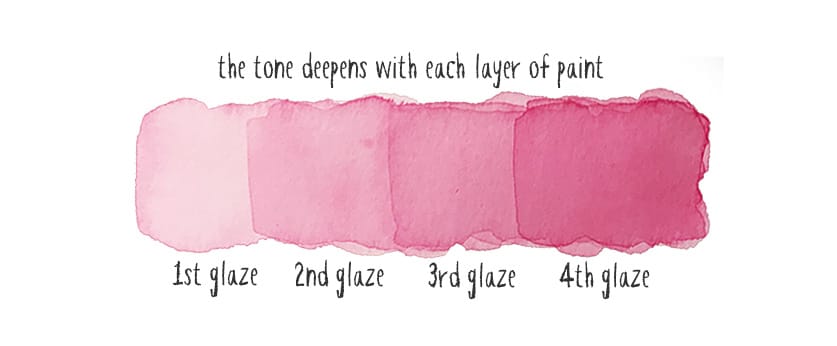
The term glazing in watercolor is another word for applying multiple layers of paint.
A glazing technique is when you paint a shape, let it dry completely, then paint a new shape over the top of the previous color.
Because watercolor paint is transparent, any new brush marks let the underlying colors that were previously painted show through.
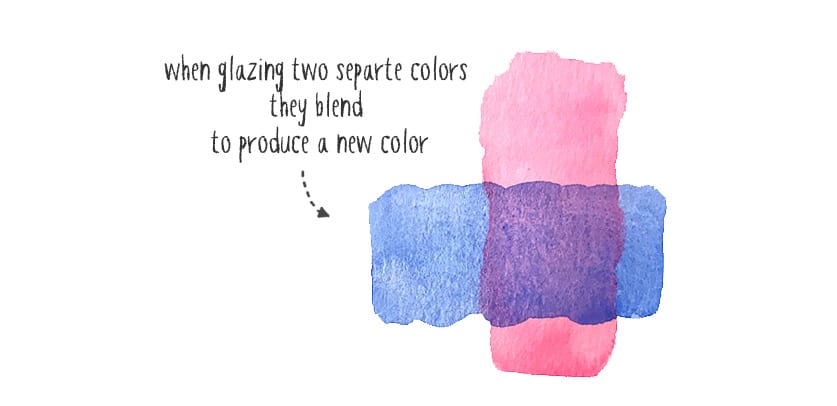
The combination of two layers of paint produces a new appearance with a modified color and a darker tone.
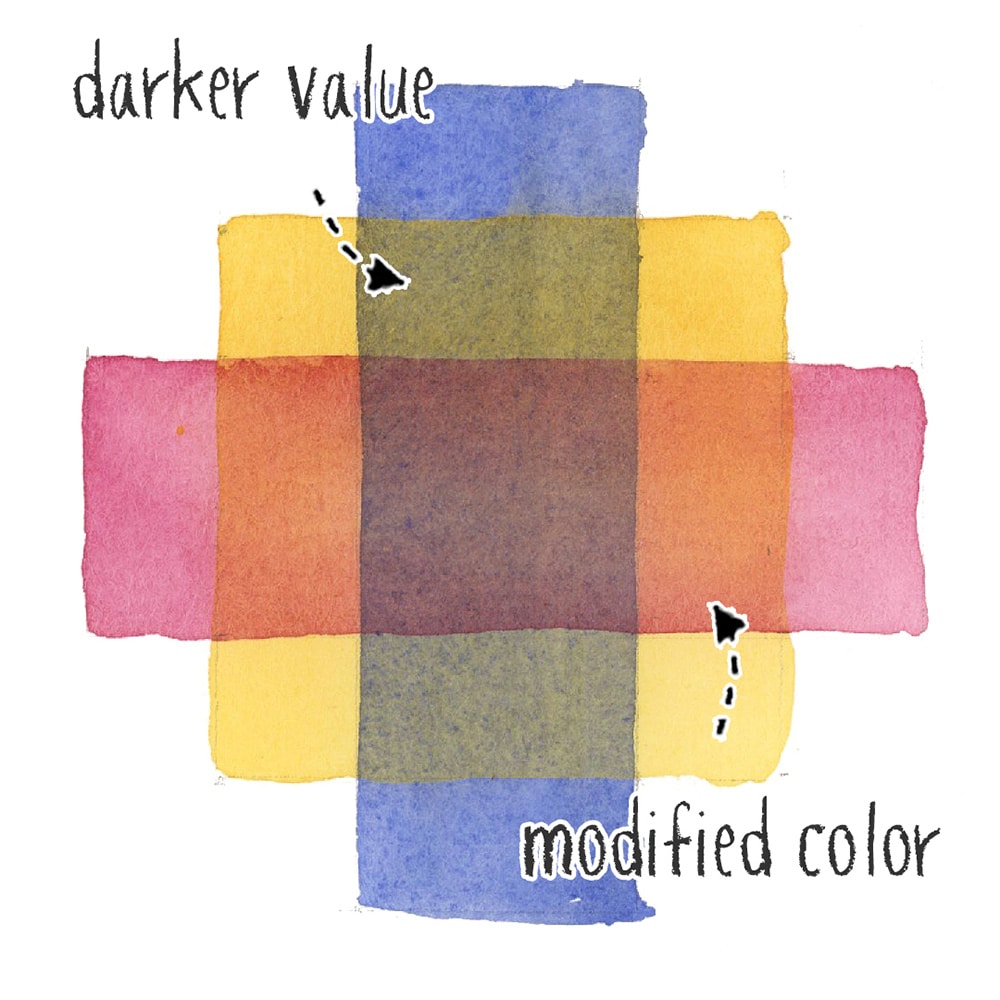
In other words, with each new layer, you increase the tonal value a bit at a time and create a new color. It’s a bit like mixing colors directly on the paper. This effect is caused by the layers of pigment building up, one on top of the other.
The ability to glaze with watercolors is one of the qualities which give watercolor paintings a unique and appealing appearance. Beautiful clean, transparent glazes of color give depth and interest to your paintings. It’s probably one of the reasons why you’re so attracted to this medium!
Admit it! You are… aren’t you?
How does this layering technique work?
Glazing is a “transparent” technique. In fact, glazing or layering paint is almost unavoidable when you paint in watercolors.
Glazes create an optical effect – Like mixing on the paper, one color at a time.
After all, watercolor paint is transparent! So the very nature of the paint is what creates this effect. Watercolor artists learn to embrace this characteristic through glazing.
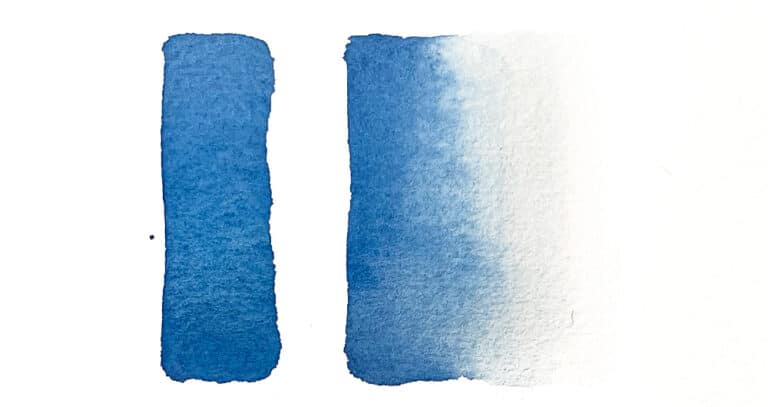
When you lay down a wash of transparent color and let it dry, you are making a backdrop of color. Then you paint more transparent glazes over the top. All subsequent colors modify the final appearance of the painting.
The effects of glazing can be beautiful. But sometimes, they can be unexpected.
The type of paint matters
The best type of watercolors to use for glazing are transparent.
Confused?
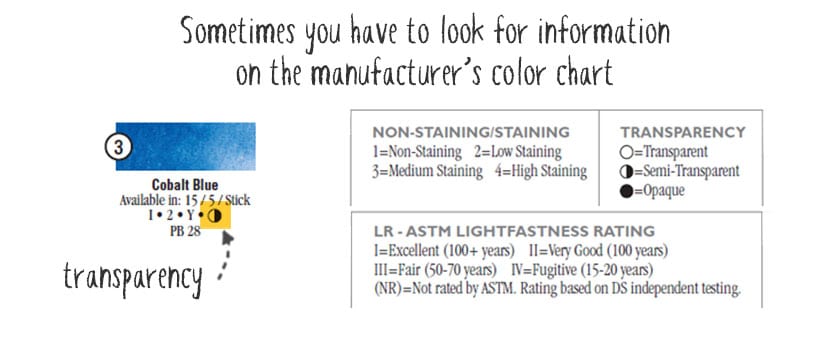
I know I said that watercolors are transparent. But the transparency of different pigments varies from one tube of color to another.
Some watercolors are MORE transparent than others.
If you look carefully at the labels of your paint, you’ll see this characteristic is mentioned.
Most paints are classified according to transparency, like this:
- Transparent
- Semi-transparent
- Opaque
Single-pigment paints are also better for glazing. They allow you to layer colors and darken values without creating muddy-looking mixtures.
Some paints are already a mixture of two or three pigments, blended to create a new color appearance (these are known as convenience colors). However, using these in glazing can produce dull results.
Think about it this way… have you ever tried mixing a new color in your palette, adding more and more different paints until it just looks like a dark and murky gray? The more pigments you add, the closer you get to what watercolor artists call “mud.” So if you glaze using multi-pigment paints, you get closer to muddy results than if you stick to single-pigment options.
Some colors reactivate when glazing in watercolor.
Occasionally you might come across problems while trying to glaze your paints. The underlying color lifts off and mixes with the new brush strokes you just laid down.
What’s happening is the first layer is reactivating with the wet brush stroke and mixing with the new color. This can happen for a couple of reasons:
- Bad paper sizing
- Non-staining paints
Watercolor paper differs in quality. Sizing is a substance that alters the absorbent properties of the paper. And on some types of paper, the sizing can be poorly applied or of poor quality. As a result, the paint lifts off the surface more easily.
So poor quality paper sizing can be one reason you’re having difficulty glazing.
Secondly, watercolor paints can be “staining” or “non-staining.” This refers to how much the colored pigments are absorbed into the paper fibers. Staining colors can be difficult to remove (they sink deep into the paper). Non-staining colors tend to settle on the surface and are easier to remove.
So if your first glaze uses paints that are very “non-staining,” the following glaze of color could disturb the underlying pigments and cause them to lift off.
Keep in mind that non-staining paints also have some advantages. For example, they allow you to use a lifting technique more easily. Sometimes this is what you want!
How to glaze watercolors
Lay down your first watercolor wash, leave it to dry completely, then apply the next wash. Let this dry, then continue building up subsequent layers.
That’s it!
Most watercolor artists build up the tonal values of their paintings in this way, allowing them to progress from light tones to darks. Remember that your first “glaze” of paint doesn’t have to be monochrome. You can paint a whole background using a variegated wash or create a shape that transitions from an intense color to a light-toned one.
Glazing and layering paint is pretty simple. If you get the ground rules right…
The rules of glazing:
- The underlying layer must be dry. This is the first basic rule. If the watercolor hasn’t dried, the pigments won’t fix to the fibers of the paper, and they will lift off when you apply the ensuing glaze.
- Think about the color mixing effect of the combined colors. It helps to understand the mixing results when you combine two paint colors.
- Transparent single-pigment paints work best. Paint colors with these properties are said to be ideal for glazing.
- Paint quickly to avoid reactivating underlying layers. Regardless of the type of paint or paper you use, quick and confident brush strokes can help. The more you “scrub” the paper with multiple passes of your brush, the more likely you will lift some of the underlying pigments.
Tip: waiting for the paint to dry between glazes can be frustrating. Use a hairdryer to speed up the process. Just be careful not to heat up the paper too much 🙂
And here’s a quick video I made to summarize glazing:
And you’ll find a description of all the important watercolor techniques on this page…
Here’s a suggested list of paints ideal for glazing:
I select my paints according to their characteristics. These are the basic paints I recommend to artists to get started. They are designed to provide an extensive range of mixing properties. They are all single-pigment paints and mostly transparent.
- Hansa Yellow Deep – Pigment number: PY65
- Lemon yellow – Pigment number: PY175
- Phthalo blue GS – Pigment number: PB15:3
- French ultramarine – Pigment number: PB29
- Quinacridone rose – Pigment number: PV19
- Pyrrol scarlet – Pigment number: PR255
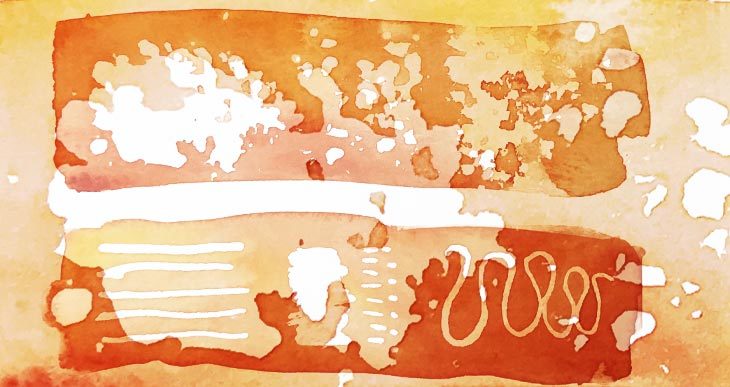
Watercolor glazing exercises
Painting drills that include glazing are a great way to learn the handling properties of your materials (paint and paper) and improve your technique.
To begin with, I suggest you test your paints by creating glazing charts.
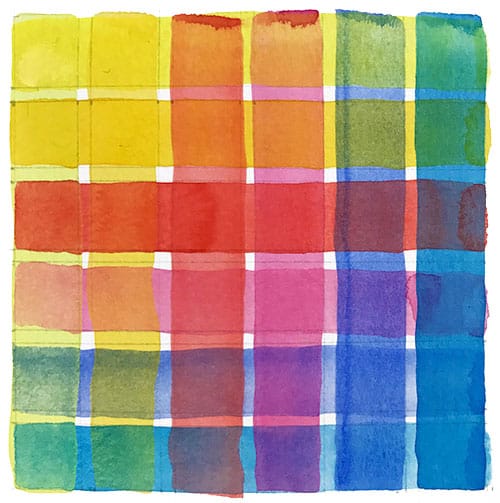
A glazing chart allows you to quickly test your paint’s characteristics and how they mix on the paper to create new color appearances.
You’ll find a complete tutorial about how to make gazing charts here…
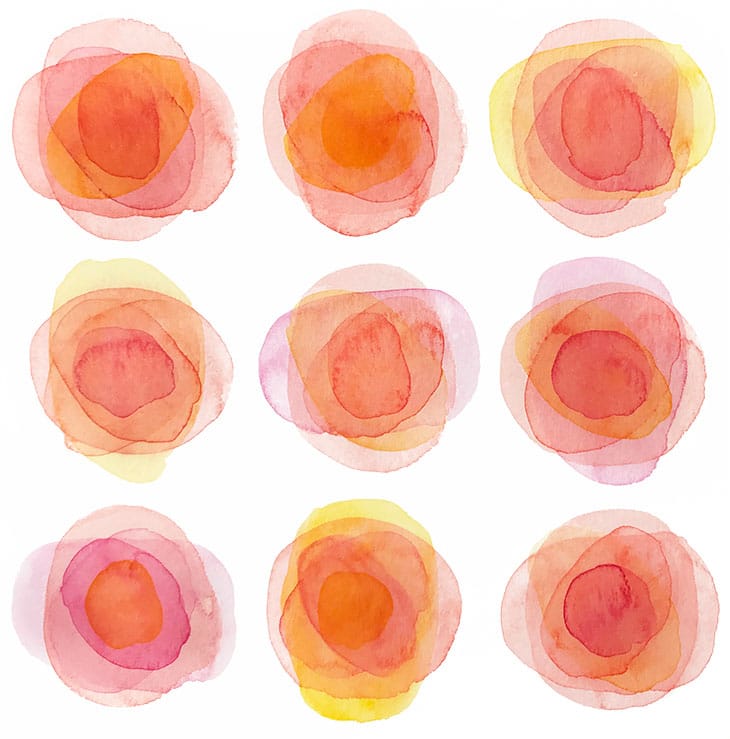
Here’s another fun painting exercise you can try out to exploit the transparency of your watercolors and practice your glazing technique.
These easy-to-paint abstract “roses” are created by layering shapes on top of each other in a series of glazes.
You’ll find a more complete description of this painting on this page…