How to Paint Cherries in Watercolor (My Step by Step Tutorial)
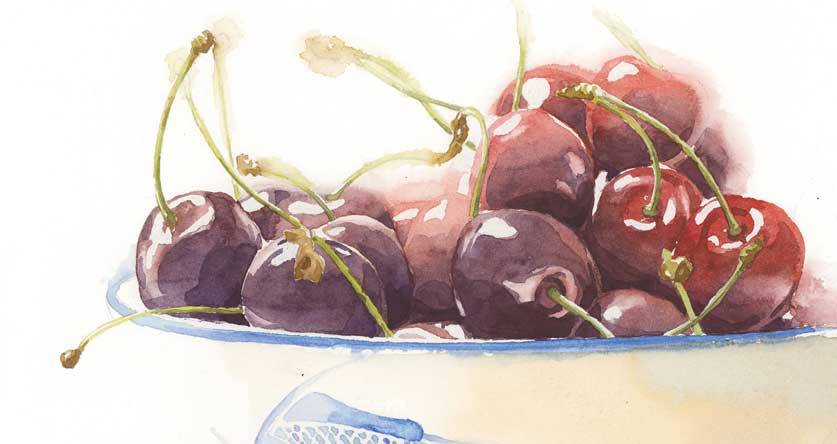
Have you noticed that sometimes you look at the world in a funny way?!
When you become interested in painting, after a while you begin to see things differently. This is what happened to me when I went to the market and noticed these cherries.
The first thing I said to myself was “those cherries would make a great subject for a painting”!
I didn’t think “those look delicious” or “I could make a great cherry tart with those”.
No… Instead I started to wonder which watercolor paints I should mix to get that amazing range of cherry reds!
This happens to me pretty often !
Maybe you find yourself doing the same thing?
So this tutorial is all about how to paint cherries in watercolor. And as usual, if you’d like to give this painting a try for yourself you can download a worksheet from my website. Just follow the link below this video.
Watercolor Cherries – The Composition
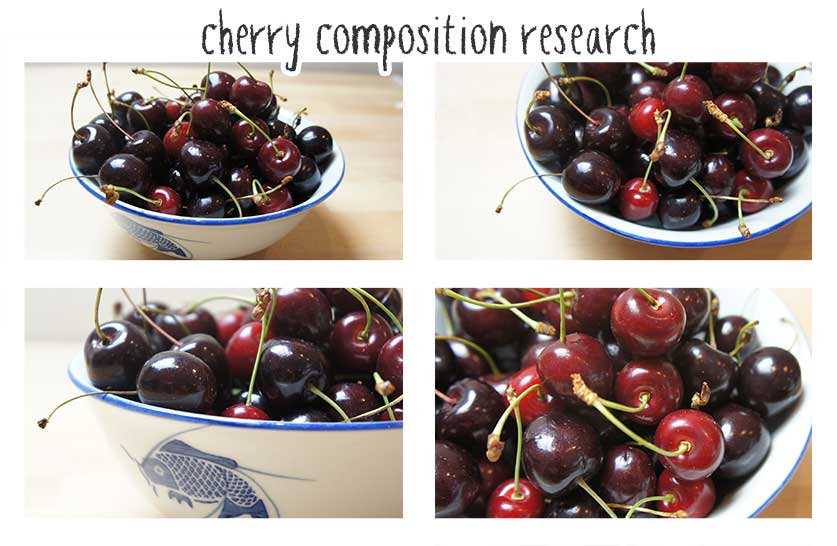
So the first thing I did was to throw the cherries in a bowl and start taking a series of photos, in an attempt to come up with a decent composition, until eventually I decided on this…
I liked the way the bowl is offset to one side, without actually seeing the whole of the subject. I think it helps put the center of focus in a more interesting place, rather than putting the subject bang in the middle of the painting.
Also, the bowl I chose is blue, which sets up a complementary harmony with the red cherries.
Preparation
I began by sketching a rough outline onto a sheet of watercolor paper, then I taped it down onto a drawing board. Making sure to tape down all the sides to help keep the paper flat.
I also like to save the white highlights on my paintings by using masking fluid. I find that masking is an incredibly useful tool, especially in the early stages. It allows you to put down broader brush strokes without having to worry about painting around fiddly white details.
(I’m using a bamboo quill pen for this)
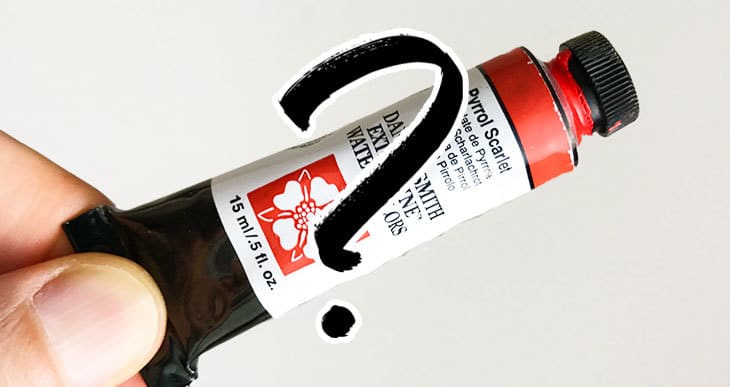
And if you’re wondering which paints I ended up using for the cherry color, I only needed two. Pyrrol scarlet, and French ultramarine.
A list of the paints used in this painting:
- French ultramarine – Pigment number: PB29
- Pyrrol scarlet – Pigment number: PR255
- Yellow Ochre – Pigment number: PY43
- Burnt umber – Pigment number: PBr7
- Paynes gray – Pigment number: Pb29/PBk9
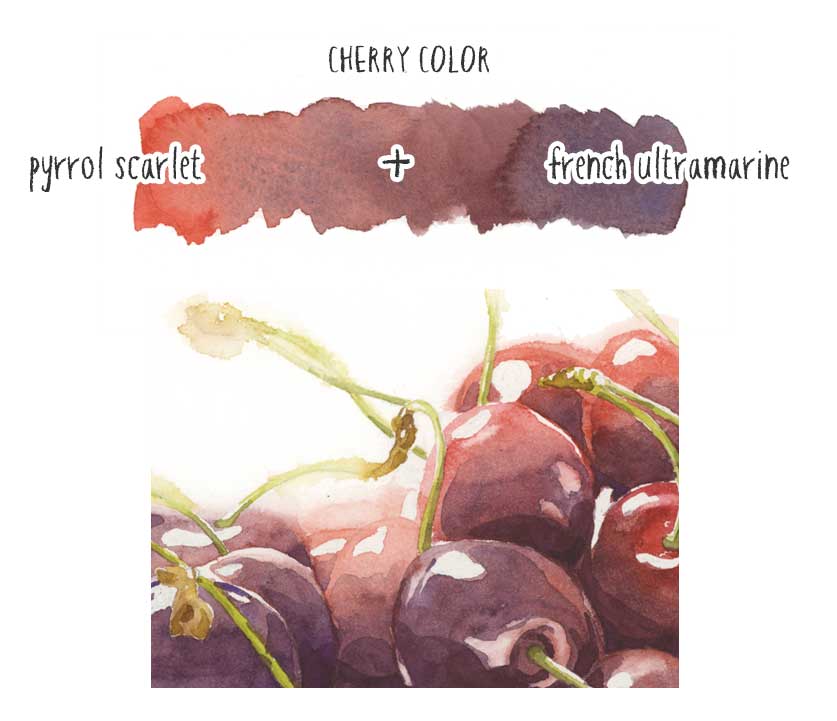
Using Pyrrol scarlet as a base color, you can see that the more blue I add to the mix the darker and more purple the color appearance becomes. This is enough to get a range of colors that approximates the cherries nicely.
My Step by Step Process for Painting Watercolor Cherries
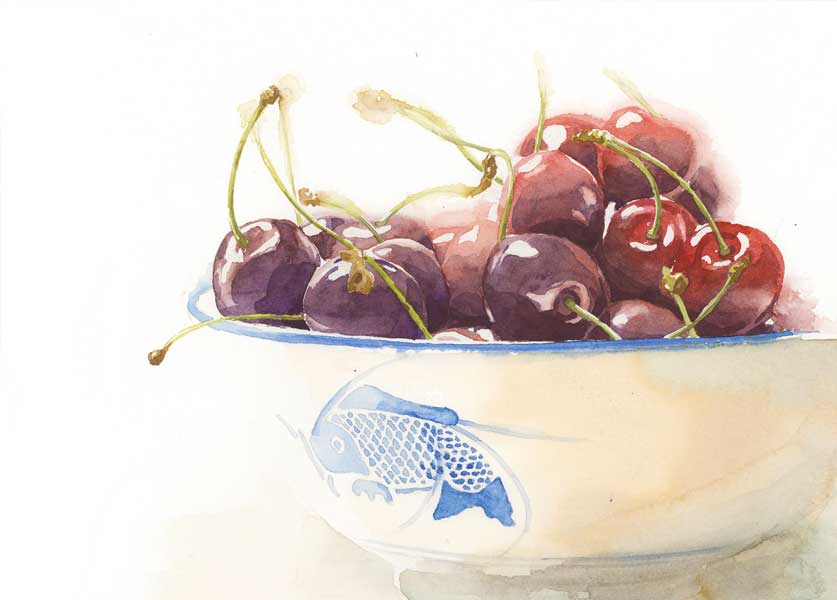
Try this painting for yourself ! Click the button below to download the worksheet for this painting.
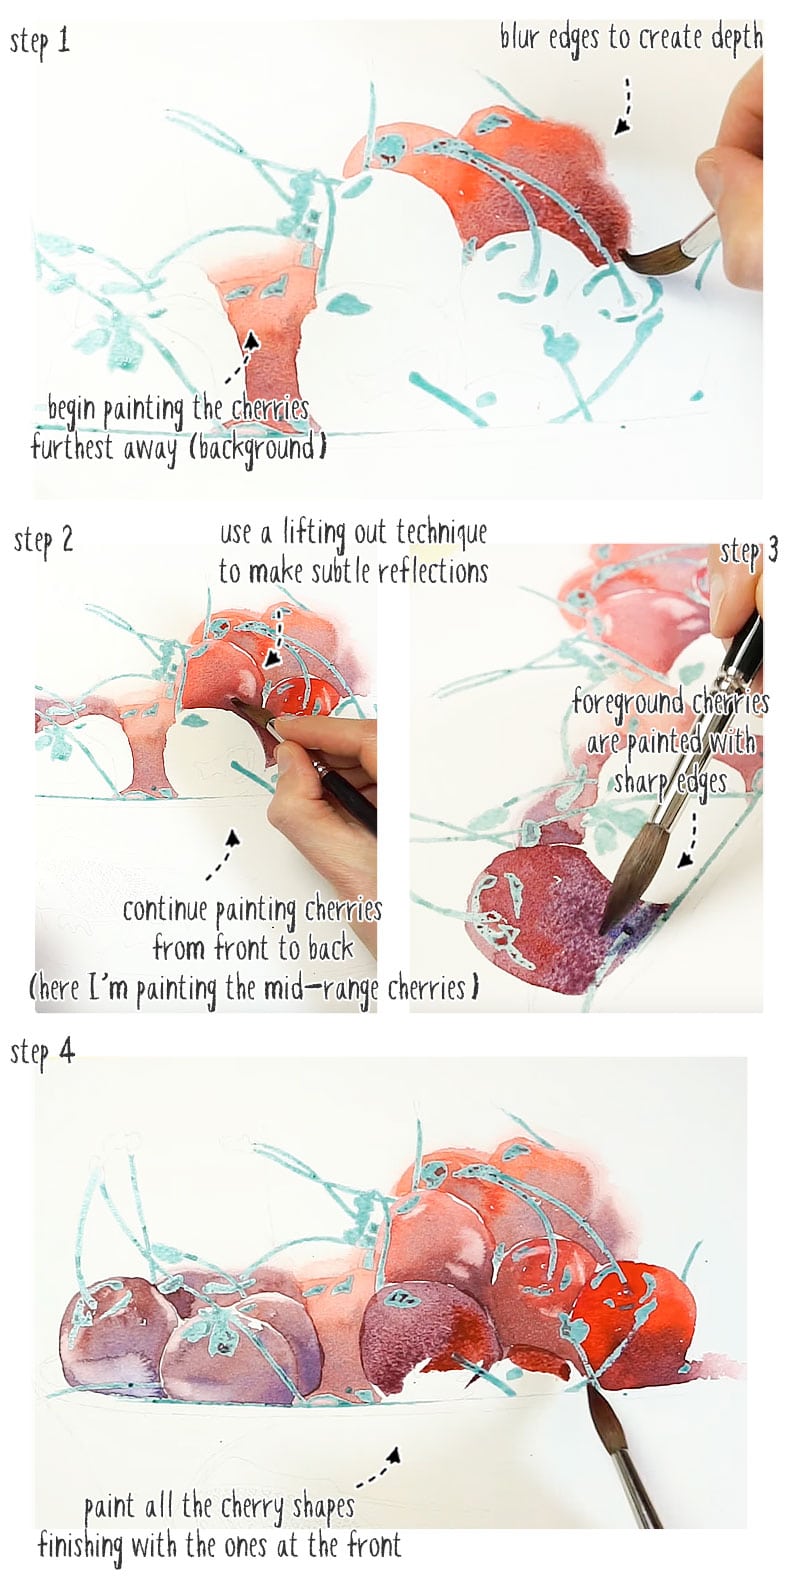
I’m also trying to pay attention to the color appearance of the cherries in the reference photo. Each one has its own unique hue. Notice also that I’m moving from one shape to another and not painting the shapes that are touching. This gives each painted shape time to dry and helps avoid accidental bleeding or blooms.
I start by painting the cherry shapes that are furthest away. I’m varying the color as I paint, adding a little more blue to the red mixture in my palette. You can also see me blurring the outer edge of these background cherries. The idea here is to try and create a better feeling of depth by making the foreground cherries crisper in detail than those that are further away, a bit like the depth of field effect you get in some photographs.
I continue painting the cherry shapes using the same principles, gradually working my way forward from back to front. (Now that the background forms are established, here you can see me working on the mid-range cherries).
Another thing to be aware of is that the cherries have a fairly shiny surface, which results in some subtle reflections and highlights. To add this effect I’m using a lifting out technique.
While the painted forms are still damp, I use a blotted brush to soak up some of the color, to try to give the impression of a reflected surface. Use the reference photo to guide you with this step.
The foreground cherries are painted with sharp edges, and still using a variegated wash. (A variegated wash is a fancy name for when the painted shape changes color across the surface). In general the cherries are darker underneath.
Don’t forget to lift out some paint while the surface is still humid. This is trickier to do when the paint has dried.
Keep painting the cherries using the same methods, finishing off with the foreground cherries at the front edge of the bowl. Then leave everything to dry.
Now I’m going to add a light color to the bowl. To do this I’m using a graded variegated wash. This sounds tricky but it’s just the fancy language used to describe a combination of two watercolor wash techniques: a graduated wash and a variegated wash. In other words one that blends from dark to light, and at the same time changes color.
My objective here is to make the white bowl disappear into the white background. This is a concept known as “lost and found edges”. (Follow the link if you’d like to learn more about this idea …)
Now leave the paint to dry completely before adding the blue details and patterns to the bowl.
If you don’t let the paint dry sufficiently, the next brush strokes could bleed into the surface, ruining the underlying wash and just make a general mess.
You might want to change the size of your brush for this next step and use a small round brush (better for details).
The main idea when painting the blue details is to use stronger, darker paint toward the shaded side of the bowl, and lighter diluted paint on the left side as it turns toward the light. This will increase the illusion of three-dimensions on the bowl.
Next I removed the masking fluid using a kneaded eraser.
For this next stage I’m going to use a watercolor technique known as glazing. This is a wet on dry technique where you paint layers of color on top of each other and wait for each layer of watercolor to dry before adding the next. This is a way to build up tonal values in a watercolor painting, making them gradually darker.
You can see how the depth of color increases with the new layer of paint. I’m only adding a glaze to the parts of the cherries where the tones need darkening. For example, I’m careful to paint around the highlights and leave the upper edges of the cherries that are facing the light.
Notice that these new brush marks have hard edges. I’m not always blending them out to make a smooth edge. I think this will help to increase the impression that the surface of the cherries is shiny and reflective.
And as a general rule I’m leaving the furthest cherries in the background lighter toned and making the closest cherries in the foreground darker. This is another way to increase the sense of depth and distance in the painting. The cherries at the front will appear to advance and those at the back appear to recede.
Now I leave the paint to dry before painting the stalks. Again I’m using a glazing technique and trying to give them a three-dimensional appearance. I start with a light-toned green and add some darker brushstrokes to the shaded sides of the stalks.
At this stage I can start adding a third glaze to the cherries. This time I’m going to darken the values of the shaded parts and add some cast shadow. To do this I’m using a paint mixture of dark purple, using the same two paints as before, but with more french ultramarine than red.
Keep applying layers of paint until you’re happy with the intensity of the shaded parts.
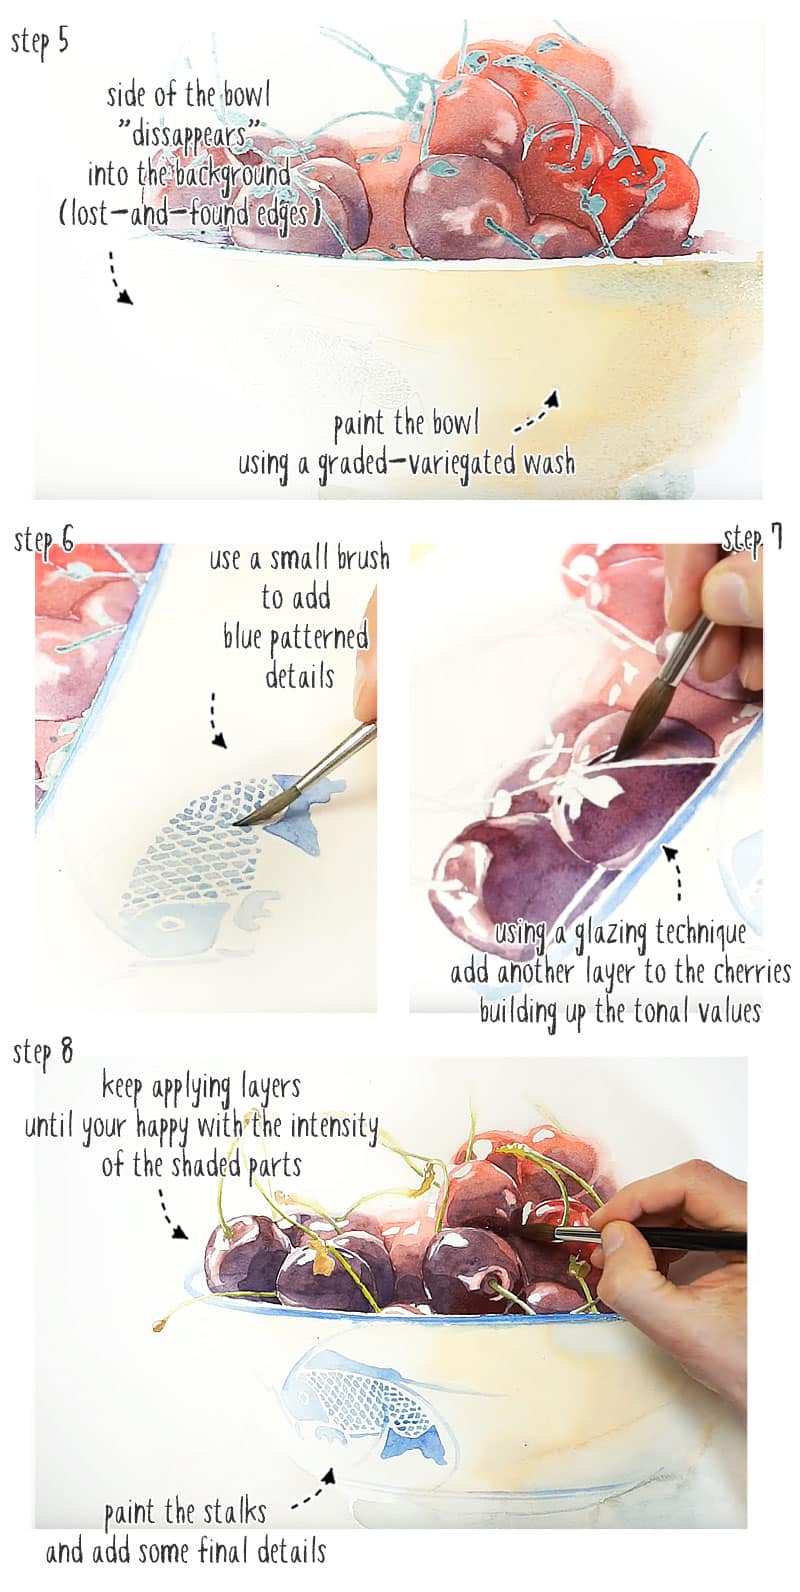
For the rest of the painting I’m just adding a few finishing touches. For example I added a few darker details to the stalks, a little bit more shading underneath the bowl, and I increased the intensity of the blue patterns towards the more shaded side of the bowl.
And that’s it !
If you try this project for yourself, let me know what you think 🙂

You are marvelous! I have been looking for a beginners cherry picture to paint for a special friend. Thanks so much for sharing your amazing talent.
You’re very welcome Cathy – hope you have fun painting it. You’ll also find the video for this on my Youtube channel here…
This is great, But Purple bowl would also look great in this painting instead.
Sound’s great ! Give it a go 🙂
This is beautiful! Thank you.
Thanks Barb 🙂