
Watercolor Painting Ideas (Super Easy Things to Paint)
Looking for some simple inspiration ?
Below you’ll find some watercolor painting ideas which use very simple wet techniques.
What do I mean by “wet techniques” ?
In watercolors, the colored pigments are held in suspension by the water you use to dilute the paint. While the surface of the paper is damp, or your brush marks are wet, the pigments flow and disperse in ways which sometimes seem unpredictable until the water evaporates and the pigments settle onto the sheet.
This is one of the characteristics of watercolor that make it so unique.
The following easy step by step watercolor ideas will teach you a few things about the way the wetness of the paint and the paper affects the way colored pigments flow.
Easy Watercolor Ideas for Beginners
It’s not easy coming up with new ideas for painting but one of the best ways to find inspiration is simply to find time to play with colors and enjoy the beautiful characteristics of watercolor. And one of the most interesting things about watercolor paint is the way different colors blend and diffuse in “wet” situations.
Most of you have probably heard of the watercolor technique known as “wet-on-wet”, but there are various ways to exploit this method of painting and the way colors combine when they’re still damp. All produce amazing and fun results…
Each of the watercolor ideas below make use of “wet” paint in different and playful ways.
You can download the template and reference images for painting these subjects below, or simply use them as inspiration for your own interpretations.
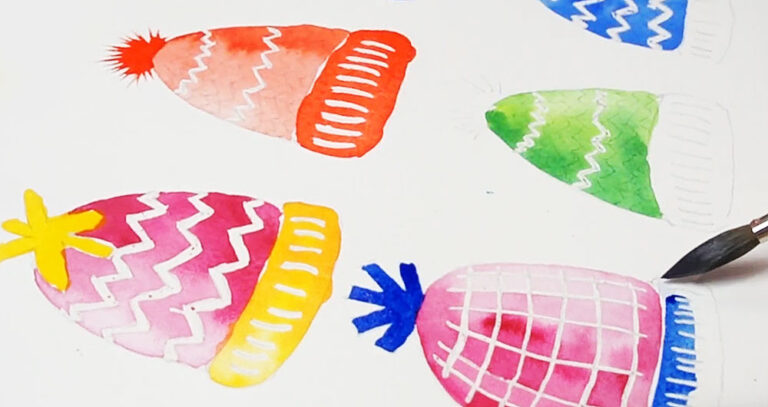
Fuzzy Birds Wet on Wet Painting Idea

Try this painting for yourself ! Click the button below to download the worksheet for this painting.
One of the best known wet-on-wet techniques involves dampening the surface of your watercolor paper before you apply a layer of paint. Hence the name “wet-on-wet” because you’re applying wet paint to a wet surface.
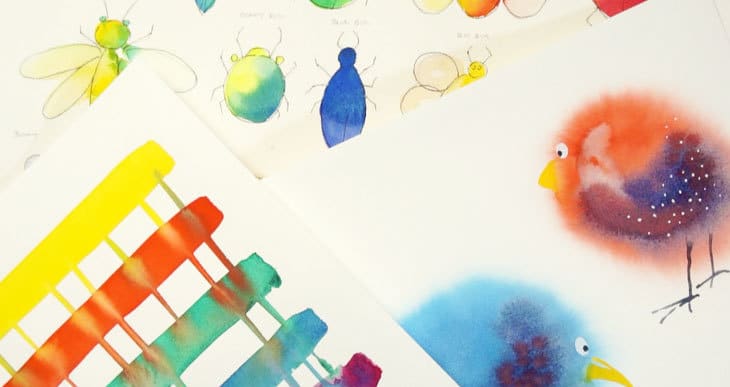
This technique is ideal for painting these fuzzy watercolor birds.
And you can pretty much just paint any shape you like and see what kind of results turn up !
Start by taping down your sheet of paper onto a flat board. This will help the paper to stay flatter when you apply water.
The first step is to brush the whole surface of the sheet using clear water. For this I use a large hake brush. A big brush like this is ideal for adding large amounts of water or paint quickly.
Keep brushing the surface with vertical and horizontal brush strokes to make sure the whole sheet is evenly dampened.
Mix up a bright color from your palette and start painting an oval shape. Notice how quickly the paint spreads outwards when the paper is very wet. Add some more paint to the center of your shape to strengthen the color.
One of the attributes of wet-on-wet painting is that the paint tends to appear lighter than wet-on-dry techniques after drying because the surface water dilutes the paint slightly.
Mix another bright color and paint a second shape. Work quickly so that the surface of the paper is still damp and the pigments disperse on the surface.
Mix up a darker color to paint the underbelly of your imaginary birds. Here I’m using a dark purple color which is the result of mixing the blue and red paints together. Like this the dark color is in harmony with the original brighter hues.
Next I used a lifting technique to lighten a small part of the shape. I do this using a blotted brush so that it picks up some of the color from the paper. Lifting can also be done when the paint is dry, but this technique works better when the paint is still wet. It’s a very useful method for varying the color intensity and values in watercolor painting.
Notice also that the surface of the paper is starting to dry. The pigments spread less quickly into the light toned shape that I just created. To add some more texture to my fuzzy shape I continue to add some dabs of strong red. Again, this color spreads out much less than when the paper surface was completely wet.
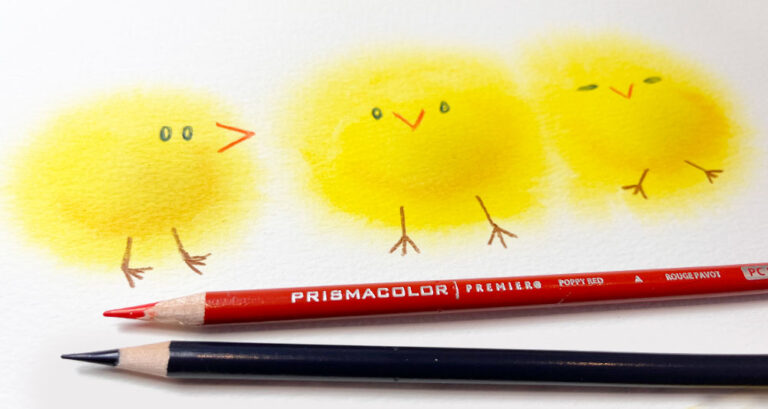
Leave the paint to dry completely before moving on. To add the details of the beak and the eyes I used some white gouache. (Gouache is water soluble like watercolors but it’s much more opaque).
For the color of the beak I just mixed some yellow watercolor to the white gouache.

Then using pure white gouache I painted the eyes and a few white dots on the body to add some more texture.
Do the same for the second bird, then mix up a dark gray color. I just used a fairly strong mixture of Paynes gray to add some feet to each bird.

I think this is a really fun painting idea which exploits the wet-on-wet characteristics of watercolor beautifully. Try to play around using different colors… You can have fun making all kinds of different fuzzy creatures 🙂
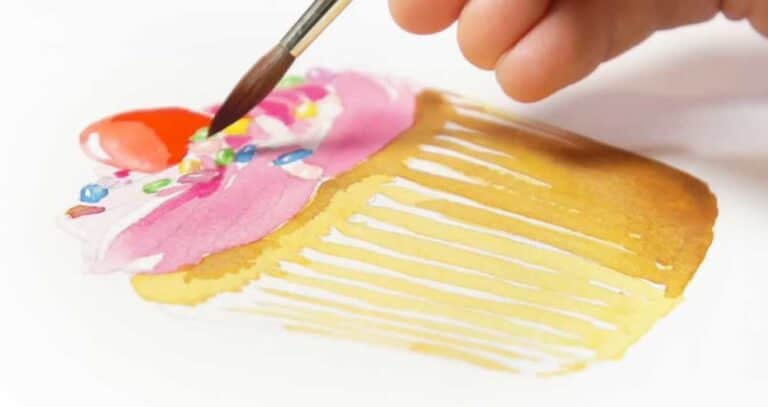
Easy Watercolor Lines and Dribbles

This next idea involves quickly painting a series of horizontal lines then joining the wet lines together with dribbles of paint and water. Because the process happens while the paint is still wet, the different colors merge creating interesting blends of color and texture.
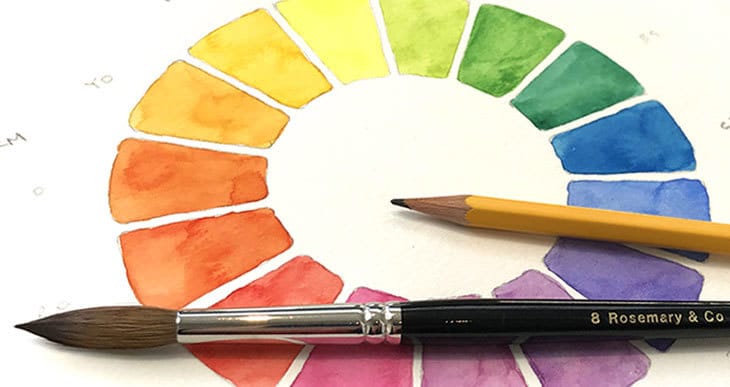
Again, start by fixing down your sheet of paper onto a board. Then choose six colors to paint your lines. I used pure colors from my palette which I knew would create brightly saturated results. The colors I picked were:
- Hansa Yellow Deep – Pigment number: PY65
- Pyrrol scarlet – Pigment number: PR255
- Phthalo Green BS – Pigment number: PG7
- Phthalo blue GS – Pigment number: PB15:3
- Quinacridone rose – Pigment number: PV19
- French Ultramarine – Pigment number: PB29
Think about where you’re going to apply the lines before you start to paint, and if needed use a pencil to draw a few evenly spaced guidelines. Note that I left a bigger gap at the bottom of the sheet so that there is room for the dribbles of paint to flow down the page.
Also I used a flat ¾ inch brush so I could paint thick lines of color quickly. The whole idea is for the paint to remain wet so you can get the colors to mingle together.
Load your brush with a strong mixture of yellow paint and apply a nice wet line across the top of the page.
Rinse your brush well then move down to paint the red and the green lines underneath. Reload your brush with paint to make sure the lines are very wet.
Next, take a small round brush, dip it in water, and use this to paint a few random vertical brush marks downwards through the colored lines.
The different colors will begin to blend together across the thin vertical lines. To boost this process, tilt your board upwards and use gravity to encourage the drips of paint to flow down the sheet. Pick up some more water with your small brush and dab the top of the vertical dribbles so you get even more drips running down the paper.
Paint the next three horizontal lines using nice wet brush marks, then tilt the paper upwards again to repeat the process of making vertical dribbles.
Use plenty of clear water on your brush so you get all the colors to drip down the sheet and mix together.

Now you can leave the paint to dry. As the colored pigments settle they create an attractive random blend of diffused colors, typical of the way watercolors flow when they’re wet.
This idea can be applied to all kinds of different patterns and color combinations.
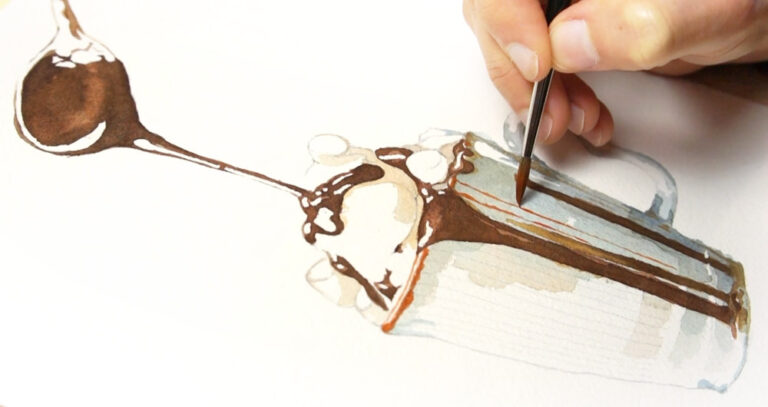
Simple Watercolor Idea for Painting Bugs

This next painting idea makes use of the way brush loads of wet watercolors and water blend together within a defined shape.
This is actually an easy way to experiment with a number of watercolor techniques and effects, including:
- Variegated washes
- Graduated washes
- Watercolor Blooms and back-runs
- Charging-in
I’ll explain each process a bit at a time.
Begin by sketching a series of imaginary bugs on a large sheet of watercolor paper. Then tape down your paper onto a board.
Start painting the first bug shape with a strong mix of bright paint (by the way you can get the list of all the color combinations I used for this painting by following the link below and downloading the worksheet). Before you completely finish the shape, pick up a new color from your palette and start painting the other side of the bug. The two colors diffuse and merge together.
Combining colors in this way is a technique for producing a variegated wash(in other words a colored shape with a variation in color appearance).
Continue painting your bugs using the same method, starting with one color, then switching to another color before you finish filling in the shape. Because both paints are in a state of wetness they will merge together to produce a smooth change in color appearance.
If you need to blend the two colors more smoothly, blot your brush to remove some of the moisture and use the damp brush to move the pigments around and get a more even distribution.
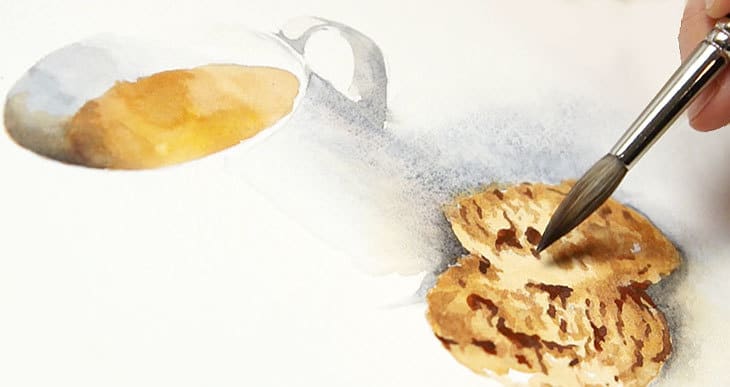
Some of the insects that I drew include wings. I painted the body of these flying bugs in the same way as before, but for the wings I wanted a lighter toned appearance. To do this I simply rinsed my brush, and painted the wing shapes using clear water.
Because the paint of the body is still damp, the color spreads into the damp shape of the wings and produces a gradual progression of color from darker to lighter. This is in effect the watercolor technique known as a graduated wash.
This creates some beautiful results, but in some places you can see another effect occurring. For example, on the last wing shape for this blue bug I used too much water on my brush. This excess of water floods back into the colored wash, creating a feathered texture which in watercolor painting is known as a back-run.
This is sometimes considered a mistake because the watercolor isn’t completely controlled, but as you can see, it’s also a nice way of creating interesting textures.
In other places I painted the whole shape using one color, then I came back and dabbed the wet paint after picking up a second color on the tip of my brush. As a result the two colors merge with each other. This is another wet-on-wet technique called charging-in.

Continue painting the rest of your bugs using a combination of different methods. Play around adding brush loads of paint or water at different stages and see what results you get. Don’t worry if the paint does weird things. Just try to observe when things happen. For example is the surface of paper too dry for pigments to fuse together smoothly, or is your brush too full of water or over loaded with paint, causing blooms or backruns to occur. Noticing under which circumstances these things happen will help you to learn more about the way to control watercolors.
The only rule to remember is that moisture will always travel from a wet area, towards a less wet area. The outcome of this creates all kinds of interesting results.
As a final touch, when the paint was dry I added the legs, antenna, and a few other details using permanent ink Pigma micron pen(link to Amazon).

Watercolor Fun using Wet Paint
Each of these painting ideas makes use of the unique and beautiful characteristics of wet watercolor.
When your brush marks are really wet, and when the colored washes flow into each other, mixing on paper – for me, this is one of the most fun things about watercolors.
Above all, the idea is to have fun playing around with your paints !


I am a total beginner but keen to learn water colour, can any one tell me a good place to start?
Hi Caroline
Well… i would say this blog and my YouTube channel is a pretty good place to get started with watercolors 🙂
I have an article here on first steps with watercolors.
Also, you can sign up for a few free lessons here;
Have fun !
After over 20 years, I have started painting again. I find I’m clumsy and make ‘unhappy’ mistakes. Do you have intermediate level painting lessons please. I have skills but need to refine them. Could you help please?
Hi Carol
You might find my youtube channel useful (click here).
Otherwise the watercolor masterclass has proven useful for some artists who already have experience. I cover all the fundamental techniques and the essential things to know for controlling watercolors in my course.
cheers
Hi Anthony
I have already signed up for your water color class. It is the best I have ever encountered: including internet, and a world famous art school. thank you.
Hi Georgia
wow – thanks 🙂
Thanks for this watercolor tutorial.
Thank you for the article about paints and how to choose. I learned more from you than watching all sorts o YouTube videos. Thank you.
Thank you Anthony, I love your tutorials and ideas – so happy I found your site 🙂
Glad you’re enjoying your watercolors Pip…
Very informative. Thank you!
You’re amazing Anthony, a great teacher.
Thanks Lydia !
Thank you! My daughter saw your little birds as I was reading this post and loved them so I made a couple for her using a gold paint (which she loves) for the beak. Turned out pretty cute.
Way to go Patty !
Glad you liked them 🙂
These are some great ideas! Nothing looks overwhelming, and a fun way to learn about wet on wet. Thanks.