
Watercolor Glazing Demo (You Need To Know This!)
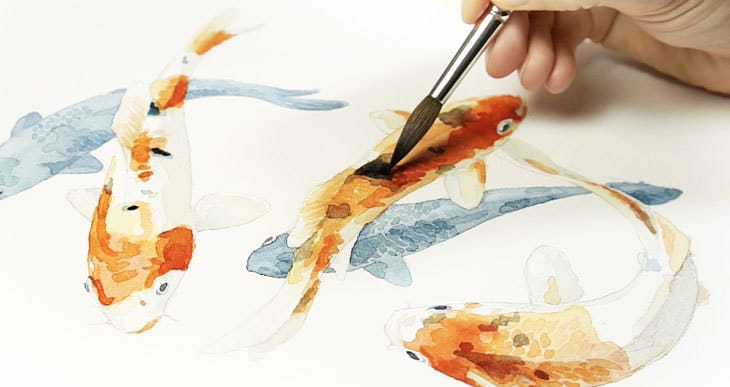
In this painting I’m going to show you an example of how to paint using a wet on dry technique known to watercolor artist’s as “glazing”.
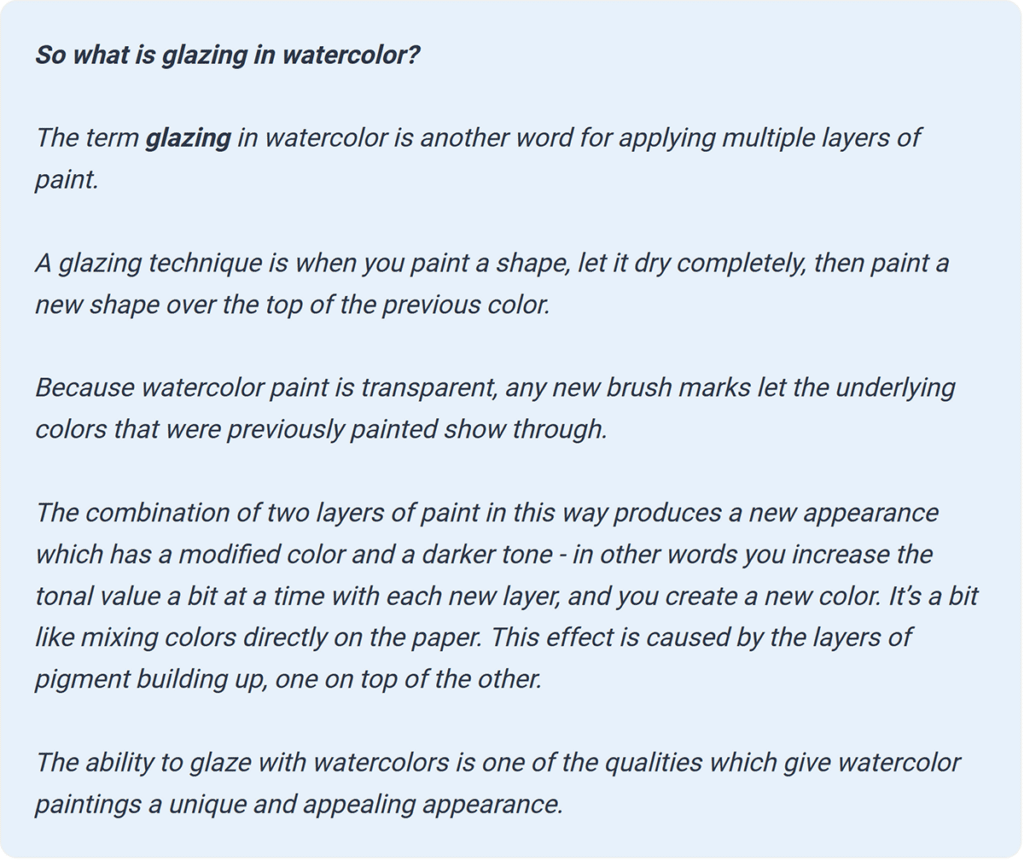
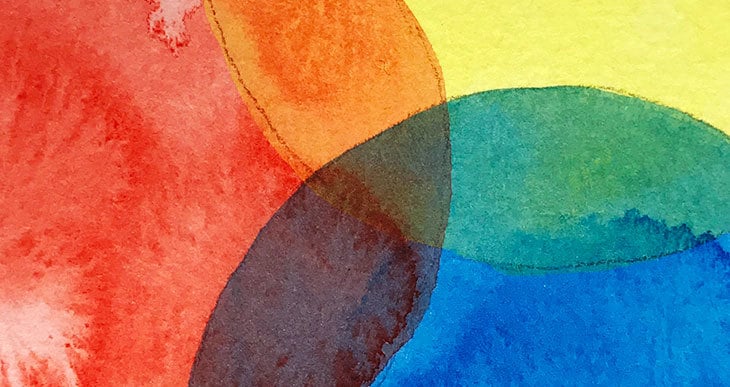
You’ve probably already heard me talk about glazing in some of my other painting tutorials. Glazing is an essential technique that allows you to build up a painting gradually, and it also exploits the beautiful transparency of watercolor paints!
I deliberately created this painting to show you how transparent layers can be used to create interesting overlapping layers of color.
For further reading see: “what is watercolor glazing”
How to paint with a Glazing Technique (Step by Step)
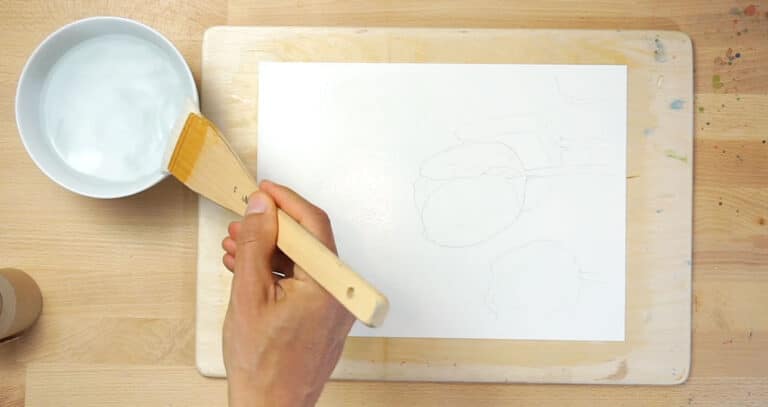
Begin by transferring the outline onto a sheet of watercolor paper then tape it down to a flat surface like a wooden board.
Be careful what type of watercolor paper you choose! Some of the cheaper, student grade papers make it difficult to glaze correctly. This is because sometimes the underlying layers of paint start to lift off the surface when you rewet the paper, even if you let the first wash of color dry completely! To make sure you can layer paints easily try testing a scrap of paper first.
(This is usually due to the poor paper sizing – the coating that alters the absorbency of the paper)
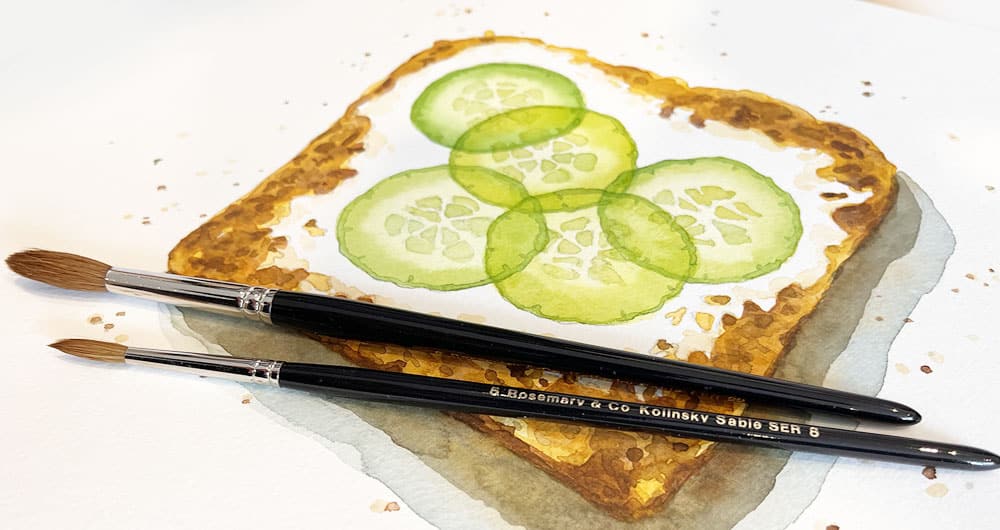
The subject is this open sandwich with cucumbers on top.

Begin by painting the slices of green cucumber. I used a fairly diluted mix of paint, and after painting each shape, I dabbed up some of the color from the center of the slice. This “lifting technique” lightens the color in the middle and leaves the outer edges slightly darker.
Try This Painting Yourself!
If you’d like to try this painting yourself you can download the traceable outline for free below. I also offer a special series of free watercolor lessons for anyone who signs up to my email newsletter. This is entirely optional (you can skip this and just grab the free stuff below).
You’ll also find a link to my Patreon membership where you can get ad-free video tutorials, plus other exclusive bonuses that I only share with members of my Patreon channel. Follow the link to find out more...

Also, for this first layer, I only painted the shapes that have a gap between them, and not the other overlapping slices.
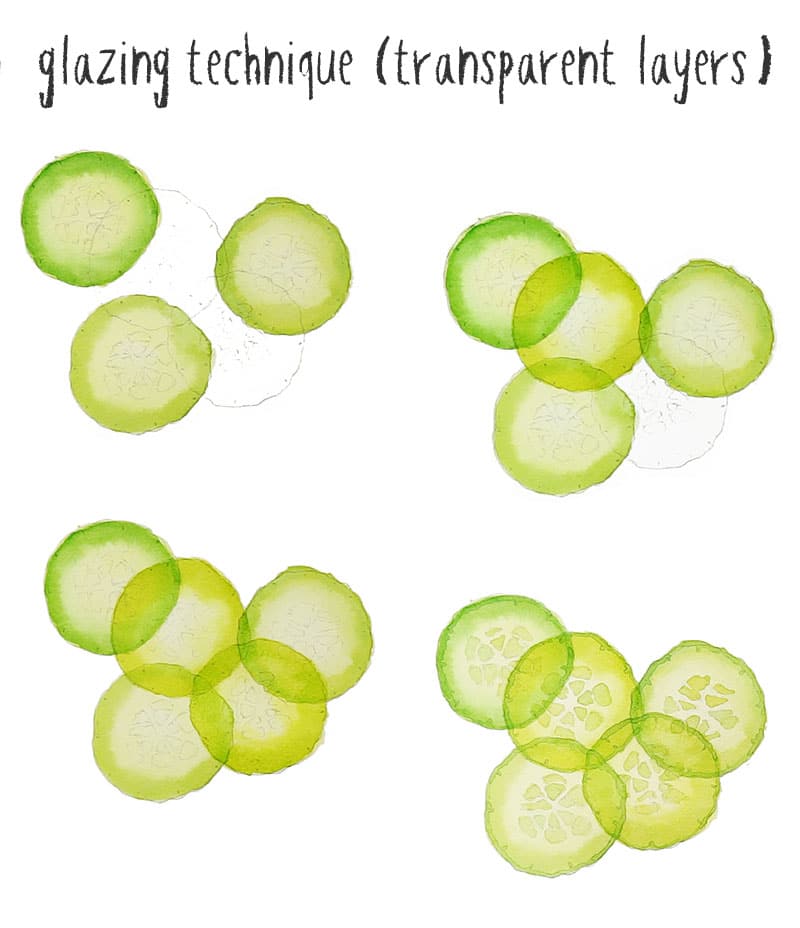
We want the cucumber slices to appear as if they’re transparent. So to do this we can exploit the transparency of watercolors by using the glazing technique, painting each of the shapes then letting them dry, before doing the overlapping shapes.
While the cucumber shapes are drying you can add a first layer of color to the bread around the edges, leaving the white paper untouched to represent the “cream cheese”.
When this is done, leave it to dry and move back to the cucumber slices…
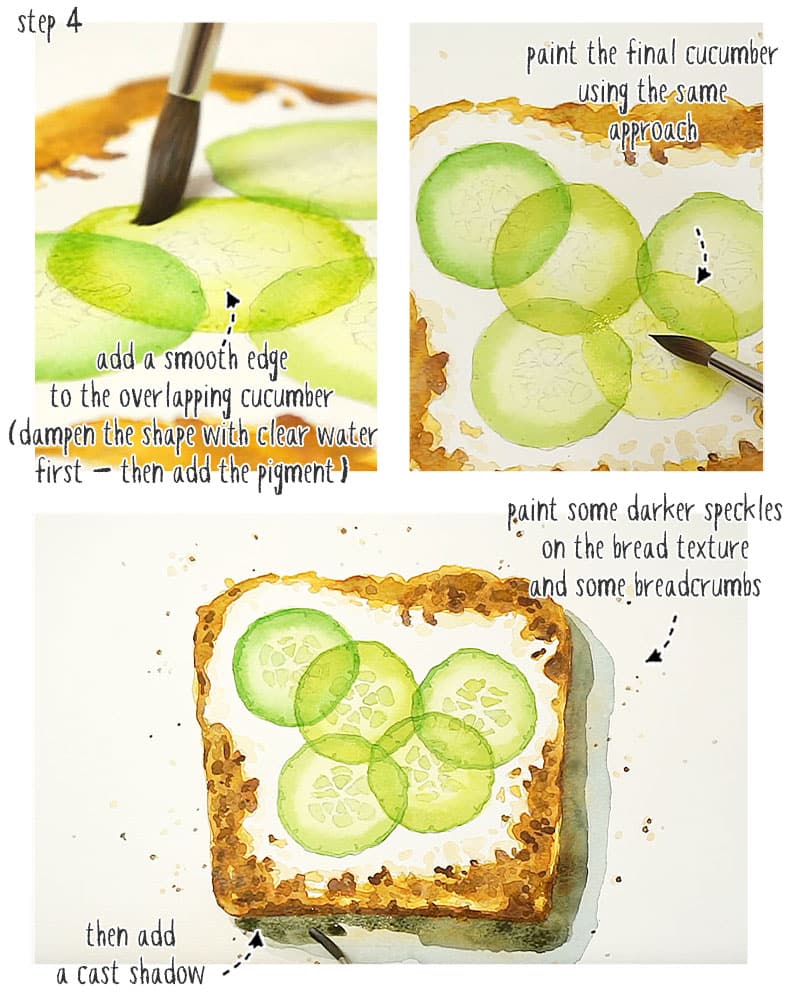
Begin by dampening the cucumber shape with clear water, then use a richer green mixture of watercolor to paint around the edges. The paint will disperse into the damp surface and create a nice smooth gradient from light to dark. If the pigments spread too far into the center of the shape, you can use a rinsed and blotted brush to pick up some of the color, and push the pigments back to the edge.
Repeat this process for each of the slices…
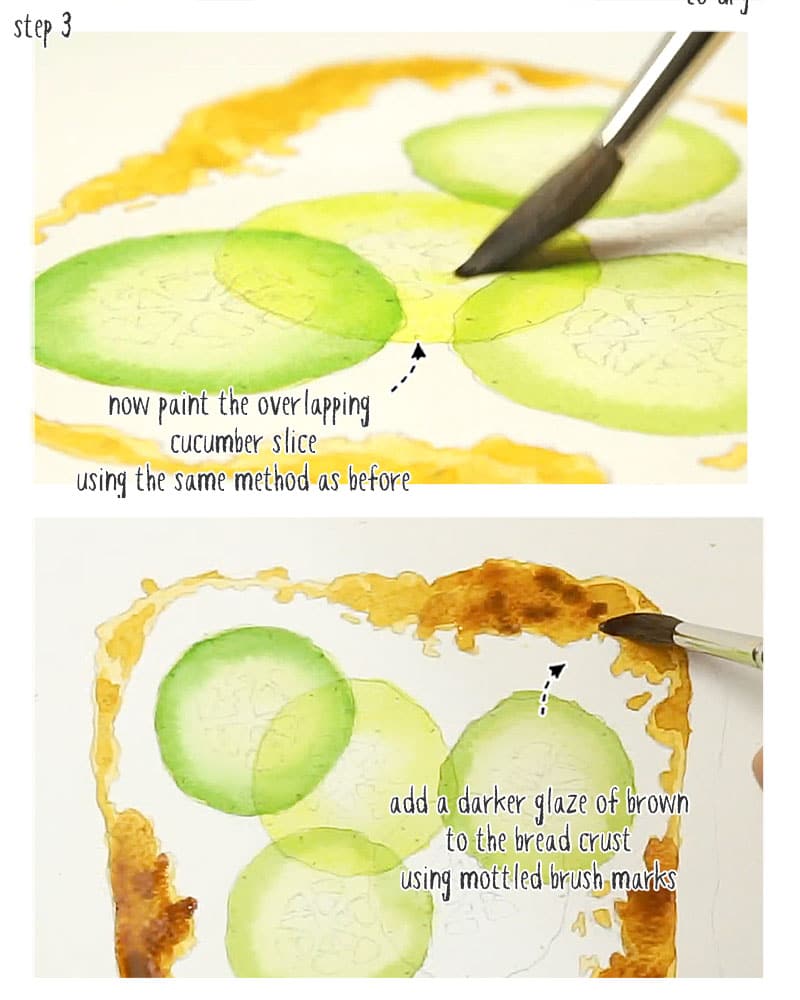
Now you can turn your attention back to the bread around the edges, adding a glaze of slightly darker brown. Don’t paint over the whole area. Add some random organic shapes to simulate the texture of the bread. Again, by using a glazing technique like this you can build up the strength of the colors one on top of the other to suggest the textured surface.

Next I painted the first overlapping cucumber slice at the top. Alternating between the different parts of the subject like this allows one part to dry while working on the next. The process for this cucumber shape is the same as before – start with a light colored, diluted mix of paint, and use a lifting technique to blot up some of the color in the center.
While this dries, move back to the bread crust.
This third layer of color, using a darker brown mixture, deepens the tonal values and adds another layer of complexity to the bread texture. Use loose brushstrokes, dab in some extra paint here and there, and let the pigments spread.
Next I continued the painting of the cucumber by dampening the surface with clear water to add a darker green border with a soft diffused edge.
Whilst this dries I dropped in some spots of paint to break up the edges of the bread texture and suggest the idea of breadcrumbs.
Now I can paint the final cucumber shape with the same process as before. Start with a diluted green color and leave it to dry. While this dries I dotted a few more breadcrumbs around the sandwich, before finishing off the edges of the cucumber slice.
To give the sandwich more depth, I added a cast shadow, with a diluted mix of gray. Before this dries I charged in some brown pigment to the edges closest to the sandwich – this is to suggest some reflected color from the bread.
The final stage is to add a few details to the cucumbers. Using a smaller brush and a light colored mix of green I started adding the seeds to the center of each cucumber slice. Painting onto a dry surface produces small shapes with nice sharply defined edges. Each cucumber was then finished with a thin line of darker green around the border, to represent the skin.
Still using a small round brush, smaller dark brown details were added to increase the speckled texture on the surface of the bread, before adding a darker gray cast shadow.
Let everything dry then take a look at the final result.
This painting involved a lot of glazing using diluted, light-toned mixes of paint. As you progress with this kind of painting you can see how building up repetitive layers on top of each other produces a more interesting result with a deeper range of tonal values.


I painted this cucumber sandwich this afternoon in my art time and learned so much. I titled it “Ode to the Coronation”. Thank you so much for your wonderful instructions and willingness to share. I have so much to learn.
Hi Cheryl
That’s great! Glad you learned something from it:-)