
Watercolor Still Life (Beginners Step by Step Tutorial)
Did you ever wonder where the tradition of giving oranges at Christmas comes from?
Well… There are a few different versions, but one of the stories I seem to remember talks about how an orange represents the Christmas season of giving and sharing.
This is because oranges can be split into segments and shared with others!
So, while I can’t actually share a real orange with everybody, I can at least share this watercolor painting of an orange. (actually this is a clementine, but shhh… just keep that to yourself, will you?)
Watercolor Still Life
The advantages of still life in watercolor are considerable. However, what most artists love about still-life paintings is the amount of control they have.
Your subject can be arranged, lit, and set up in any way you like. You can move things around, change backgrounds, and find precisely the angle you want for a composition.
You can work directly from life or take a photo.
And painting from photos adds a new level of benefits!
You can take multiple photos from different angles and get numerous compositions from a single subject. A snapshot also suspends your subject in time! This means you can take all the time you want to paint your still life because fruit or flowers won’t wilt, and you don’t have to worry about objects getting moved by accident.
While we’re on the subject, I’d also like to dispel the myth that painting from photos makes you a bad artist. I know many great artists who paint only from photographic references. So don’t believe this is wrong in any way.
I think still life is excellent for beginners. For a start, they can be painted comfortably from home. Painting is difficult enough without a battle against changing lighting conditions or outdoor elements. And more experienced artists get all the same benefits, plus they’re a great backup subject, especially if the rain prevents you from getting out to paint.
Another non-negligible advantage is that you don’t have to render your subjects accurately to get good results. If the proportions of your apples or that bottle aren’t quite right, nobody’s going to notice!
Convinced yet?
Here’s a summary of the advantages of still life painting:
- High level of control over the subject
- Paint any time
- From photo or real life
- There’s no hurry
- Paint from the comfort of home.
- Suitable for beginners and seasoned painters alike
- It doesn’t have to be accurate
Watercolor Still Life Ideas
So what should you paint?
Finding inspiration can be tricky at the best of times. So begin by looking around you!
Do you have any old heirlooms or things you’ve collected over time? Are there any objects that hold a particular meaning for you?
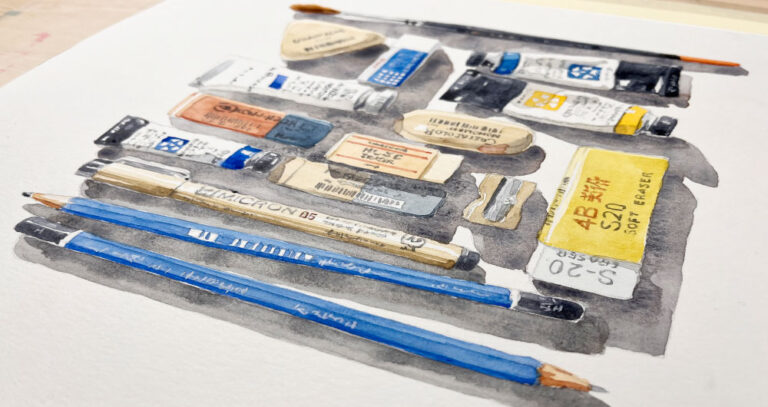
For example, I know a lot of artists who begin their sketchbooks by painting their artist supplies.
Here are a few ideas on how to find still life inspiration:
- Look in the kitchen. This is an excellent source of interesting objects which anyone can relate to. Utensils, bowls, and cutlery, all make great subjects.
- Raid a junk shop or a thrift store. Aged and stressed objects generally have interesting forms and nice textures.
- Find some old tools. Ancient hammers and used brushes have a lot of history and character.
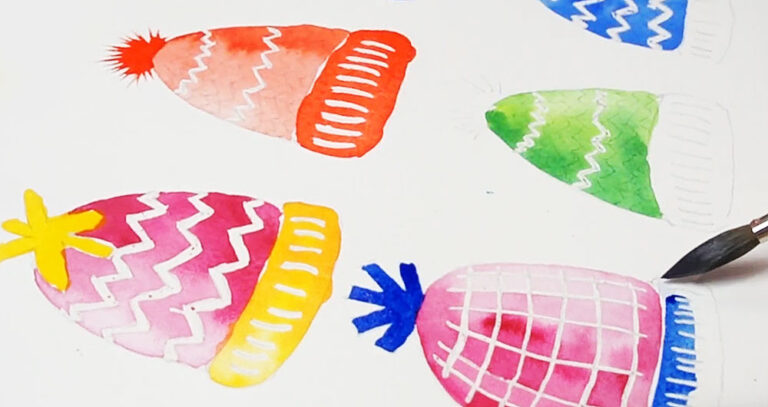
- Keep an eye out for attractive packaging or interesting-looking jars at the grocery store. Candies and cakes are great as well.
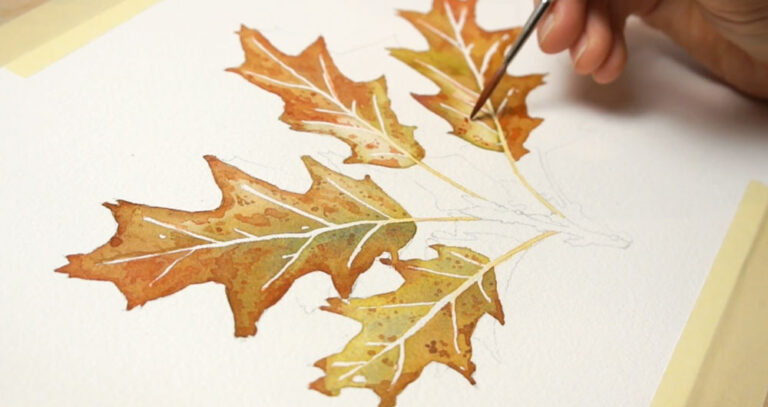
- Pick things up while you’re outdoors, like leaves, twigs, bark, or rocks. Natural forms and textures make good still-life objects.
- Flowers and plants are classic subjects to paint.
Over time you can build up a collection of objects for still life paintings. This could provide you with endless compositions and painting ideas.
Tips: Don’t use too many objects when you set up your still life. Still-life paintings can quickly get confusing. Also, try to select things that relate to each other somehow. Then, your artwork will tell a more straightforward story.
Watercolor Still Life Painting Step by Step

I’m going to take you through the step-by-step process I used to paint this watercolor still life from beginning to end.
If you want to follow along with this project, you can download the sketch template and my reference photo below.
Try this painting for yourself ! Click the button below to download the worksheet for this painting.
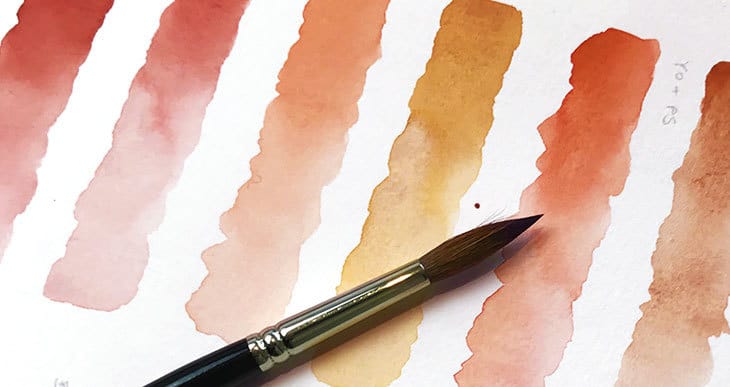
The colors and supplies used in this exercise were as follows:
- Hansa Yellow Deep – Pigment number: PY65
- Phthalo Green BS – Pigment number: PG7
- French ultramarine – Pigment number: PB29
- Pyrrol scarlet – Pigment number: PR255
- Burnt Sienna – Pigment number: PBr7
- Arches Watercolor Pad 140 lb Cold Press (100% cotton Artist grade paper)
- Pebeo Masking Liquid
- Da Vinci Mop brush size 4 series 418
- Kolinsky Sable series 22 size 8 (short handle)
How to paint a watercolor still life
Begin by tracing the outline onto a sheet of watercolor paper. I’m using arches cold-press 140 lb / 300 gsm paper.
Next, fix the sheet onto a board using masking tape around all the edges. The masking tape defines the framing and cropping of the painting, so if you want the same composition, be careful to line up the masking tape the way I have in the sketch template.
The first thing I did was identify the brightest parts of the oranges and the orange segments and apply masking fluid to reserve the white paper. I’m using a bamboo dip pen for this.
Leave the masking fluid to dry completely then dampen the background with clear water, being careful to paint around the shapes of the oranges. I’m doing this so I can apply a wet-on-wet wash for the gray background color.
I chose to mix a cool gray color using burnt sienna and french ultramarine. I wanted the background to have a slightly blue tinge to set up a complementary color scheme with the oranges (Orange and blue create a color harmony which is said to be “complementary”).
While this wash is still wet you can charge in some stronger paint into the areas of cast shadow. And to add some texture to the background, I used a spray bottle to splatter a few drops of clean water onto the damp wash.
Let the background drybefore painting the oranges, first with a diluted mix of warm yellow, then go back into the wash with a stronger mixture. The aim here is to begin establishing the tonal range, with light values around the highlights and stronger values toward the shaded side.
While the orange is still damp, continue to build up the value of the shaded side of the orange, with darker shades of orange paint. Use the reference photo as a guide to try and discern the bigger shapes of darker values.
Add some orange paint below the orange to represent the reflected light bouncing off the orange onto the surface underneath. Then leave this paint to dry before moving on to the next stage.

Apply the same approach to the second orange, being careful to paint around the leaf and stalk, and building up the tonal values to represent the spherical form. Begin with diluted yellow, then a stronger yellow mix, then orange, then darker orange, using a wet-on-wet technique so that the colors fuse together.
Be careful if you leave an edge not blended. The brush stroke should be quite wet, so that you have time to come back and continue to pull out the colored wash before the paint dries. Otherwise you’ll end up with a hard edge where the paint begins to settle into the paper.
Blend out the edges of the orange bounced light underneath.
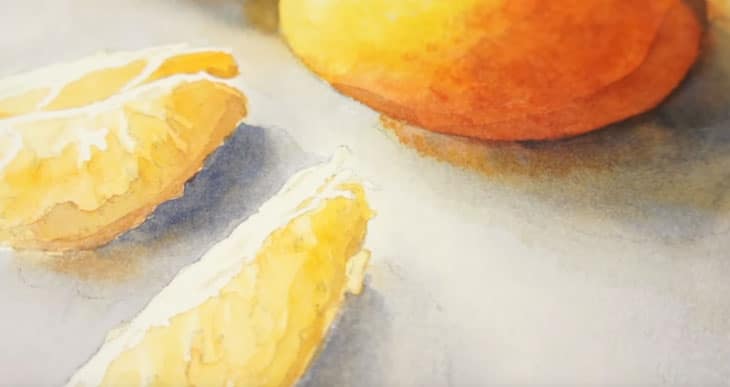
Now you can add a first wash of color to the orange segments. I also painted a glow of orange color underneath these shapes. I used a lifting technique to create vertical lines of lighter color to simulate the textured veins on the segments.
Next I added a wash of light green to the leaves and the stalk. I’ll come back to this part later to add more detail using a glazing technique.
Now that the paint has dried, you’ll probably notice that the colors are lighter and less vibrant. This is normal with watercolor paints – the colors always look stronger while the paint is wet.
So to increase the color intensity I repeat the process again with a second layer of colors. Each orange is painted from light to dark, paying attention to build up the values to create an illusion of depth and three-dimensions. To avoid a harsh edge around the highlight I start by wetting the area with clear water, then I add brush strokes around the highlights which blend smoothly, then continue to increase the strength and color value as I progress.
I added a new glaze of color to the orange segments, but this time painting details to represent the textured pattern on their surface.
Leave this layer of paint to dry completely then you can remove the masking fluid using a kneaded eraser or a rubber cement pick-up tool.
In an attempt to improve the mottled texture of the orange peel, I used a natural sponge dipped into paint, and dabbed onto the surface. You only need to do this in a few places to subtly improve the textured effect.
The final stage of this painting is to add some stronger shadows. Begin by adding some shadow details around the stalk, then add some stronger form shadows to the oranges themselves.
If you like you can use a dry sponge to mop up some of the paint and create a mottled edge to the shadow shape.
I added a few darker details to the bottom of the segments near the shadow.
Then I started adding stronger cast shadows underneath the oranges themselves. I used french ultramarine neutralized with a small amount of burnt sienna. I wanted the shadows to have a blue hue to continue the complementary color scheme.
Don’t forget to add some cast shadows on the oranges themselves, created by the stalk and leaves, and also in the extreme corners where the two oranges meet.
Then add the cast shadows under the segments as well.

The final step is to add some details to the leaf using a darker toned green mixture. Leave gaps to let the underlying color show through, and to represent the veined texture on the leaves.
Still life is an excellent way to practice watercolors regularly with a high level of control over your choice of subject and composition setup.
And next time you have some oranges lying around, why not try this kind of painting for yourself!


and Happy New Year dear Anthony!
Thanks Gabriella !
thank you for the oranges. I have done it with great excitement. It will work. I am travelling now and will do the next lesson just in the following week. After January 9th. Thank you for this lovely one step with the You tube. Thank you it is most helpful.
Wonderful tutorial. Thank you so much!
You’re welcome Barb !
How do I get the outline? I’m a subscriber but can’t see where to download it
Hi Maureen
Look underneath the full painting, where it says “download the sketch template”. You should see a button which says “Download the template”.
cheers!
Anthony,
Thank you for all your tips, and instructions. As a self “teaching” beginner you are giving me valuable information and I truely appreciate it. Happy New Year. Aline
Thanks Aline ! Glad you’re enjoying the tutorials 🙂