Watercolor Ghosts (Fun Halloween Painting Tutorial!)
Ready for some phantom fun?!
In this lesson I’m going to show you how to paint this quick and fun watercolor for Halloween!
These little watercolor ghosts make a great beginner-friendly tutorial that will help you practice blending and how to manipulate pigments on the paper.
I’ll explain the methods I used so you can reproduce ghostly shapes like these in just a few minutes.
You’ll be amazed how easy it is to conjure up these watercolor phantoms!
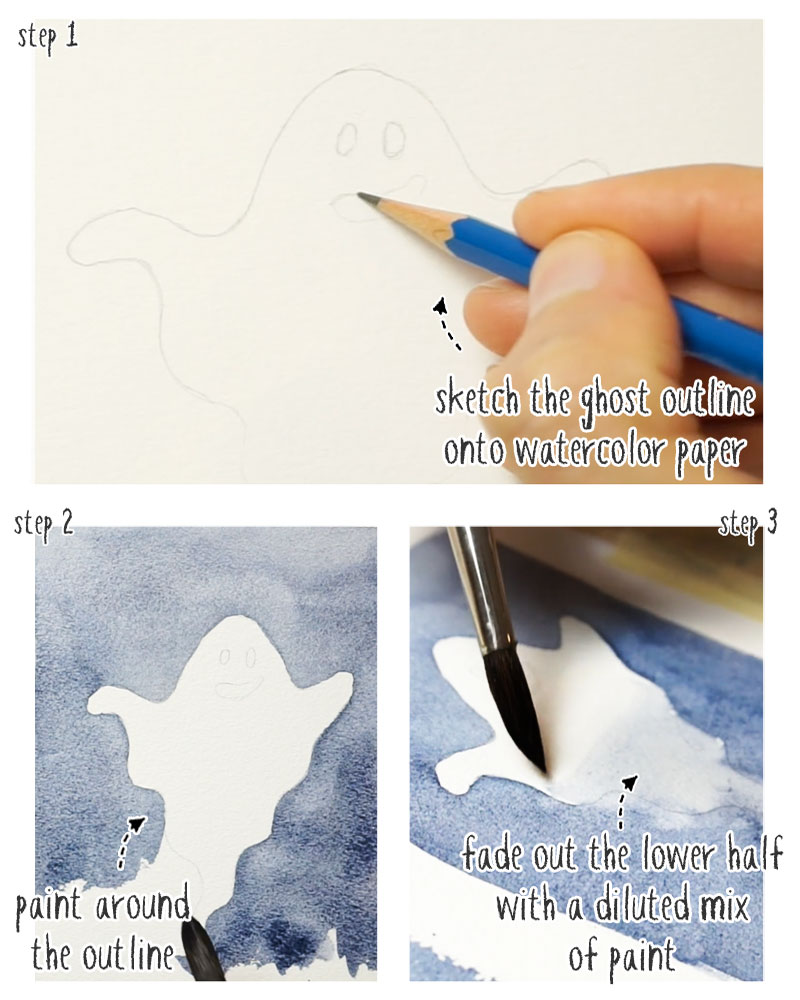
To begin – sketch your ghost outlines
Start by sketching a phantom or two onto a sheet of watercolor paper.
Anyone can do this painting if you follow all the steps in this lesson, but for those who’d like to go a bit further, you can get the outline sketch for my ghost characters, a tutorial worksheet, plus the full length video on my Patreon…

As usual, anyone should be able to easily follow along with this painting… but if you want, you can also get the outline sketch, the tutorial worksheet, plus the full length video on my Patreon : you’ll find my full library of ad-free video tutorials, plus other exclusive bonuses that I only share with members of my Patreon channel. Follow the link to find out more...
For this painting I’m using a sheet of artist quality, 100% cotton watercolor paper. And there’s a good reason for this… (in this case, Arches 140lb paper)
For the lifting and blending methods I use to get these results, there really is a big difference in handling properties between student-grade paper, and full cotton watercolor paper.
Cotton watercolor paper makes it much easier to blend pigments and get smoother results, with less blotchy water marks. You’ll see this more clearly as I progress with the painting…
Step 2 – paint the outlines & fade the bottom half
So in the first steps you can see me painting around the shape of the ghost. I mixed up a fairly big puddle of color using a mix of Payne’s gray, and a bit of French ultramarine to produce a cool gray appearance.
My brush marks are nice and wet because I want to keep the surface damp from beginning to end. Like this I can blend out some of the edges more easily and at the same time try to avoid any water marks like back runs or blooms.
I’m careful to paint around the outline, especially near the head because I want a more clearly defined face with sharper edges.
Once I finish painting around the outline I go back into the ghost shape with a diluted mix of paint on my brush. The idea here is to fade out the lower half of the ghost’s body and blend the edges so they have a diffuse and hazy appearance.
So to begin I cover the lower half of the body with a light-toned mix of the same gray color. The trick is not to use a soaking wet brush. And because the surrounding wash is still damp I can blend into the edges to smooth them out.
The second ghost shape is painted the same way. I’m being quite quick with my brush strokes to get the paint down fast. But I take care to paint the outline of the shape more precisely.
Once again I added a diluted wash of color over the bottom half of the ghost, to start fading it out.
Before leaving the paint to dry, I also used a lifting technique to blot up any excess pigment inside the ghost shape. To do this you simply rinse and blot your brush and use the brush head a bit like a sponge to soak up the paint from the surface.
As long as the colored wash is still damp, you can use your brush to manipulate the paint of the paper surface quite easily, either adding more pigment, lifting, or moving the pigments around to distribute the color differently.
Don’t forget to add the eyes before leaving everything to dry. And of course, if you get bored of waiting, use a hair dryer to dry the paper faster!
Step 3 – Add a second glaze, then blend and lift
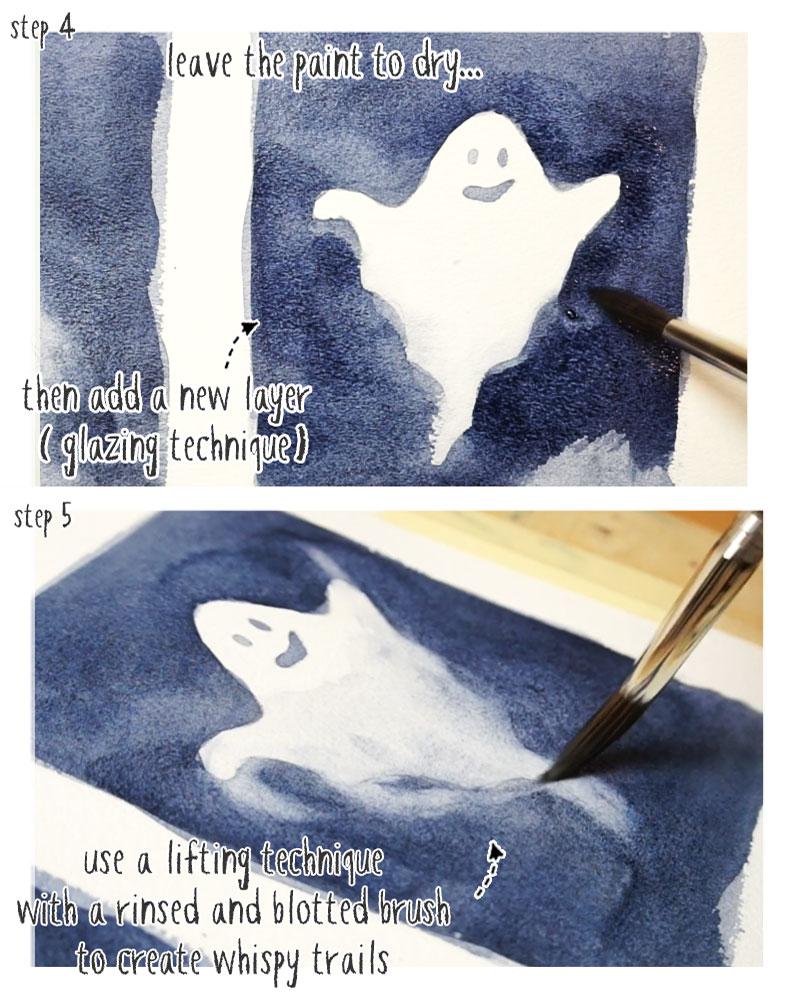
Now I’m going to repeat the process again by adding a new layer of paint. I’m effectively using a glazing technique to deepen the tonal strength of the painting, producing a darker more intense color.
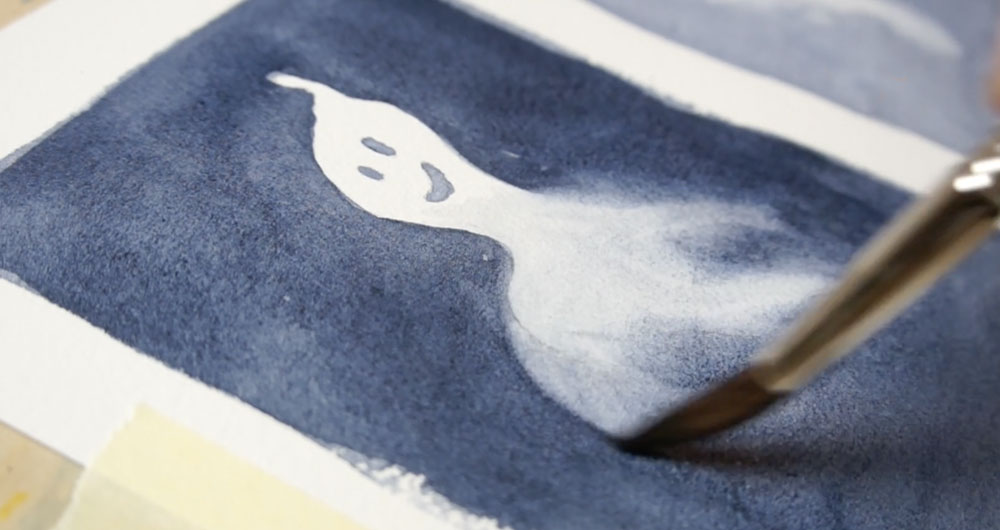
In parallel I’m going to be doing a lot more blending and lifting to produce some wispy white trails to the bottom half of our ghost characters.
Make sure you mix up plenty of paint in your palette before starting. If your puddle runs out midway through the wash, you’ll lose precious time trying to mix a new puddle of the same color and strength!
So this time I’m adding quite a lot of paint to the bottom half of the ghost, covering up most of the outline we previously took care to preserve! But then I start blending this out to create a graduation from dark to light, then I’m rinsing and blotting my brush to use it to lift and push the pigments on the damp surface.
You can see me using multiple curved brush strokes to lift the paint and make some blurred trails as a way to create a ghost-like impression.
I’m going to leave the first ghost to dry while I tackle the second character.
The same rules apply – I want the head to remain focused and sharp, but the rest of the body should fade away.
You can see how this painting nicely combines different watercolor techniques. The crisp hard edges around the face are made using a wet-on-dry method, that is, painting damp brush marks onto a dry surface. We also used glazing to reinforce the color intensity of the painting. And the soft diffused edges were done with wet-on-wet techniques involving lifting and blending.
You can also watch the painting process & brush strokes used to paint these eerie ghosts on my YouTube channel… search for “watercoloraffair”.