
How To Paint A Watercolor Cupcake (In 4 Easy Steps!)
You can paint this watercolor cupcake in a few easy steps!
And you don’t need any skill or experience with watercolors. I’ll explain the exact steps and techniques you need as you follow along.
One of the biggest obstacles beginners face is figuring out how to start painting a subject? Detailed and complex looking subjects like this make it difficult to know where to begin.
What should you focus on?
How do you simplify this cupcake into manageable parts?
Often the choices you make before you start to paint can mean the difference between success and failure!
So what I want to do in this video is show you exactly how to paint this cupcake in watercolor in just 4 easy steps!
Yes… just 4 steps…or “layers” is all it takes.

Simplifying subjects into stages like this is an essential skill for watercolor painters. You need to learn to see the subject as a series of “layers”.
Try This Painting Yourself!
If you’d like to try this painting yourself you can download the traceable outline for free below. I also offer a special series of free watercolor lessons for anyone who signs up to my email newsletter. This is entirely optional (you can skip this and just grab the free stuff below).
You’ll also find a link to my Patreon membership where you can get ad-free video tutorials, plus other exclusive bonuses that I only share with members of my Patreon channel. Follow the link to find out more...
Watercolor Cupcake Step by Step Tutorial.
This tutorial will help you see how to break down this complex looking object and make it more approachable. You’ll see that it isn’t as complex as it first seemed. And in addition, you’re going to improve your watercolor techniques!
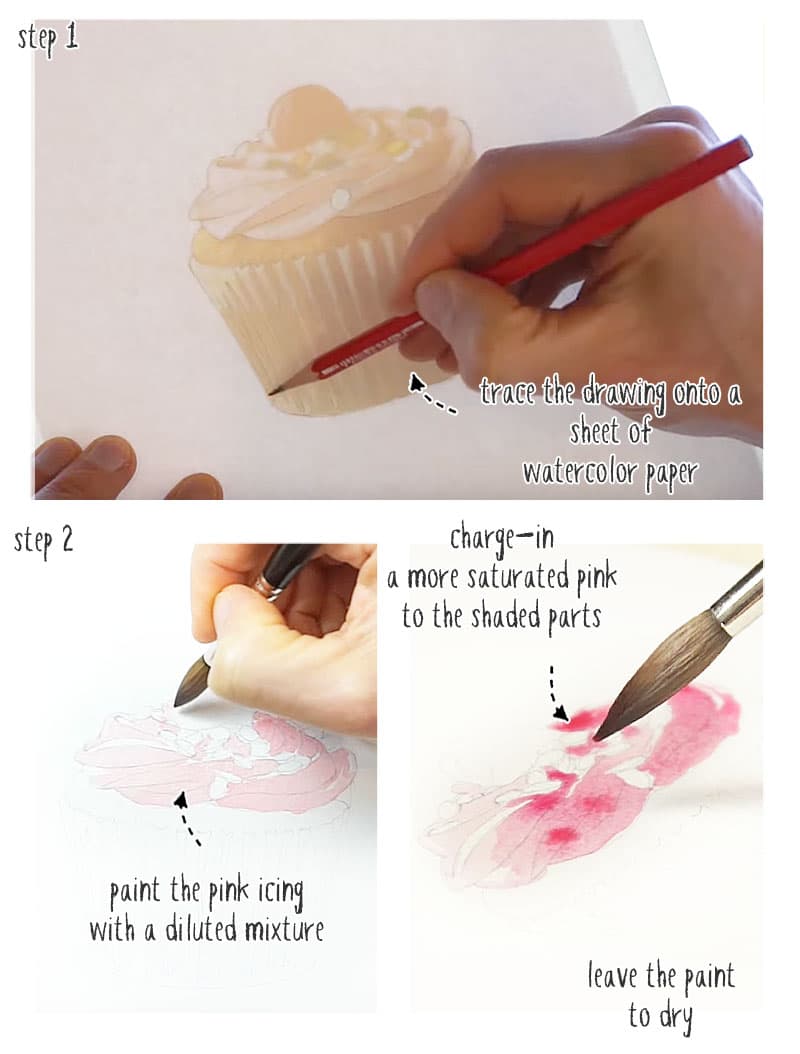
Step 1
Begin by transferring the outline of the cupcake onto a sheet of watercolor paper. I do this using a light board to save time. You only need a light pencil outline to work with
Then fix down the sheet onto a flat board ready for painting…
Step 2
I began by painting the pink icing on top of the cupcake with a diluted, light-toned shade of pink.
The reason for painting this first is because the surrounding shapes touch and overlap the pink icing. If we try to paint all the adjacent parts at the same time, the colored pigments will run into each other. We need to leave it to dry then paint the surrounding shapes so as not to spoil the first wash of pink paint.
Notice I’m leaving some white highlights by painting around them and leaving the white paper to show through. You can see the lighter toned highlights on the reference photo.
Because the light in this scene is coming from the upper left hand side, we know that the lower right hand side will be more in the shade.
So while this layer is still wet, dab a stronger mix of pink into the damp shape on the shaded side of the icing. This is a technique known as “charging-in”. The pigments spread into the underlying wash of color producing a nice smooth gradient from light to dark.
When you’re finished, leave the paint to dry.
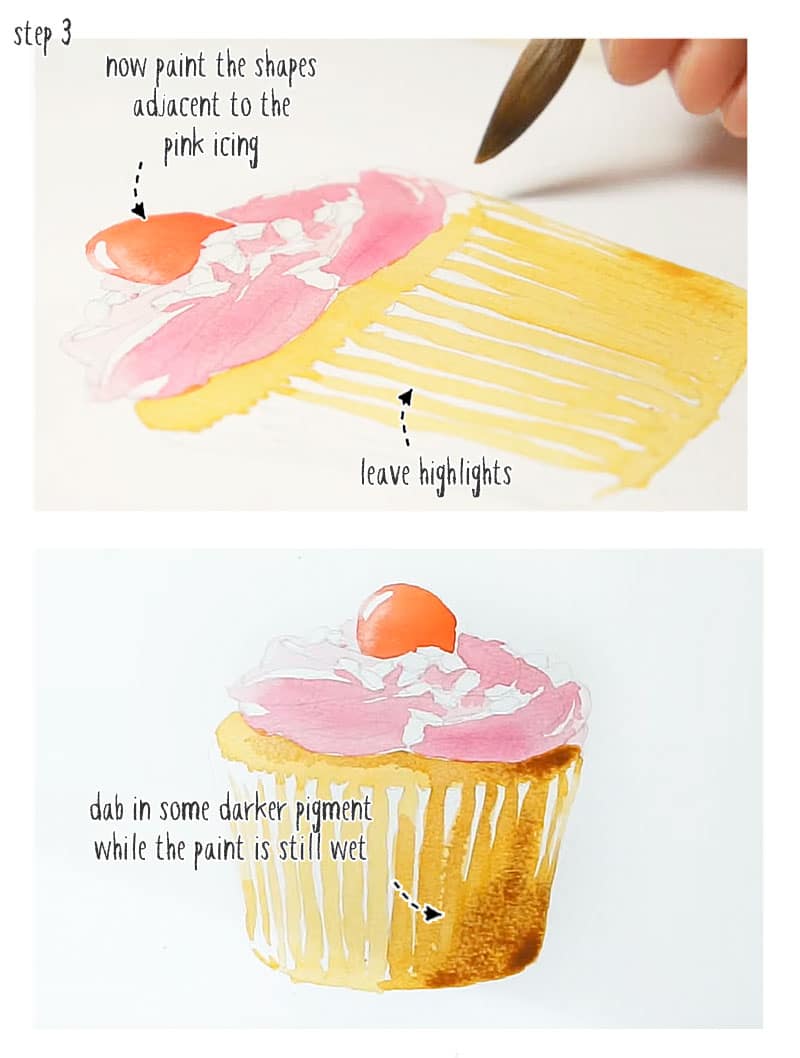
Step 3
When everything is nice and dry, you can start painting the adjacent shapes.
I started with the cherry at the top, being careful to leave a nice bright highlight on the upper left. Again, you can use the technique of charging in to intensify the richness of the color in the lower right hand of the cherry shape. This helps increase the impression of three-dimensions.
I also used a blotted brush to create a softer highlight on the left hand side of the cherry. Blotting up the wet paint like this is called a “lifting” technique.
Next I started painting the cake and the cup with a mix of yellow and brown. Notice I’m treating the whole cake shape as one big shape. Just paint everything as one uniform color to begin with, and leave the ridges of the paper cup untouched like I’m doing here.
Before this shape has time to dry dab in some darker brown color to the shaded parts of the cake. For example, the underside of the icing and the right hand side of the cupcake will be in shadow. Be careful however to maintain the highlights.
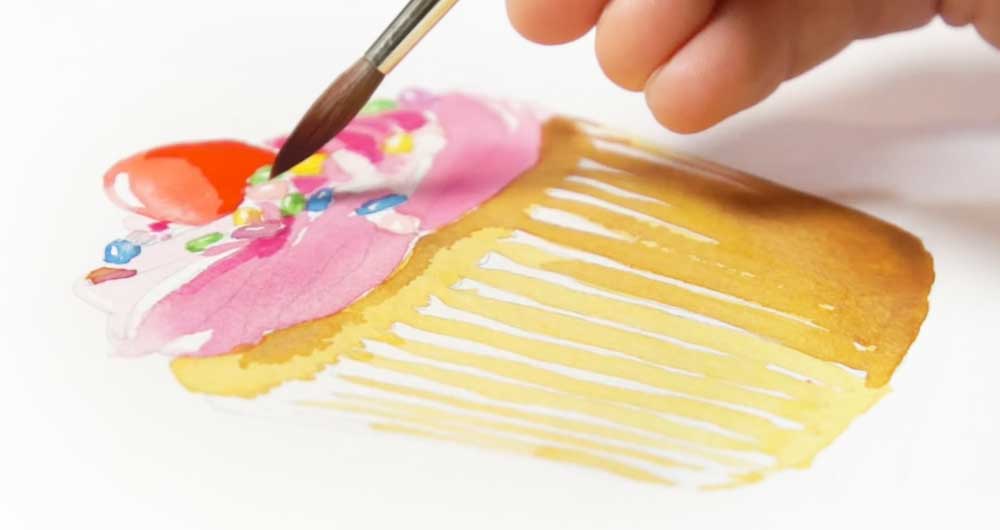
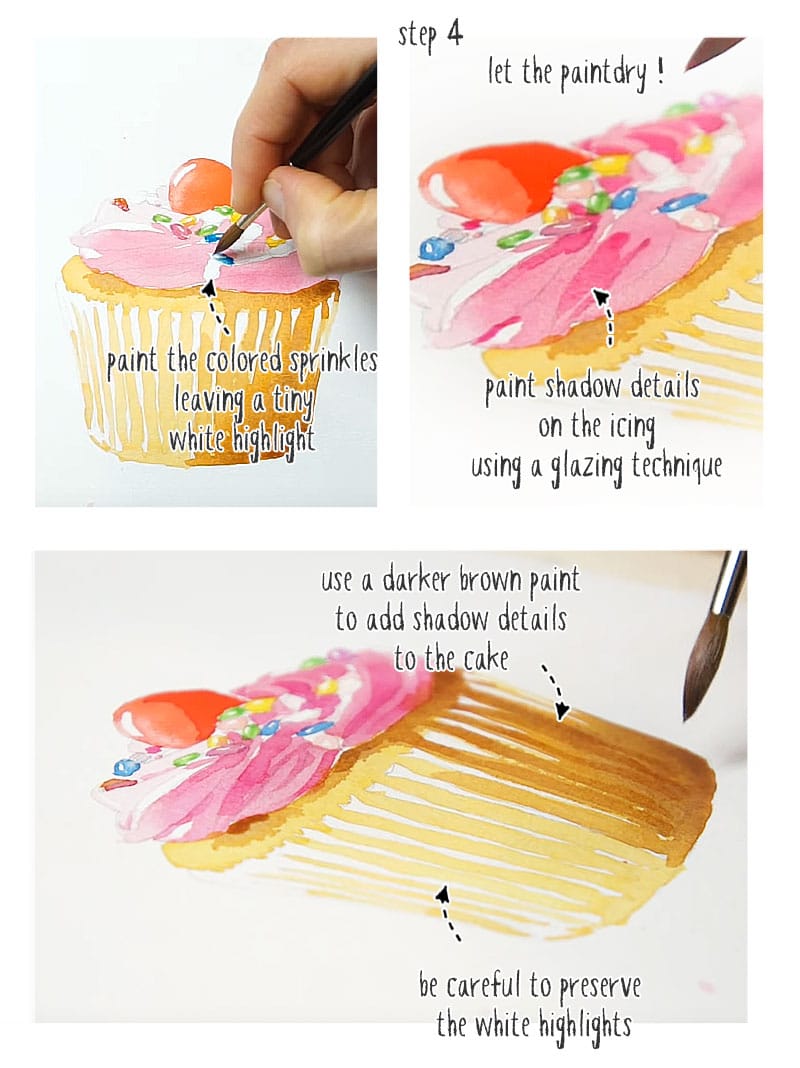
Now you can paint the colored sprinkles on the icing. Because everything has had time to dry you can paint some nice detailed, sharp-edged shapes to represent these.
Vary the colors, leaving a tiny highlight on each of the sprinkles!
Now you need to leave everything to dry again before moving on to the next stage. If you’re impatient (like I am) you can use a hairdryer to speed things up!
Step 4
In the final stage we’ll be adding more depth to the painting with a few brush strokes of darker paint.
Building up a watercolor painting like this is a classic way of working in this medium. Layering colors on top of each other in this way is a technique called “glazing”.
Add a brush stroke of darker red to the shaded side of the cherry. Then
Starting with the icing at the top I used a richer toned mix of pink to add some shadow details. This final touch helps the folds in the icing look more convincing.
Using a darker mix of brown paint I did the same thing to the cupcake. A few well placed brush strokes are enough to add more depth and weight to the painting.
Now you’re finished, take a look at the final result!
Beginners often try to tackle paintings that are too complicated without realizing it. By starting with simple subjects like this cupcake you’ll make more progress, quicker!


Hi Anthony, I am fairly happy with my cupcake although the pencil was heavier than I intended. It’s going to be a birthday card for my daughter. I’m wondering whether to add a shadow & some background colour.
Great news Rita!
If you do decide to add a background, I would suggest making it very light toned and diluted, so you have a high contrast between the cupcake and the background. it’ll make the cupcake stand out better 🙂
Hello, Anthony. Thank you for the tutorial. I’ve created one yet. How did you get pink tone? Or you have it in a tube? I have tried to get it by mixing of red, a bit of purple and a bit of yellow. But to get pastel-pink tone I had mixed white & red.
Hi Tanya
I use Quinacridone rose (pigment number: PV19) – but you can use any “cool” red for this. Just make sure your paint is well diluted to get a pink hue 🙂
Hi Anthony, I look forward to painting the cupcake. I enjoy receiving your emails and the work you do so wanted to say “thank you”.
Thanks Robin!
Glad you’re enjoying the lessons 🙂
I love this and will give it a try!
Have fun!
Thank you! I love to paint cards for friends – this is perfect!
Thanks Heather 🙂