
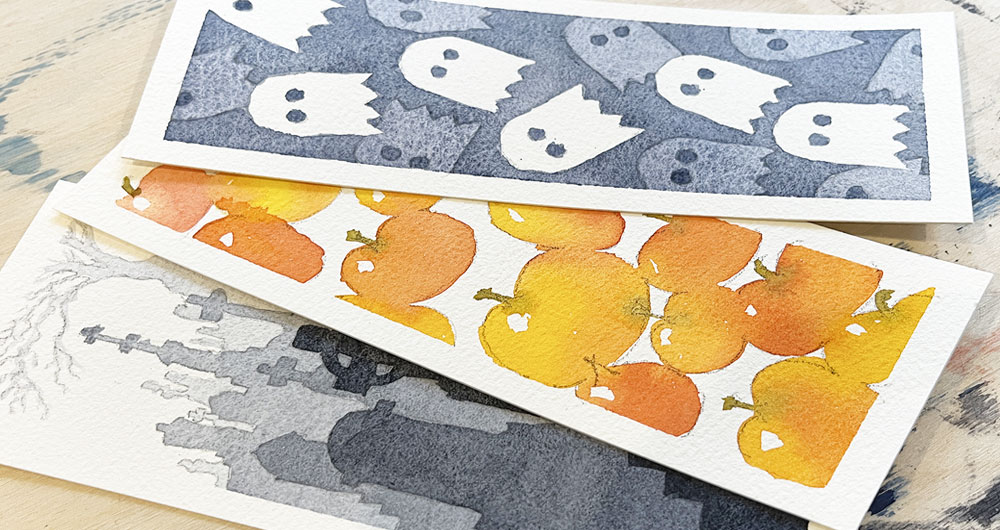
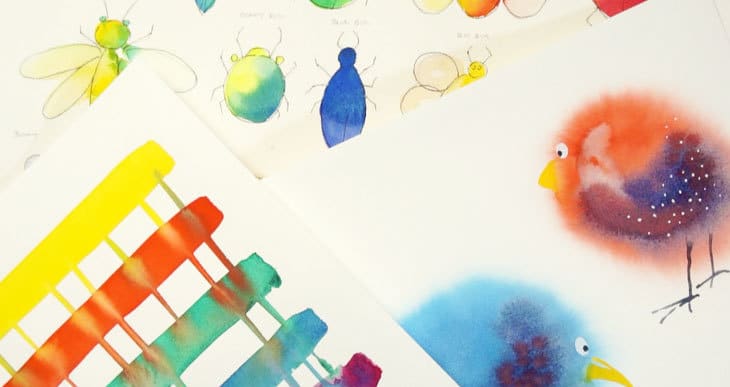
Halloween Watercolor Bookmarks!
Do you remember the game Pacman?
And those little ghosts that chased you all around the board…?
Well… that was the inspiration for the first watercolor bookmark painting in this fun little painting series 🙂
I had a lot of fun painting these, I think you will too!
I’ll be releasing these, one at a time, over the next few days as soon as I get them ready…
They only take a few minutes each! Here’s part 1:
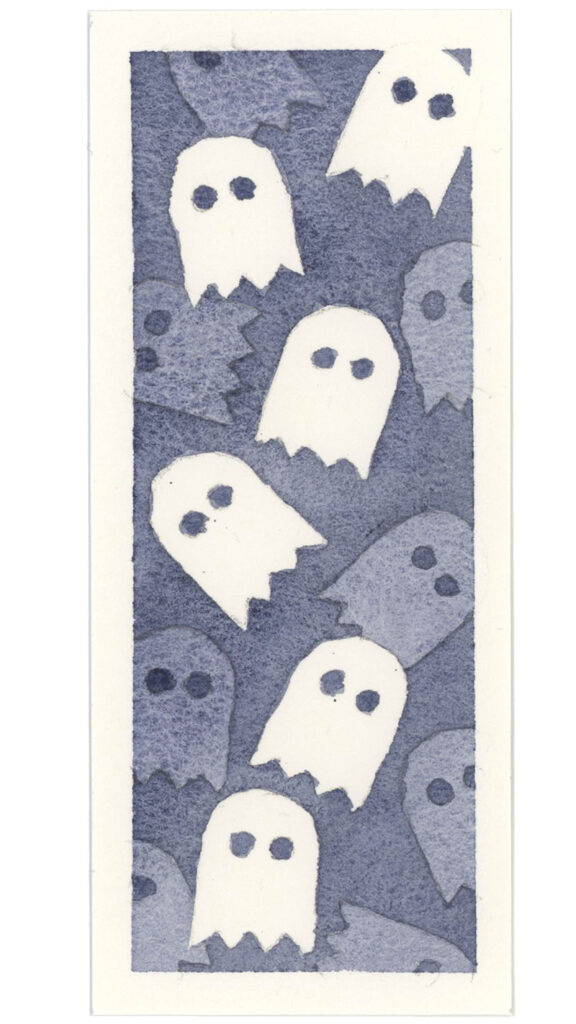
Halloween Bookmark Idea No.1
You can paint this watercolor Halloween bookmark in just three easy steps!
Start by cutting out a strip of watercolor paper for your bookmark – the one I’m using here is about 6 inches high by 2 ½ inches wide.
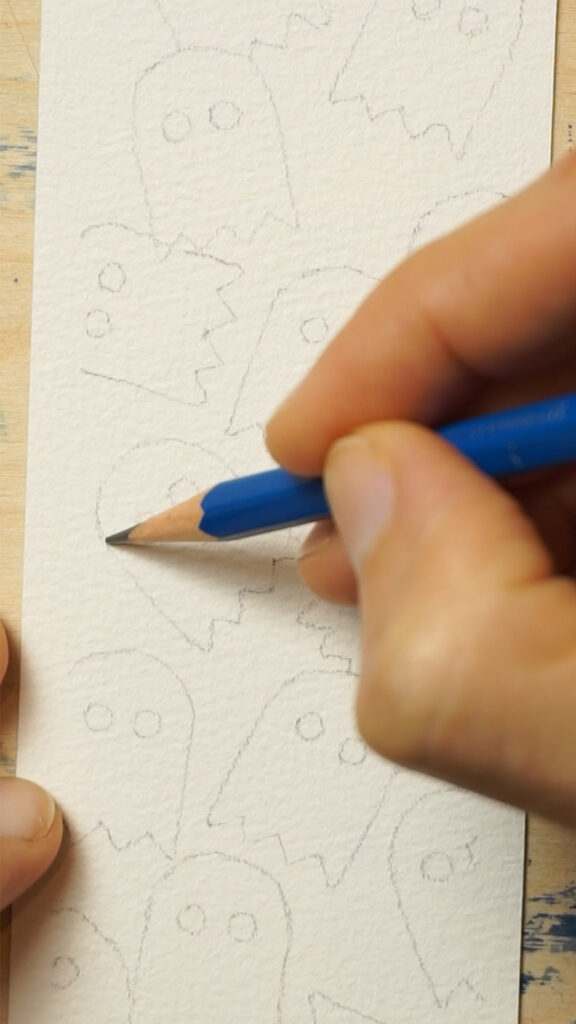
Step 1.
Trace the ghost pattern on the paper. For this you can download the free outline template below – or just sketch something similar, filling up the sheet with a bunch of little ghost shapes.
Next, tape down the bookmark onto a flat board using low-tack masking tape. The tape will protect the edges of the paper and leave a nice white frame around the painting. Make sure the tape is well stuck down so that the paint doesn’t bleed underneath the edges while you paint.

Choose which ghost shapes you want to leave completely white, and which ones will be darker.
You can mark each shape with a pencil to remember which ones to keep white, so you don’t accidentally paint over them.
Step 2.
Mix up a fairly transparent wash of paint and start painting around the first ghost shapes. I’m using a small brush for this because the details are quite delicate, and it helps me stay within the lines. Just take your time and slowly work your way around each ghost, letting the paint flow smoothly.
To get a nice even wash of color the trick is to pick up plenty of paint with your brush, and keep picking up more paint so the paper surface doesn’t have time to dry. Working with a wet surface like this helps you avoid streaky brush marks. Just keep your brush loaded and pull the paint across the paper, letting the wet paint blend smoothly.
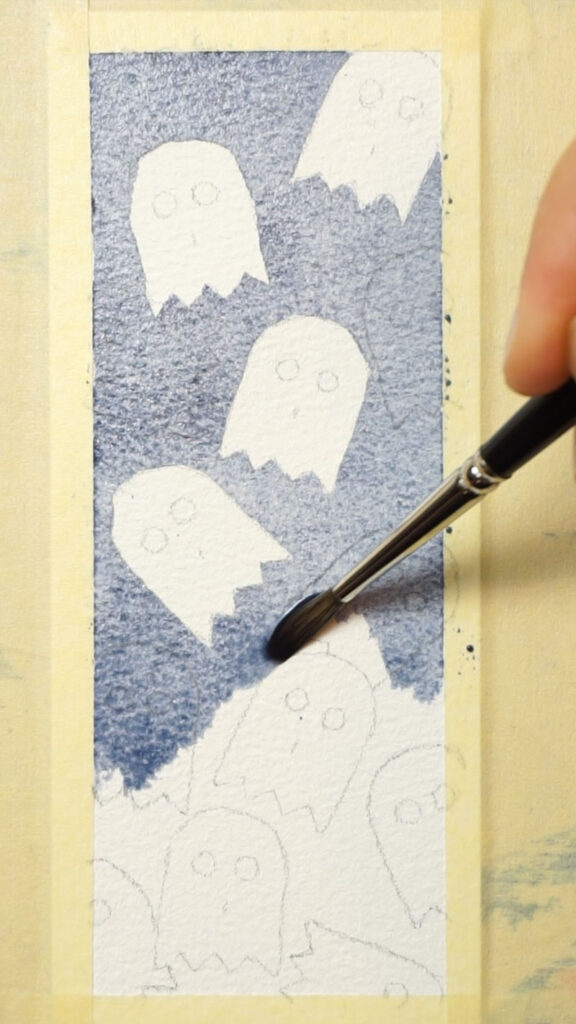
As you paint around the ghost shapes, don’t forget to go back and paint the other side before the paint has time to dry.
When you finish the background, go back and fill in the eyes for each of the little white ghosts 🙂
Leave the paint to dry completely before the next step (if you get impatient, just use a hairdryer to speed things up!)
Step 3.
Using another transparent mix of watercolor, paint the background with a second layer of color – only this time you need to paint around the second set of little ghosts as well as the first set of white ghost shapes!
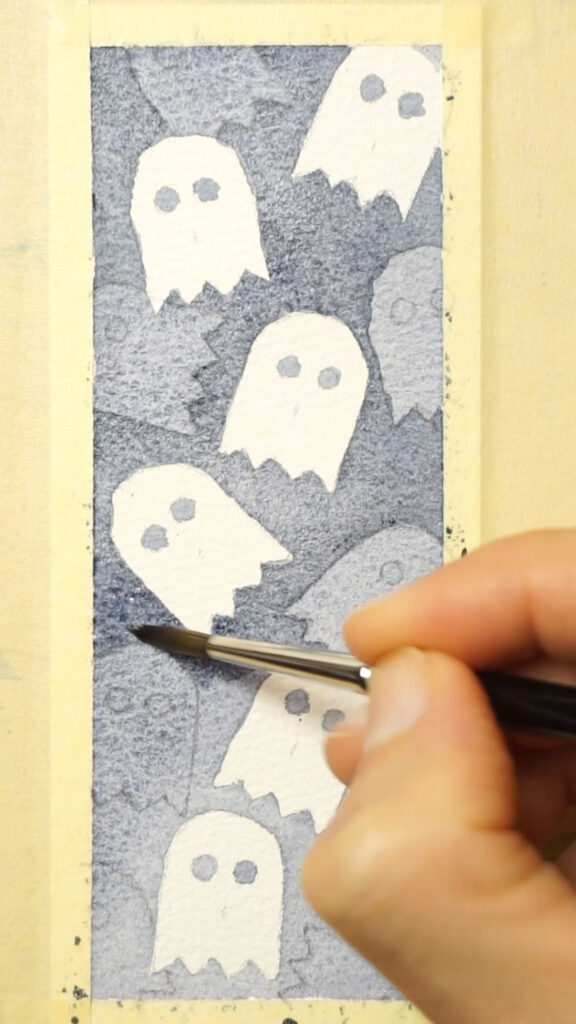
Building up the layers of paint like this in watercolor makes them darker with each new layer – and painting layers onto a dry surface like this is a technique known as “glazing”.
When you’ve finished the background, go back and fill in the eyes on the second set of ghosts – but ALSO, don’t forget to add another layer of color to the eyes on the first set of white ghosts, so they have the same “darkness” as the background color…
Leave the paint to dry completely before carefully removing the masking tape around the edge 🙂
And there you go!
A Halloween watercolor bookmark filled with cute little ghosts!
Halloween Bookmark Idea No.2
This next watercolor bookmark uses an easy wet-on-wet blending technique.
Again, I started with a strip of watercolor paper about 6 inches high by 2 ½ inches wide.
Step 1.
Trace the pumpkin pattern onto the paper. For this you can download a free outline template below – or sketch something similar, filling up the sheet with a bunch of little pumpkin shapes that overlap.
Next, tape down the bookmark onto a flat board using low-tack masking tape, using the tape to protect the edges and leave a nice white frame around the painting. Don’t forget to make sure the tape is well stuck down so that the paint doesn’t bleed underneath the edges while you paint.
Step 2.
Mix up three colors in your palette – a yellow, a red and an orange. I used a warm yellow and a warm red paint to get the brightest possible orange mixtures when the colors blend.
Begin painting the pumpkin shapes, altering the paint color on your brush as you progress. Constantly changing the colors on your paint brush like this and painting while the previous shapes are still wet will create beautiful smooth blends of color.
By painting wet into wet like this, the pigments merge together creating nice transitions of color – and if you use a warm yellow and warm red you’ll get rich, vibrant oranges that don’t lose any saturation.
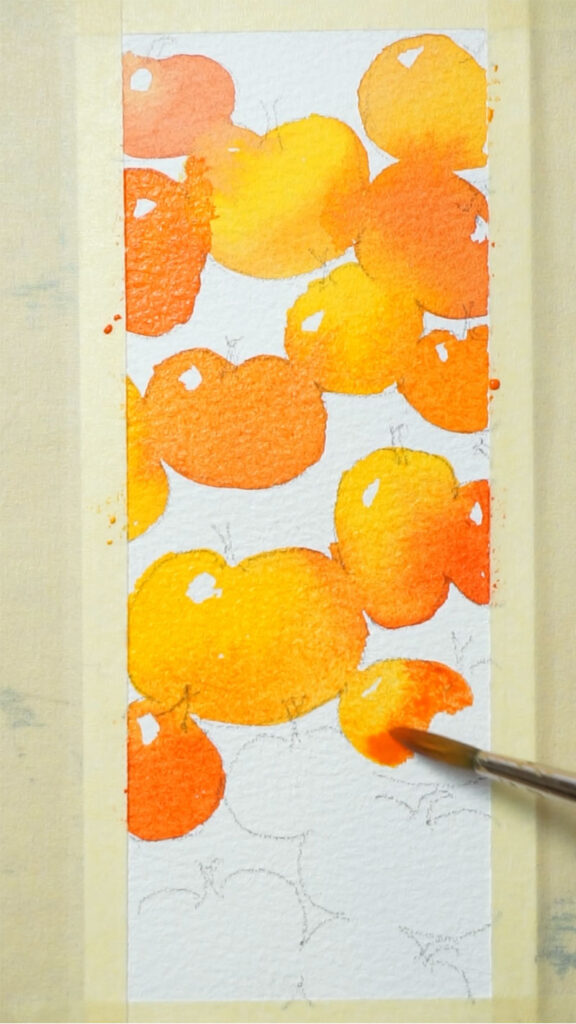
The key is to keep the colors flowing into each other while they’re still wet, so pick up plenty of paint with your brush and apply nice wet brush strokes.
Work down the page, and as you paint each pumpkin shape let them overlap so that the colors seep into the adjacent shapes. The colors blend naturally. Let the wet paint bleed into the neighboring areas, forming soft transitions.
From time to time you can also leave a small white highlight by painting around a small area, allowing the white of the paper to show through. These highlights can add a touch of “sparkle” and give your pumpkins a more lively and interesting appearance.
Keep painting, moving quickly while the surface is still wet.
Step 3.
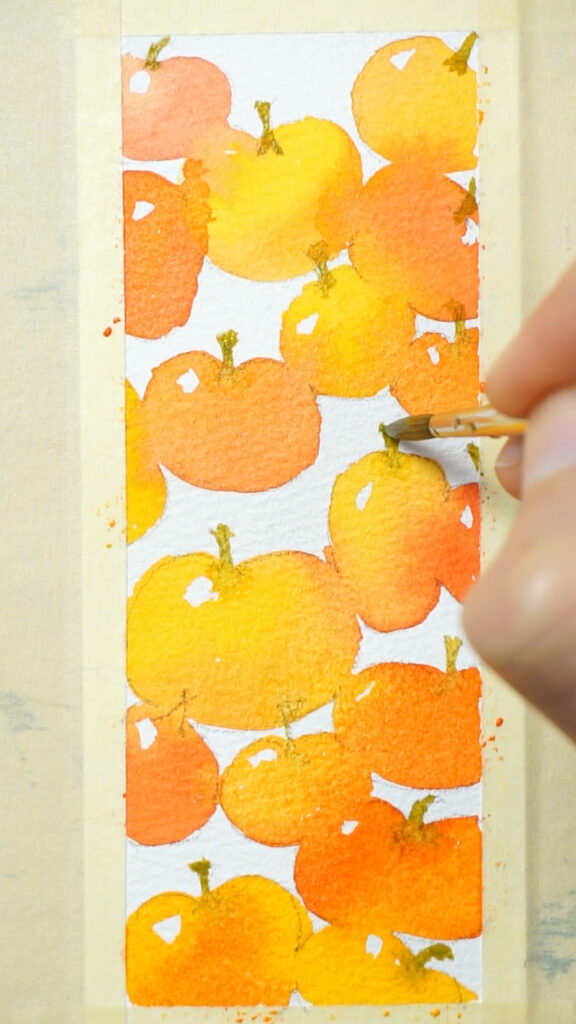
Mix your yellow with a bit of blue paint to make a puddle of green, then start adding small stalks to the little pumpkin shapes… If the surface is still wet then that’s fine… just let the colors merge together!
Leave the paint to dry completely before carefully removing the masking tape around the edge 🙂
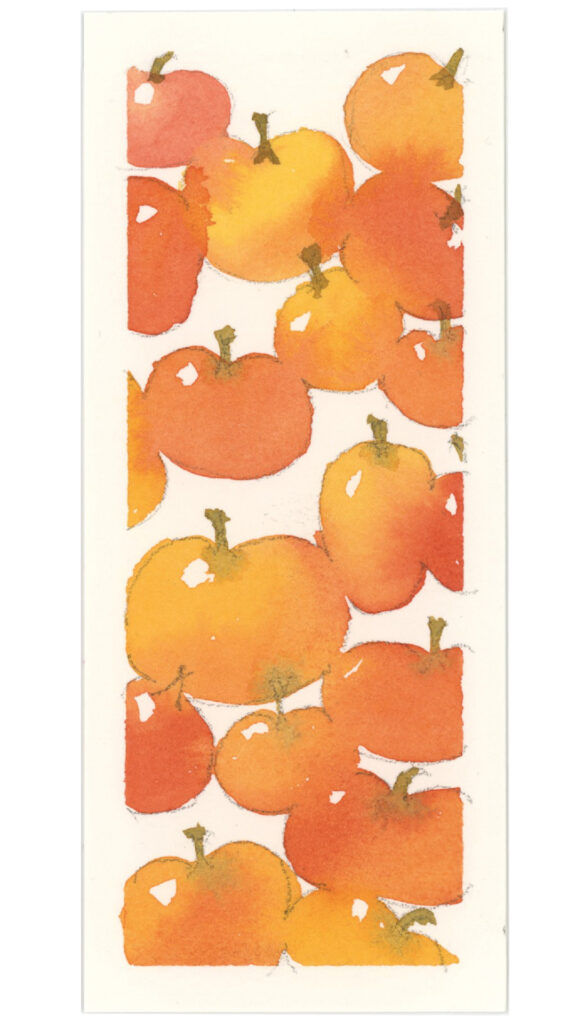
Voila!
A Halloween watercolor bookmark filled with cute little pumpkins!
Halloween Bookmark Idea No.3
You can paint this spooky Halloween watercolor bookmark in 5 quick steps!
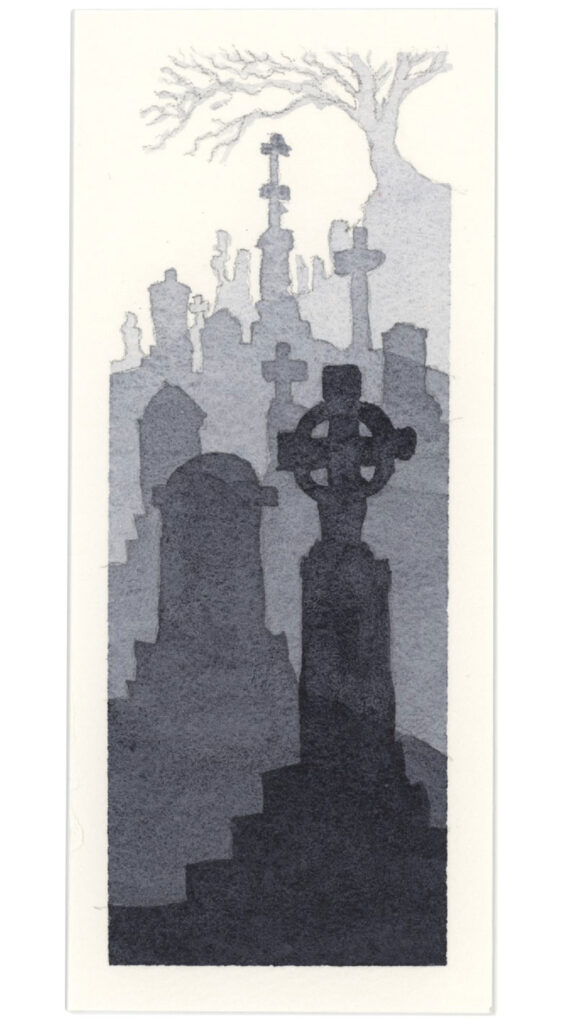
This graveyard scene was painted using a simple layering technique, building transparent layers of watercolor one on top of the other…
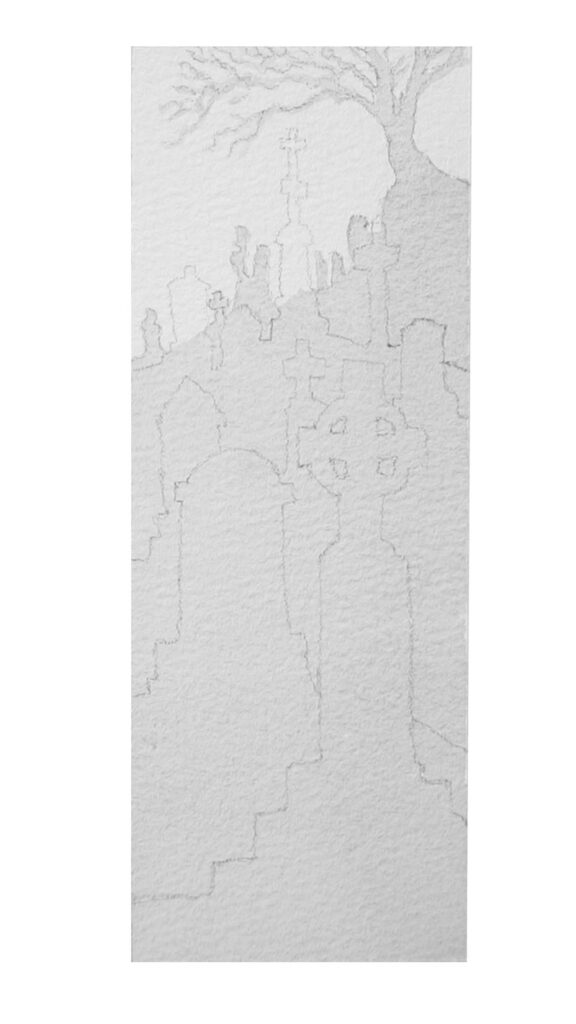
Getting Started.
Trace the sketch outline onto the paper. You can download a free outline template below – or just sketch something similar, with 5 layers of tombstones getting smaller and smaller into the distance.
Next, tape down the bookmark onto a flat board using low-tack masking tape. The tape will protect the edges of the paper and leave a nice white frame around the painting. Make sure the tape is well stuck down so that the paint doesn’t bleed underneath the edges while you paint.
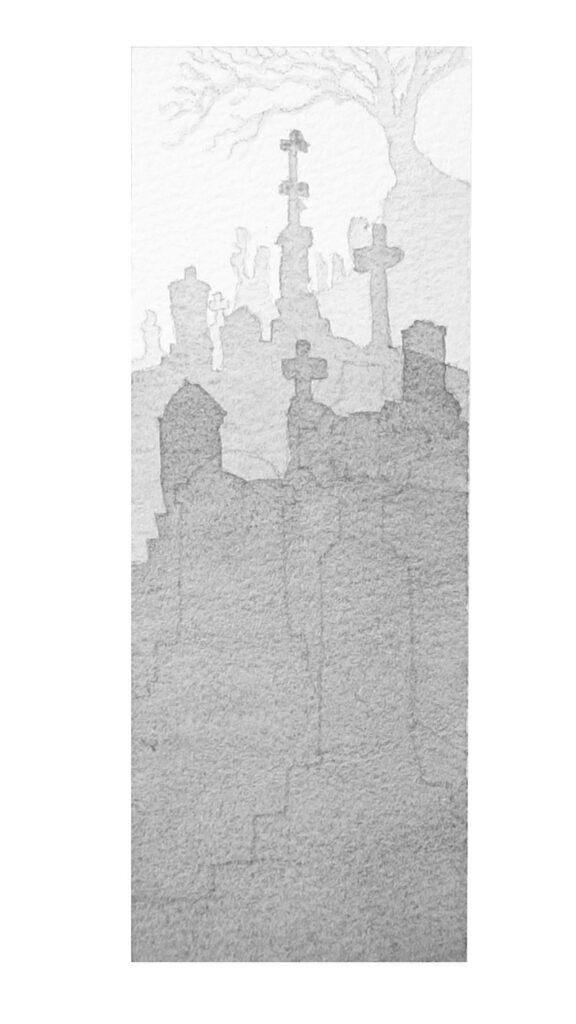
Step 1.
Paint the first layer using a light gray, transparent mixture of paint. You want the layers to become progressively darker with more and more pigment and less and less water – so this painting is also a great way to practice your water to paint ratios in watercolor!
Use lots of water to dilute this first layer of paint – you may be surprised how much water you need to mix in to get a very light gray appearance.
Paint a smooth even wash, keeping the paint moving quickly while the surface is still wet.
Then leave the paint to dry completely before moving on…
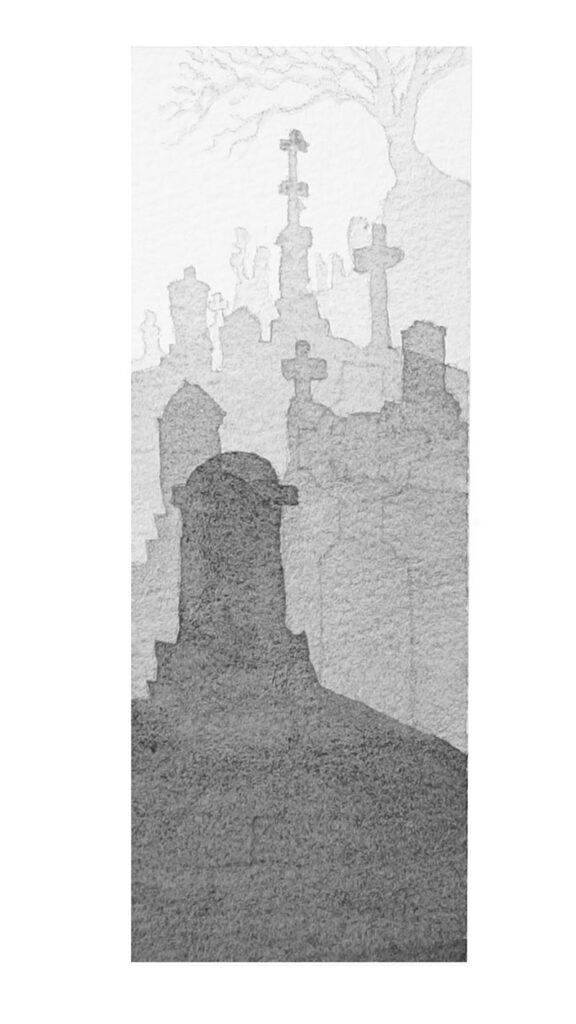
Step 2.

Add some more pigment to your puddle of paint to make a slighter darker mix. Then, begin painting the next row of tombstones below.
You want the mixtures of gray paint to go from very light to very dark in just 5 steps – so try to judge your water to paint ratio based on this objective.
This layer should be somewhere between mid-gray and very light gray.
Try using a scrap of paper to judge the strength of your paint mix…
Leave the paint to dry fully before starting the next layer. If the surface is even slightly damp, the next layer may cause unwanted blooms or watermarks.
Step 3.
Mix up a mid gray puddle of paint and paint the next row down.
This layer should be noticeably different to create a clear step in darkness.
You guessed it! … Now leave the paint to dry again.
Step 4.
This time the mix of paint should be between mid gray and dark gray…
You can also begin to see how the different shades of gray create a sense of depth as if each layer of tombstones fades into the distance.
Step 5.
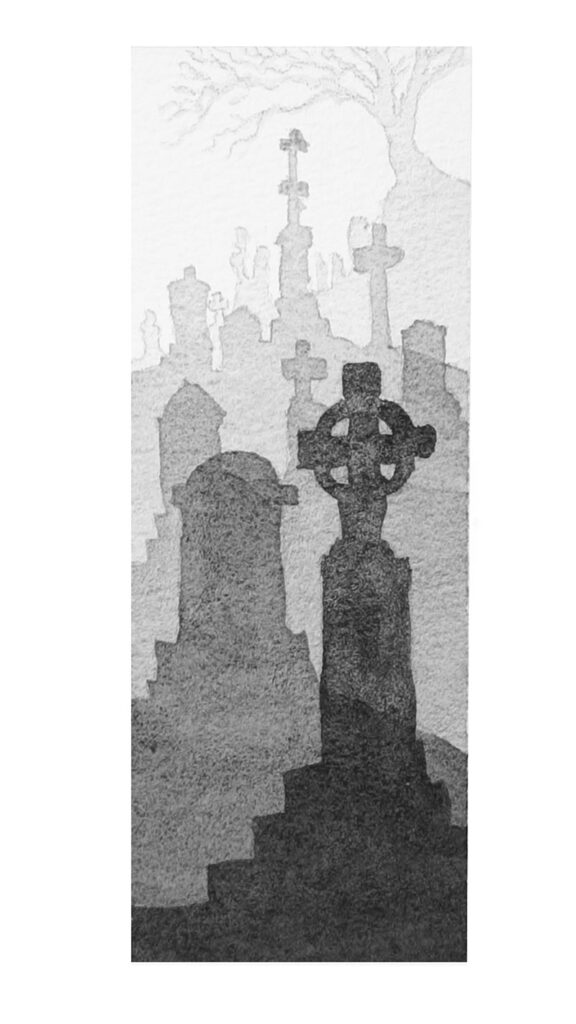
Mix up your final puddle of paint, adding lots more pigment, but make sure your paint is still liquid and watery enough to spread evenly on the paper.
Leave the paint to dry completely before carefully removing the masking tape around the edge 🙂
And there you go!
A fun-to-paint Halloween watercolor bookmark of a spooky looking graveyard!
Happy Halloween!


I absolutely loved doing these spooky paintings. They were so much fun
Thanks Lisa 🙂
Thank you, a light yet practical practice. Really fun. I got carried away with water on the pumpkin one and it got me thinking and reviewing how to sop up water. It dried before I rescued it but a good lesson that made me think and do some research. I will try these again. Cheers!
These look like such fun Halloween watercolor painting ideas! Thank you so much for sharing. I’m going to try them all.
Hi Anthony,
You sneakily (spookily 👻) incorporated negative painting into the first project! Chouette 🥳 Un grand merci! A topic I’m always wary of. I think I’m beginning to understand it better!
Have a beautiful evening!
Thanks Rahda
Have fun!
Thank you for these great tutorials for a quick project.
I had my teenage grandchildren give them a try and before I knew, they had made Halloween bookmarks for all their friends
T
That’s fantastic 🙂
I haven’t had Paynes grey in my palette for years, even though I’m a Daniel Smith convert! I tend to mix my own.
Thanks for the Halloween ideas, I’ll probably use it for one or two cards, not many people I know actually read real books, except me.
Glad to hear you mix your own grays 🙂
Have fun with the paintings!
Hi Anthony! I learnt here the glazing explained, I did some plants’ bookmarks but we’re too saturated. Now I’m getting more ongoing the water flow! Awesome! Gracias!
Is the pigment Daniel Smith Payne’s Grey that you use for this bookmark, Anthony? Thank you for the template, the adorable idea for a quick Halloween craft, and a free lesson to practice glazing with delicate brush work. I appreciate it and look forward to reading about your other October holiday bookmarks.
Hi Sandy
Yes I used Payne’s Gray for this 🙂
Have fun!
I did have a lot of fun putting together my own template and painting this ghostly bookmark, Anthony. Completing the adorable painting left a big smile on my face and a sense of confidence that I can paint, too! Thank you! I am looking forward to painting the pumpkins. 🤩
Thanks Sandy!
Have fun with the pumpkins painting 🙂