Watercolor Daffodils (A Step by Step Tutorial)

Daffodils… They’re springing up all over the place!
And just about every artist I know is painting these things at the moment. So I thought I’d add my own contribution and show you the step by step process I used to paint these watercolor daffodils.
In this tutorial I used a variety of techniques which I’ll describe as I build up the painting layer by layer. And if you’d like to try this painting for yourself then you can download the reference photo, and sketch template by following the link below.
Now… Daffodils are not the easiest flowers to paint. I’ve lost count of how many attempts I threw away trying to get this floral composition to look any good. They have a complex structure and a uniform color which makes it tricky to create depth and realism.
As a result I used a fair bit of “artistic license” to interpret this subject in an attempt to get a convincing sense of three-dimensional form and an interesting composition.
You’ll find out what I mean below, so hang on to your brushes and let’s get going !
Watercolor Daffodils Composition
Here’s the reference photo I chose for this painting. I liked the grouping and positions of the flowers, but the subject looks quite flat. I think this is probably because the monochrome yellow flowers make it difficult to read the forms, and the white background means it’s difficult to read the distance from front to back.

Adding a dark background improves the composition dramatically. The contrast between the dark green background and the bright yellow daffodils helps them stand out and makes the flowers the focal point of the composition. Also, having a blurred background like this and a sharp foreground helps increase the sense of depth.

As you can see in the final painting I deliberately broadened the range of colors and the tonal values of the flowers. This helps distinguish the different parts by adding bright orange to the centers and emphasizing the shading on the petals.

Together, these tricks help create an illusion of three dimensional form, improve the composition and add more depth.
How to Paint Watercolor Daffodils

Try this painting for yourself ! Click the button below to download the worksheet for this painting.
After transferring the sketch to watercolor paper, tape down the sheet around all the edges. This is especially useful when painting big background washes like in this example to help keep the paper flat when wet.
I begin by painting the flower shapes with a light mixture of lemon yellow. Notice however that I’m being careful to leave a few areas untouched so that I get some white highlights.
Even though these don’t appear to exist in the reference photo I’m adding white because I want to create a larger range of values so that the daffodils appear to “pop” in the finished painting (Remember the term value simply refers to the lightness and darkness of a color).
Next I start charging in some warm yellow paint into the places where I can see that the values are stronger on the reference photo. For example, the shaded parts of the petals and the interiors of the trumpet forms at the center of the daffodils.
I’m doing this while the first wash is moderately damp. As a result the edges become slightly blurred as the paint diffuses into the damp surface.
Once this second layer of paint is applied, I leave the paint to dry completely. Then I apply a warm orange color to the center of the flowers. I’m using a wet-on-dry technique to paint these shapes. This gives me a nice crisp edge to my brush marks. Before these orange shapes have time to dry, I blend the bottom edge so that the color fades out. This blending technique produces a nice graduated color.
Next I dabbed in a stronger orange color to the damp centers of the flowers. Then I continue to use this color to apply more brush strokes and build up the values in different places. Painting layers of paint onto a dry wash like this is a watercolor technique known asglazing. The flowers start to develop a more three-dimensional look as I continue to glaze. Working this way allows me to paint shapes that have both sharp edges if I leave the edge dry and soft edges if I need to blend.
Keep adding this orange color to the darker shaded parts of the flowers then leave the surface to dry all over.
Before moving on to paint the stems I added a final glaze of bright orange in the flower centers, leaving a sharp edge on one side and blending out the other.
Next I painted the stems and the leaves. For each shape I took advantage while the paint was still moist to paint in different colors so that the pigments would fuse together and create a more interesting varied appearance. This is a version of what’s known as a variegated wash.

After painting the basic shapes of the leaves I turned my attention back to the shading on the flowers. I want to give the forms of the daffodils more depth by adding some cast shadows and shading on the petals. Notice that to do this I’m using not a gray color. Shadows are rarely pure black or gray. In this case I’m using a diluted mix of dark neutral blue-green. This will give the shadows a green hue which results in a more harmonious final appearance (yellow and green together create an analogous color harmony).
Then I started painting the green background. To do this I’m using a mop brush which is ideal for laying down big washes of color. I’m also trying to work quickly because I want the underlying wash of paint to remain damp so I can do some more wet-in-wet work. And to avoid the paint from drying before I’ve finished I stopped painting the background wash halfway up the page.
Like this I have time to add some additional brush strokes of various colors. The paints blend together smoothly so I end up with a burred looking backdrop. I’m also using vertical brushstrokes to try and give the impression of leaves and stems.
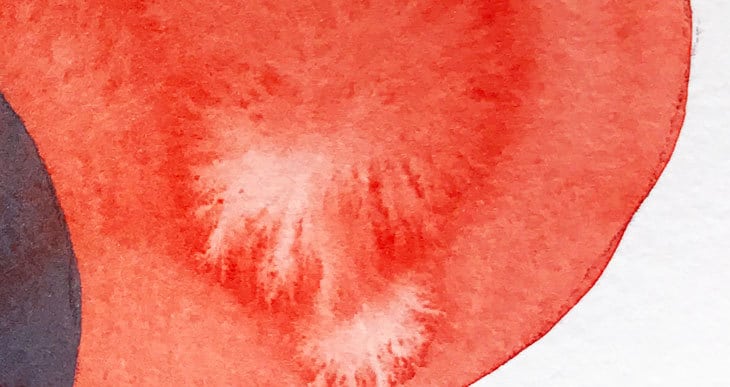
Because the paint is still damp I can also do some lifting to create a few lighter toned shapes in the background. Lifting is a watercolor technique where you blot up some of the colored pigments from the surface. The objective is to create some variety in color and value and to try to give the background a more convincing blurred appearance.
Now I can move on to the top half of the background. Painting around objects like this is a great way to practice your brush work. You can see that I have to twist my hand to get the tip of the brush in the right direction. However keep in mind one of the advantages of fixing your painting on to a board is that you can turn the board around to make access easier and avoid difficult brush positions.
When painting big areas like this make sure you use plenty of paint. You want your brush to be fully loaded with and very wet. Otherwise your previous washes might dry between brush loads, and you’ll end up with streaks and hard edged marks, instead of a more uniform appearance.
If you’ve worked quickly enough then the whole of your background shape should still be moist. You can now charge in some brush loads of various colors and build up a variegated wash.
I’m aiming for a darker color on the right hand side and a lighter toned color on the left, so you can see me applying darker and darker paint on this side.
Because I’ve already painted the first layer of color for the background I feel more confident about continuing to paint the second layer in one go. So you can see me continuing the wash down into the lower half of the painting.
The left hand side gets treated with a lighter colored paint. After laying down each shape I come back into the damp wash with a few quick vertical brush strokes, the intention is to give an impression of stalks or leaves. And I do the same thing on the right hand side with a darker mixture of paint.
Leave the background to dry completely before adding a new layer. You can see the colors fade slightly as they dry. This is why glazing is such a useful technique for building up the color intensities a bit at a time.
I’m now concentrating on the stems of the daffodils adding darker lines to the gaps between stems and some cast shadows.
Continue applying this new layer of paint up into the top half of the painting. You need to work quickly but at the same time be careful not to paint over the yellow daffodils.
When you reach the right hand side make your paint mixture progressively darker. For example, to do this I added more French ultramarine to my green mix, which neutralizes the color appearance and makes a nice leafy green.
This new dark mixture continues down into the bottom right of the background. At one point you can even see that I painted directly into the green wash with blue french ultramarine. Then I push the color around with my brush so that it blends into the underlying layer of damp paint.
I’m slowly working my way around the daffodils in a clockwise direction. Here I’m darkening the color of the background between the flower stems, and on the lower left.
Next I wanted to add some cast shadows on the stems underneath the flower heads. This is important because it will improve the overall impression depth of the finished painting.
I continue adding cast shadows and shading on the flower petals themselves. Again I’m using a diluted mixture of neutral green to add the shading. When I say “neutral” I mean a color which has been dulled down to reduce its color saturation. I added shadows as if the light was coming from the upper right hand side, to the undersides of the flowers but not too much on the higher petals.

At this stage I felt that the color of the center of the flowers needed intensifying. I think this is an important focal point in the composition so I added a fairly strong mix of orange, being careful to paint around the white thread-like “stigma” in the middle. The contrast between these white parts and strong orange color will help attract the eye. After painting the first brush strokes I blended out the edges using a damp brush.
And as a final touch I added a few extra brush marks to boost the cast shadows on the leaves and stems.
I hope you enjoyed following along with this spring time painting ! And since I’m in a Spring-like mood… here’s one of my favorite spring-time poems :
Spring is sprung, the grass is riz.I wonder where the birdies is. They say the birdies on the wing, but that’s absurd.I always thought the wing was on the bird.