
How To Trace A Picture Onto Paper (Easy Way to Copy & Transfer!)
Transferring an image from a reference onto a sheet of paper can be challenging. And there are several different ways to do it!
It can get pretty confusing!
I have my own preferred method, but of course, you’re not limited to just one technique.
Below I’ll explain the options available for tracing a picture onto a sheet of paper. And I’ll even explain the pros and cons of each method 🙂
(Let’s get one thing clear…
You don’t need to know how to draw to enjoy painting or watercolors!
I can hear a lot of you breathing a sigh of relief. But I almost always start with a reference photo of the subject I want to paint and transfer it to watercolor paper.
Even if you prefer to start with a hand-drawn sketch of your subject, it’s better to draw on a separate sheet of ordinary paper and then transfer it onto watercolor paper when ready.
Suppose you choose to sketch directly onto watercolor paper. In that case, you’ll need to modify the drawing and erase any errors before you’re happy with the results. The problem is that you’ll end up with many pencil marks, which you’ll have to remove. And when you make excessive use of an eraser on watercolor paper can damage the delicate sizing on the surface.)
So how do you easily transfer a sketch onto watercolor paper?
The Best Way to Trace a Picture onto Paper
The ideal way to copy an image onto a blank sheet of paper is to use a drawing light board. This is a quick and clean method for transferring an image from a reference picture. It saves a lot of time and doesn’t leave a mess.
Having traced multiple photos and sketches onto thick paper over the years, this is my favorite way of copying references onto a clean sheet.
What is a light board for drawing?
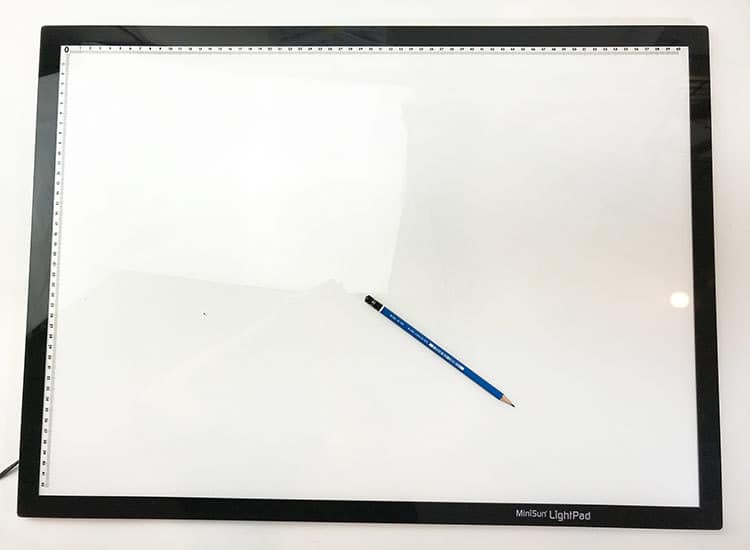
A drawing light board, also called a “light pad” or a “lightbox,” is an LED screen that lights up an image from behind, making it easy to trace onto most paper types.
You can even trace onto relatively thick paper stock, like 140lb watercolor paper.
This is the quickest, easiest, and most comfortable way to trace a subject onto paper.
Before investing in this handy piece of equipment, I struggled to trace drawings, using inadequate and frankly awkward methods.
For example, you can trace by placing your sheets flat against a window, but after a few minutes, the upright position causes pain in your arms! Or you can use traditional methods like carbon tracing sheets, which transfer a graphite outline onto the paper. But this tends to leave streaks and creates an indentation on the paper’s surface, which you cannot remove!
With LED technology becoming much cheaper, it’s possible to buy a decent light pad for the same price as a few packs of carbon paper!
This is the kind that I use (link to Amazon)
My own light table is quite big. I prefer the large size for comfort reasons. But you can quite easily use a small-sized light board and move your sheet around for tracing a larger image.
Using a Light Board
Using a light table is incredibly simple.
However, here are a few tips for getting the best out of this transfer method…
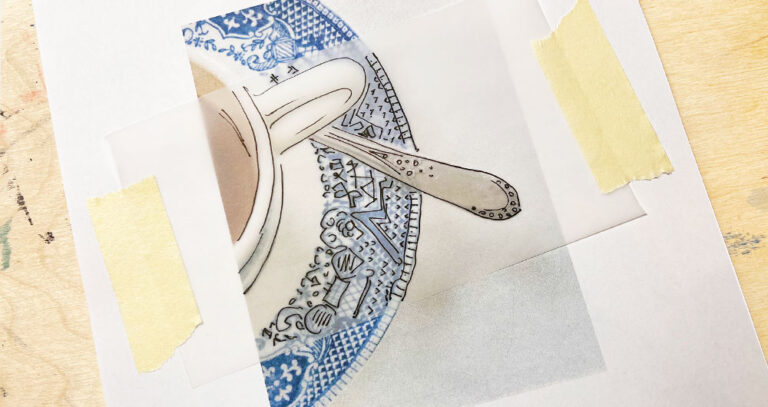
The best technique I have found is to fix the reference image to the back of the blank sheet using low-tack masking tape. This has a couple of advantages.
- It stops the reference image from moving around, so you don’t lose the correct position.
- Also, if you only put tape along the top edge, you can hinge the watercolor paper up from time to time to get a better view of the reference image underneath. This is especially useful if you’re using a photo reference, where it can sometimes be challenging to discern edges.
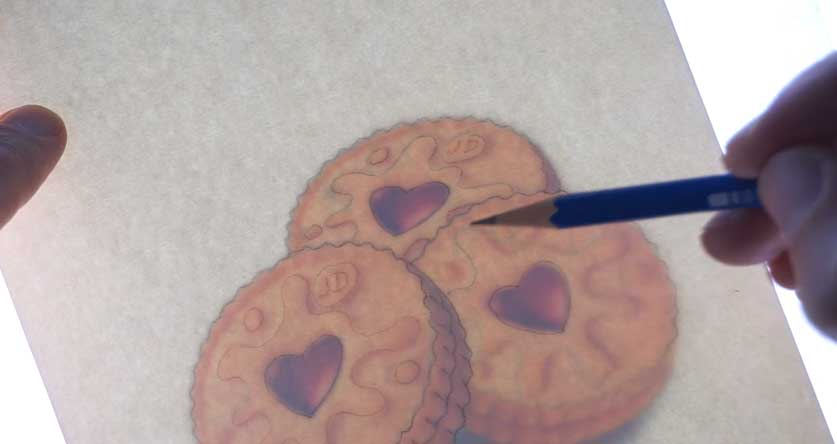
Here’s how I trace a picture using a light board, step by step:
- Place your reference image on the light table and put a couple of strips of masking tape on the top corners, sticky side facing up, of course.
- Next, lay a sheet of watercolor paper over the reference image. Take a few moments to align the image the way you want it. Then press down on the tape to make it stick to the underside of the watercolor paper.
- As an added precaution, turn the paper over and add an extra strip of tape along the top edge.
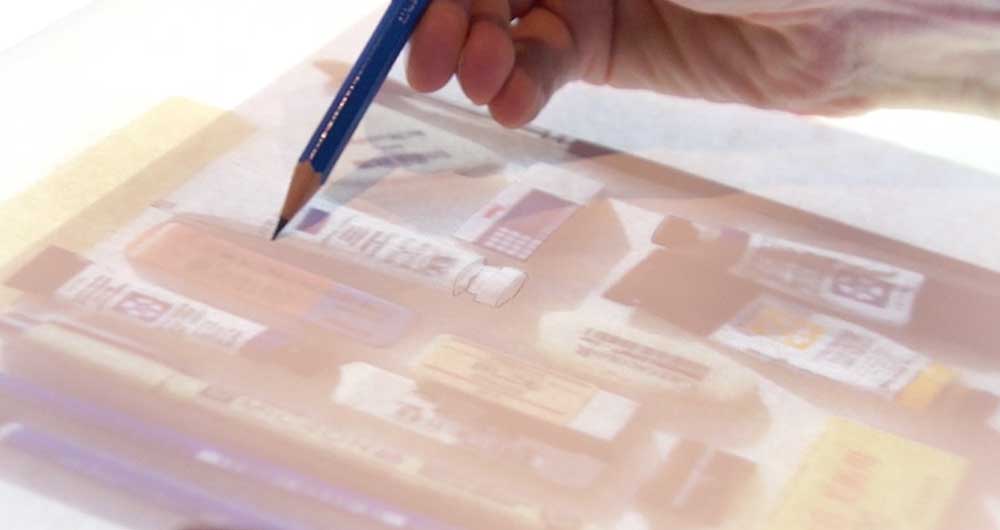
- Use a light graphite pencil, such as an HB, to trace the image onto your clean sheet of paper.
The light table works really well. Even with thick 300 gsm / 140lb watercolor paper, you can easily see through the sheet for tracing art.
Tip: To make this approach even easier, turn off any other lights in the room, and block out any exterior light while using the lightboard. You’ll find the contrast is better, and it will be simpler to discern the underlying picture.
How to Trace with Carbon Paper
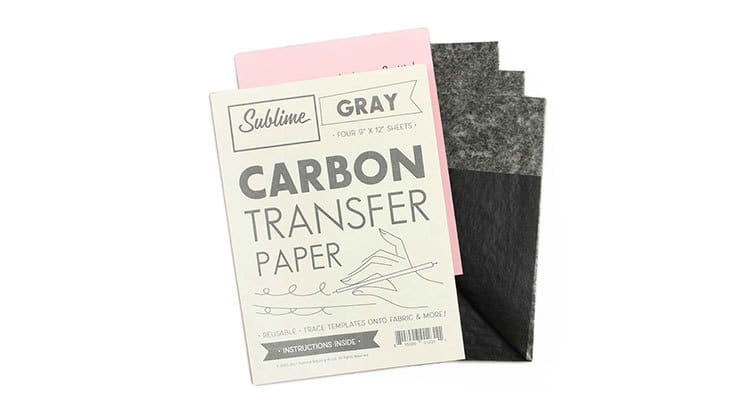
This special type of “transfer paper” can be used to trace a picture. Place the carbon paper between your reference image and the blank paper, then trace a freehand outline using a pen or pencil.
Some of you may want to avoid investing in a light table. The next best method for transferring drawings is to use carbon paper.
- Place a blank sheet on top of the watercolor paper.
- Position the original drawing over the carbon sheet.
- When you press down using a pencil to retrace the outline, some of the carbon gets transferred to the underlying sheet of paper at the bottom of the pile.
However, carbon or graphite paper is not always the best option. I’ve always found carbon paper messy, and I end up with smudges everywhere! The lines can also be quite dark and difficult to erase.
Tracing Using a Window
The backlight from a window during the daytime provides an easy way to trace a picture without needing special equipment.
To make the process easier:
- Tape the original reference picture to the window at a comfortable height for drawing.
- Position the blank sheet of paper over the reference, and tape it down.
- Trace a freehand outline using a pencil.
The biggest drawback of this method is the awkward position. Drawing upright with your arm held in the air for an extended length of time can be uncomfortable for many people.
How to use tracing paper to transfer an image
Because tracing paper is semi-transparent, you can see through it to the underlying reference image. However, using it to transfer an image is a long process involving multiple steps. Therefore, this method is more time-consuming than other direct tracing or transfer techniques.
- Fix the reference image onto a tabletop or flat board.
- Tape a sheet of tracing paper over the top, so it doesn’t move around.
- Trace a freehand outline of the subject onto the tracing paper.
- Turn the sheet of tracing paper over.
- Cover the reverse side of the traced outline with a layer of graphite using a stick or a soft pencil.
- Now carefully position the prepared tracing paper over a blank sheet (Tape both down, so they don’t move around).
- Retrace the outline one more time. The graphite on the underside will transfer onto the blank sheet thanks to the pressure of the pencil tip.
As you can see, this is a longer process, and there are many opportunities for the final sheet to become smudged! If you apply pressure with your hand resting on the tracing paper, you can deposit smears of graphite where they are not intended.
It’s a long-winded technique!
I prefer to do things quicker 🙂
Printing line drawings onto watercolor paper
Using a printer is another option to consider if you want to quickly get an outline onto a final paper sheet before painting or drawing.
This method is helpful if you already have a digital file with an outline (sketch outlines are available for most of my own online tutorials).
The process needs little explanation, but there are a couple of caveats.
- Will the printer take thick paper stock? You need a minimum paper weight of 140 lb when doing watercolor painting. This is pretty thick.
- Is your printer ink waterproof? Non-waterproof ink will run when you apply water. If the outline is very light, this is not a problem. On the other hand, waterproof ink means the underlying sketch outline will remain visible even after painting.
I suggest testing your home printer to try this out and see if it fits your needs.
To Sum Up
You can see now why light boards like this are my best-loved method for tracing pictures.
Transferring an image is not the most enjoyable or important part of the creative process.
I prefer to get it done quickly so I can have fun painting 🙂


Late to the party ;0) but I just ordered a light board, and I know it’s going to be a game-changer! Thanks for this, and all the other tips! I am LOVING getting into watercolor!!
Wow! I have been handing sketching before i watercolor! I thought tracing was cheating! Everything i read says no! Ordered my light pad!!! Coming tmrw!
Good news Paula!
Have fun 🙂
Ditto on the light board. I use Artograph LightPad 930 LX . Very nice! It’s never too late to start painting! Loving the beach unmbrella tutorial! Quick and fun!
Thanks Linda!
Excellent information. I’ve used a light board for ages but only recently realised that being in a dark room makes the image much clearer. The tips on taping the paper are very helpful Your posts are inspiring.
Thanks Robyn 🙂
Thanks for inspiring us all the time, no matter what!
Painting is so uplifting, fun and something to be proud of!
Love it!
Thanks Clio !
Do what you need to & grow! Lay down perfectionism & Grow/share your skills! (I’m changing jobs & doing this myself).
Thanks! Go for it Becca – do your thing 🙂