
How to Paint 5 Golden Rings in Watercolor
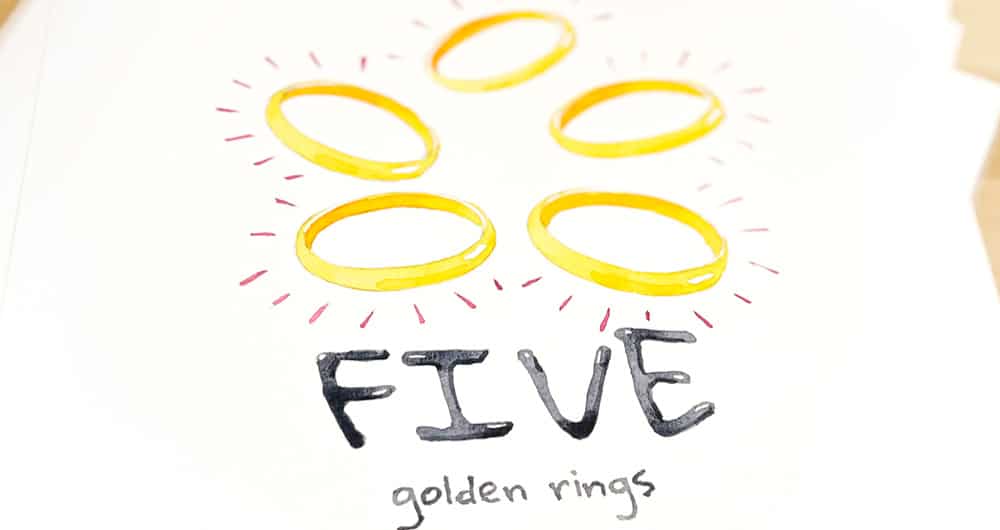
Welcome to day five of this watercolor painting challenge (or just a bit of creative fun for xmas!) As you’ve probably guessed the overarching theme is the “12 days of Christmas” and this lesson shows you how to paint a composition of “five golden rings”.
Did you ever find it odd that the song suddenly switches from birds to “golden rings” then back to birds again?
… 4 calling birds
… 5 golden rings
… 6 geese a-laying
… Etc.
It’s been suggested that these golden rings are in fact birds. They could be referring to ring-necked pheasants! Another possibility is that these were originally European goldfinches. The modern version eventually converted these references into 5 golden rings 🙂
If you stumbled upon this lesson in the middle, you might want to check out the beginning of this challenge here.
Ready? Let’s jump in…
Painting 5 golden rings in 4 easy steps
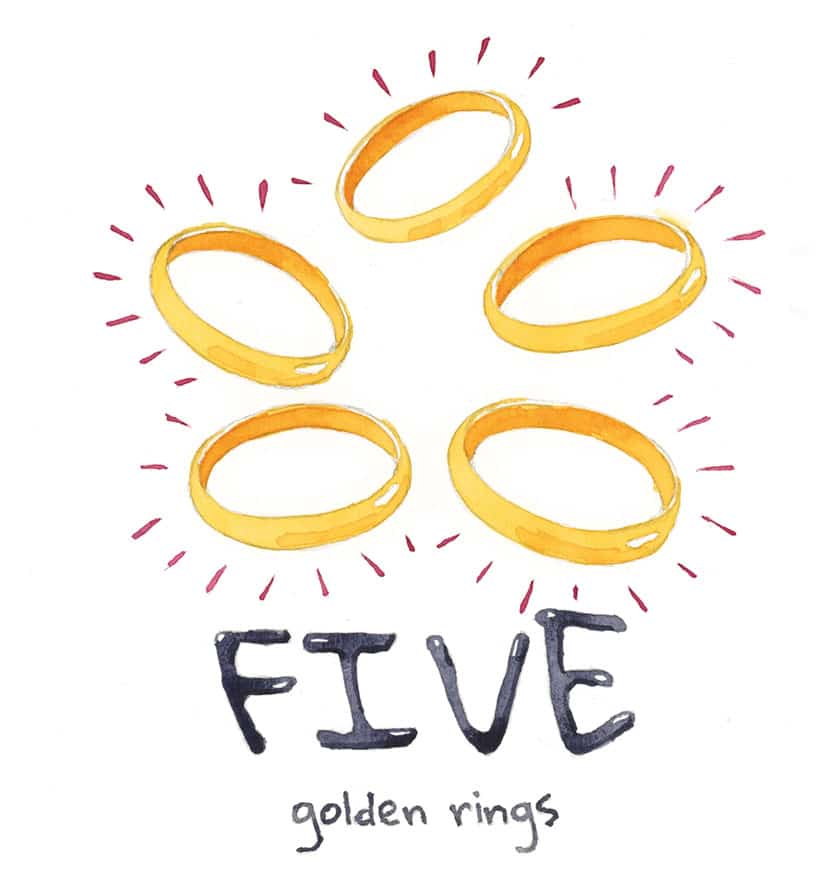
In this composition I thought it would be fun to arrange the 5 rings “in a ring”. I positioned the five rings so they circle each other, creating a larger loop of rings. And like in the previous composition (4 calling birds) I use size to suggest some depth – the front rings are larger than the ones at the back to imply distance.
Here’s the link to the worksheet and printable sketch outline for this painting:
Try this painting for yourself ! Click the button below to download the worksheet for this painting.
And the full list of paints I used for this watercolor are as follows:
- Hansa Yellow Deep – Pigment number: PY65
- Quinacridone rose – Pigment number: PV19
- Paynes gray – Pigment number: Pb29/PBk9
To receive daily email reminders for this painting challenge (starting with day #1), you can sign up below:
Finally, I’ve created a special category for these tutorials which you can view here. This will provide an overview of the whole challenge.
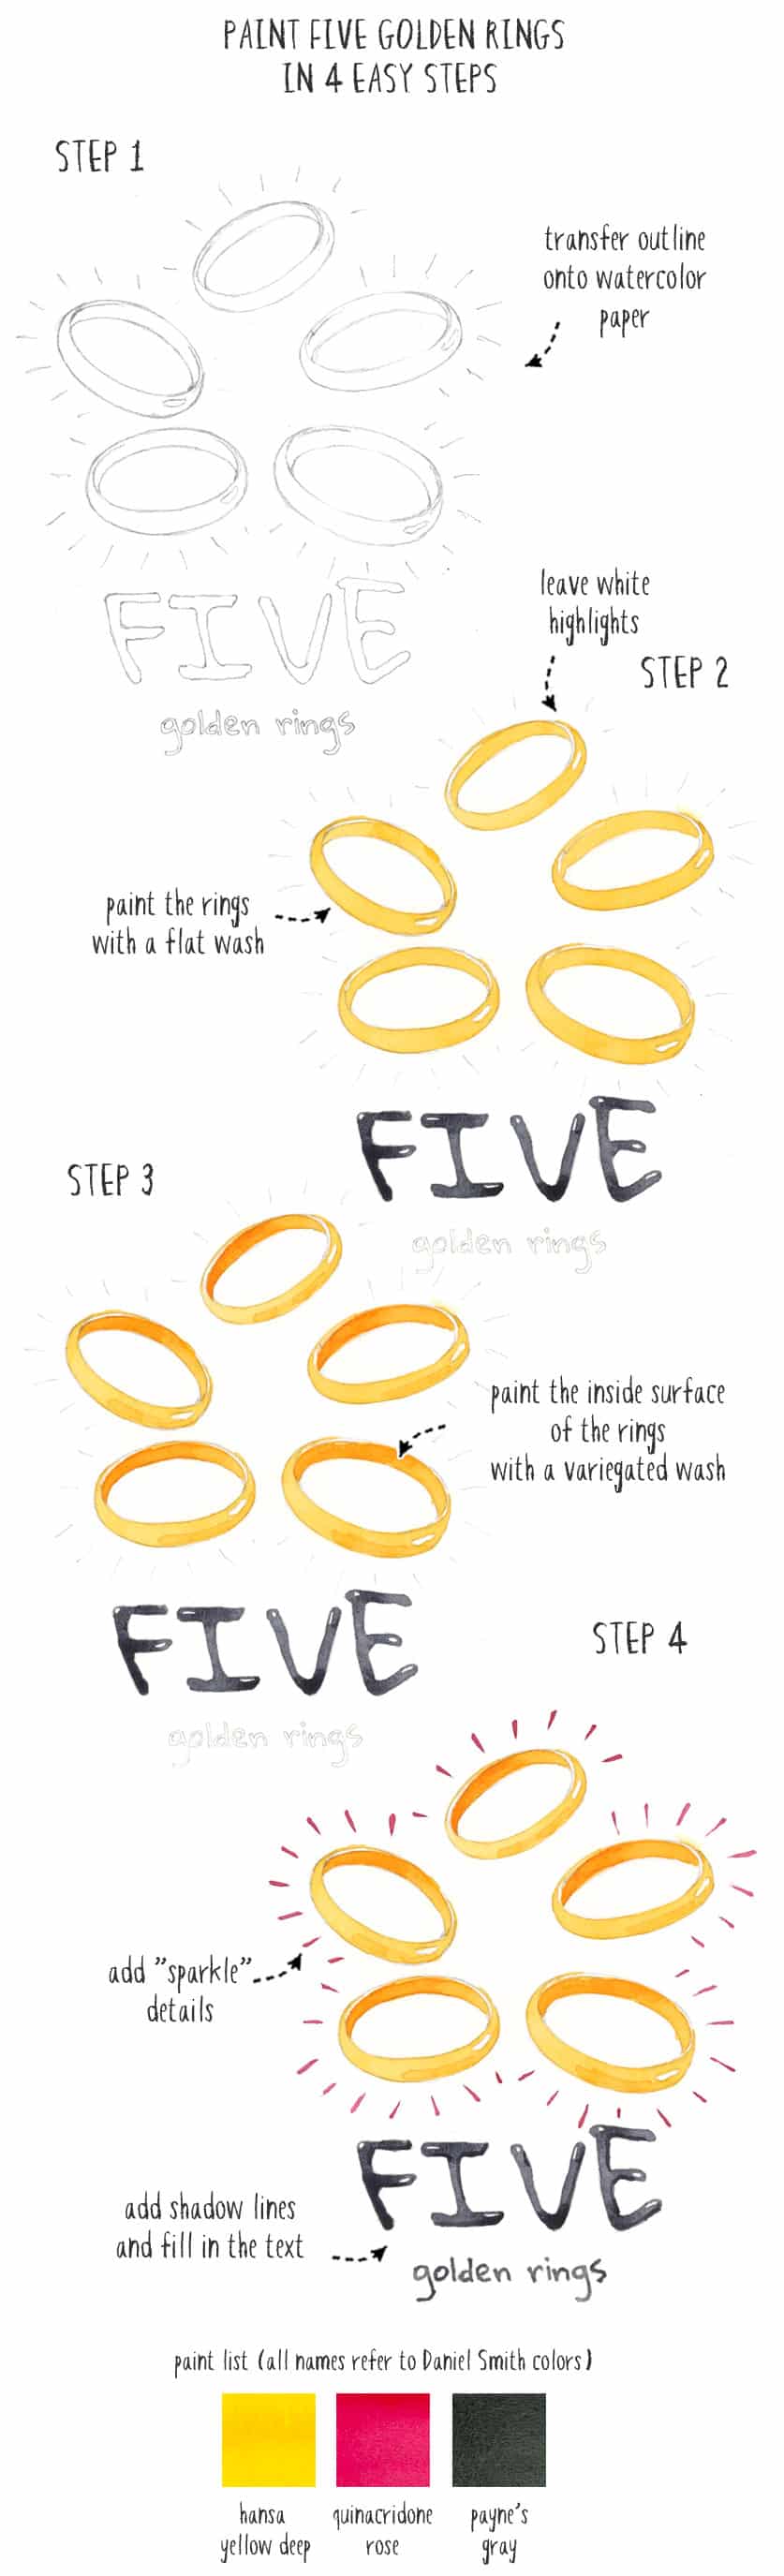
Step 1
As usual, print out the sketch outline then transfer the drawing to a sheet of watercolor paper.
Step 2
Now paint the ring shapes using a warm yellow paint color (hansa yellow deep in my case).
Notice that I left thin white highlights on the upper facing edges of the rings. Shiny objects have bright, well-defined highlights. These sparks of white paper help suggest the sheen and reflective qualities of gold. I also left a highlight on the outer facing sides of the rings.
Paint the word “FIVE” in gray, again leaving a few white highlights.
Step 3
When the first layer of paint has completely dried, use a glazing technique to paint the inner band of the rings. Painting the inner surface of the rings this way will darken the tonal values and suggest shading, improving the 3-dimensional effect of the composition.
Note that I painted these surfaces using a graduated wash. The paint is applied in a darker mix to the left and progresses towards a lighter more diluted mix on the right. Again this variation in color intensity helps the suggestion of three dimensions.
Be careful not to paint over the white highlights!
Step 4
The last details include the words “golden rings” underneath and an array of sparkles !
I painted these radiating lines in bright pink. Like this, the colors in the finished composition contrast and produce a bright, lively overall appearance (the color harmony is complementary).
I hope you had fun!
Let me know if you’re enjoying these challenges in the comments below 🙂


This appears to be the easiest but I found it hard to draw 3d rings.
Hi Caz
You maybe try tracing the outline from my worksheet 🙂