How Watercolor Glazing Works
If you’ve ever felt like your watercolors have a mind of their own – paint drifting where you didn’t put it, edges going fuzzy, colors bleeding into areas you thought were finished – there’s a good chance it’s the same thing that was happening to me when I got back into painting.
The solution turned out to be simpler than I expected. And it starts with understanding one fundamental thing about how watercolor paint actually behaves.
It’s a technique known as ‘glazing’.
So what exactly is glazing in watercolor?
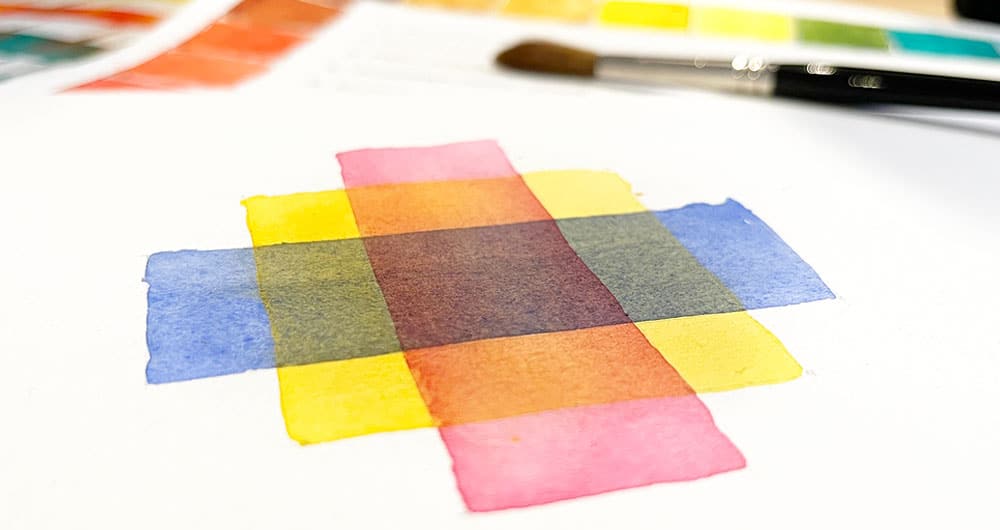
Glazing is simply the process of painting in layers.
You paint a shape, let it dry completely, then paint a new shape over the top. That’s it. You just need a bit of patience to let the paint dry (or maybe a hairdryer if you’re impatient like me!).
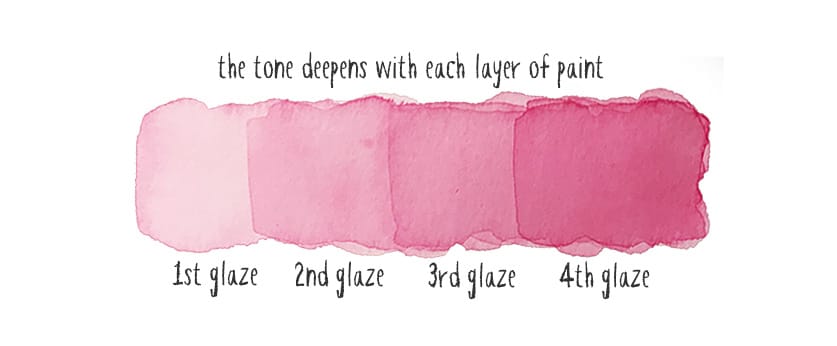
Because watercolor paint is transparent, any new brush marks allow the underlying colors to show through. Each new layer modifies the color beneath it and darkens the tone slightly. The result is a painting that builds gradually from light to dark, one layer at a time.
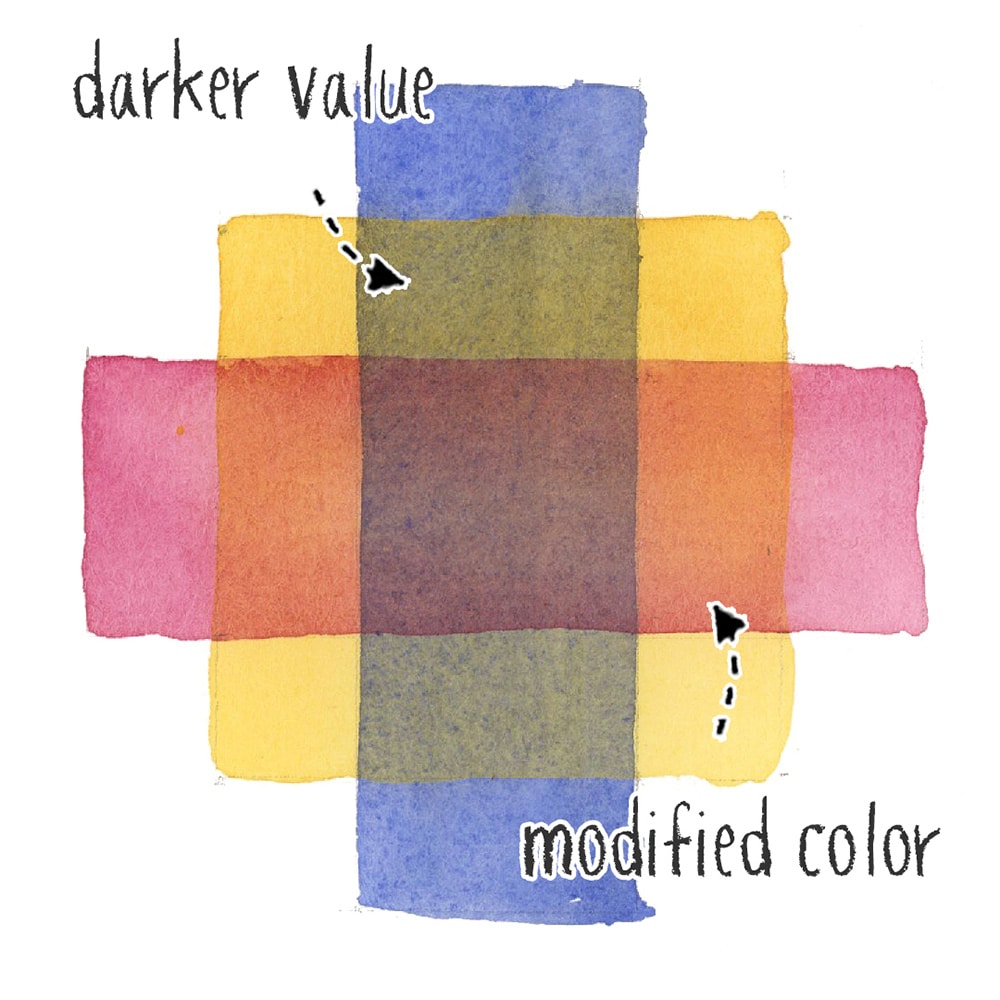
In other words, with each new layer, you increase the tonal value a bit at a time and create a new color.
Think of it like mixing colors directly on the paper rather than in your palette. Each glaze adds depth, interest and subtle color variation that you simply can’t achieve in a single pass.
It’s actually one of the things that makes watercolor so unique and so beautiful as a medium. Chances are it’s one of the reasons you were drawn to it in the first place.
Go on. Admit it 🙂
The one thing most beginners don’t realise
Watercolor paint behaves very differently depending on whether the surface underneath is wet or dry.
Paint a stroke onto dry paper and it stays where you put it – clean edges… defined shapes… nice predictable results!
Paint the same stroke onto damp paper and the pigment spreads and bleeds outward into the wet area.
Neither effect is wrong. Both are useful. But if you don’t know which one you’re working with, you’re not really controlling the paint. You’re just painting randomly.
Glazing is built on the principle of dry on dry. Each layer goes down onto a completely dry surface, which is what gives you control over where the paint actually goes.
This is the thing I wish someone had told me on day one.
The rules of glazing:
There are really only a few things you need to get right:
- Wait for each layer to dry completely before adding the next one. This is the big one. If the underlying paint is still damp, a new brush stroke can behave in unpredictable ways — either diffusing softly into the wet area, or creating those irregular blooming shapes that spread where you definitely didn’t invite them. The safest rule for a beginner is simple: if you’re not sure it’s dry, it isn’t. Wait a little longer. Or use a hairdryer on a low setting to speed things up. (Just don’t hold it too close to the paper or you’ll end up with a different kind of problem entirely).
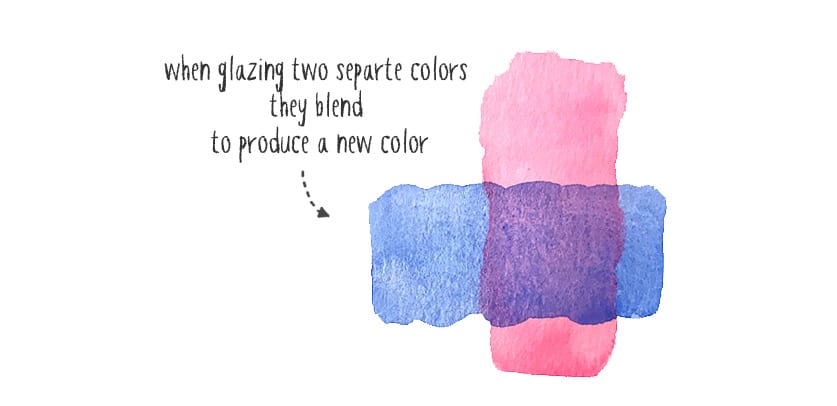
- Think about how your colors will combine. Each new glaze modifies the color underneath it. A yellow glaze over a dry blue wash will shift toward green. A red glaze over yellow moves toward orange. It helps to have a rough idea of the result before you commit – though a little experimentation is half the fun!
- Work quickly and confidently. The more you scrub at the paper with multiple passes of your brush, the more likely you are to disturb the layer underneath. One confident stroke is worth ten hesitant ones.
A simple exercise you can try right now
The best way to understand glazing is to experience it yourself. And this exercise is about as painless as it gets.
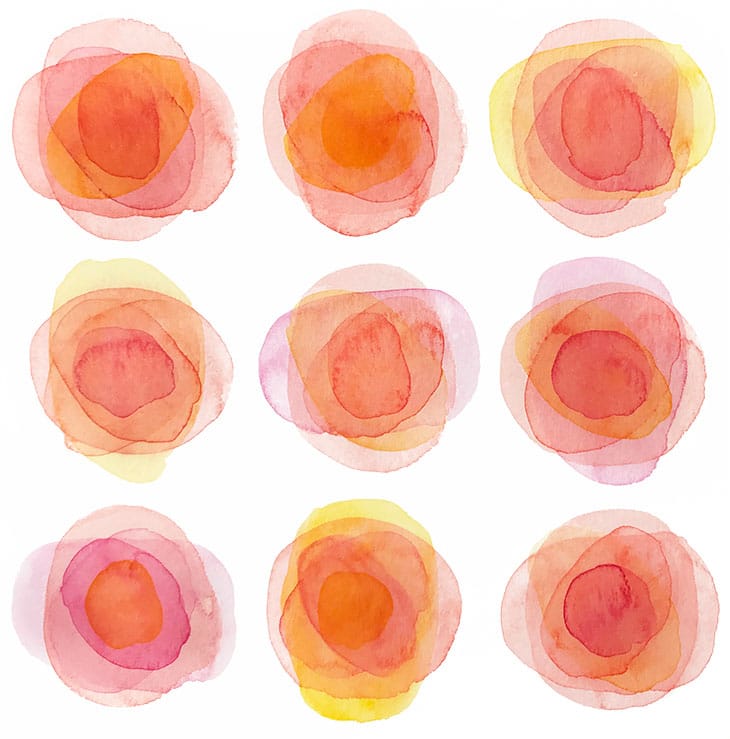
Try painting this set of abstract watercolor roses. They’re surprisingly easy. And they’ll teach you more about glazing in twenty minutes than reading about it for an hour.
Here’s how:
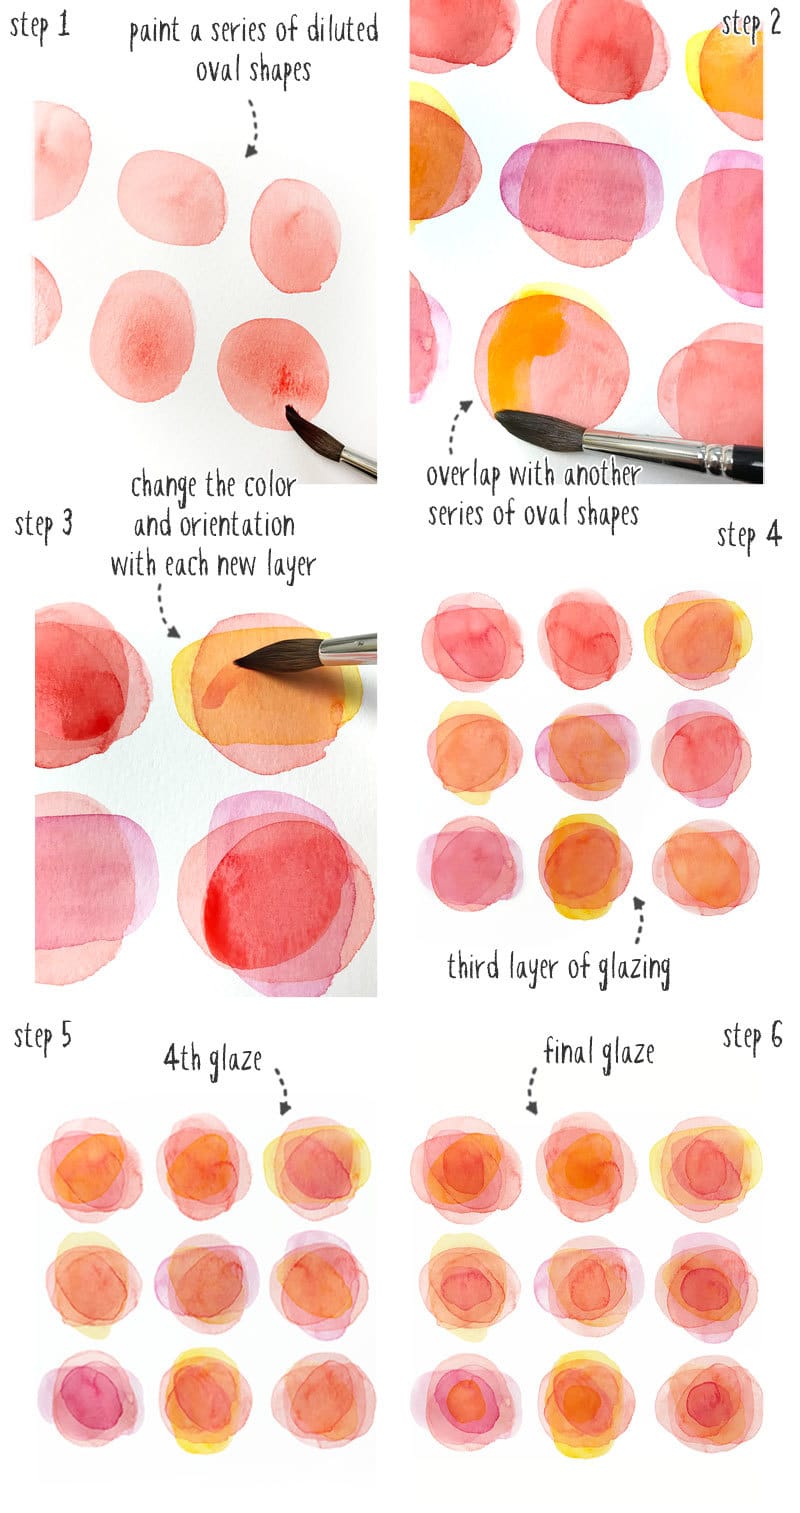
Step 1.
Mix your colors fairly diluted – you want to exploit the transparency of the paint. Paint a series of oval shapes on your paper, alternating the orientation slightly to add variety. Now put your brush down and wait for them to dry completely. I know. Waiting is the worst. Use the hairdryer.
Step 2.
Once dry, paint a new set of ovals over the top of the first, using different colors. Overlap the edges of the existing shapes. Notice how the underlying ovals remain visible through the new layer, and where the two colors overlap you get a third combined color. This is glazing doing exactly what it’s supposed to do.
Step 3.
Let everything dry again. Then paint another set of ovals, slightly smaller this time, into the existing shapes. Change the colors and orientation again.
Step 4.
Repeat until you’re happy with the result. You’ll end up with a pattern of layered abstract flowers that actually look pretty nice 🙂
Take a moment to pay attention to what happens with each new layer – how the colors shift, how the tones deepen, how the shapes gain depth and dimension. That’s glazing!
One last thought
Once you understand how layers work, you’ll start approaching watercolor painting differently. Instead of trying to get everything right in one go — which, as I discovered, doesn’t end well — you’ll start thinking in stages. Light first. Build gradually. Darken slowly.
It takes a bit of patience. But it gives you something far more valuable in return: the feeling of actually being in control of what ends up on the paper!
Which, trust me, is a significant improvement on hoping for the best.
Thanks for reading !
Anthony

