The Hidden Secret to Better Water Control
Hi!
A lot of artists, even experienced ones, try watercolors only to find out it’s trickier than it looks 🙂
So just to reassure you:
it’s not you…
it’s not a lack of talent…
It’s just that watercolor has some unique characteristics that need to be learned!
Luckily, these challenges are completely normal – and absolutely solvable.
Over the past few years of painting and teaching in watercolors, I’ve discovered there are some very common struggles that all artists face.
And “Water control” is the biggest frustration of all – no question.
But there’s one often overlooked factor that can make it a whole lot easier!
In this lesson I’ll walk you through it step by step.
Water Control
If you’ve ever felt like water has a mind of its own, you’re not alone! Even now, I still get caught off guard by the occasional water control mishap.
You know the kind I mean – streaky washes, unpredictable blooms, or those moments when your paper suddenly turns into a mini swimming pool!
It’s no wonder, really. With watercolor, you’re essentially painting with water – which makes it very different from mediums like acrylic or oils. And that’s exactly why watercolors can feel so tricky – you need to understand how to work with the water, not against it, and how to control the water during the painting process.
Mastering this comes down to two key things:
- First, timing (because as the paper dries, the moisture level changes, affecting how much control you have over the paint).
- Second, the type of paper you use.
And this is where I think many watercolors beginners hit their first real stumbling block.
The type of paper you use actually has a huge impact on water control, especially when working with wet-on-wet techniques.
(And in case you don’t know, “wet-on-wet” simply means applying wet paint to a wet surface, and is one of the key techniques that makes watercolor so unique).
The longer you paint with watercolors, the more you’ll hear artists stress how important good-quality paper is!
To be honest, when I first got back into watercolors, I was a bit skeptical about this. How could paper make such a big difference?
But over time, I realised they were right 🙂
So if you’re struggling with water control issues – like watery stains, or streaky brush marks – the problem might not be your technique…
It could simply be your paper!
This is something my Masterclass students notice all the time.
For example, Ruth, one of my students, shared this after doing a paper comparison exercise:
“I did this exercise twice – once on student-grade paper and the other on Arches. The background on the student-grade paper was very streaky, but it blended beautifully on the Arches. What a difference!”
“Arches” is one of the best brands of artist-quality watercolor paper, and using it can make blending and achieving smooth washes much easier compared to lower-grade papers. (Arches can be pretty expensive – if you don’t want to pay the premium price there are a couple of cheaper options… more about that later…)
**Why Paper Matters More Than You Think**
But why does the type of paper you use make such a big difference?
It all comes down to how the paper is made…
Especially the way it’s “sized”
(“sizing” is the treatment applied to the paper to control how it absorbs water).
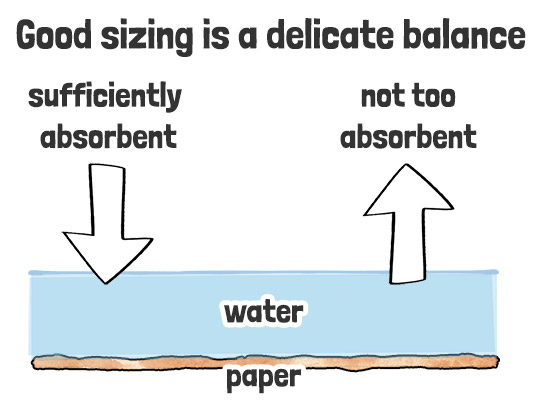
Different papers handle water and paint in completely different ways, which is why some brands seem to make blending effortless while others leave you fighting against streaks and unwanted textures.
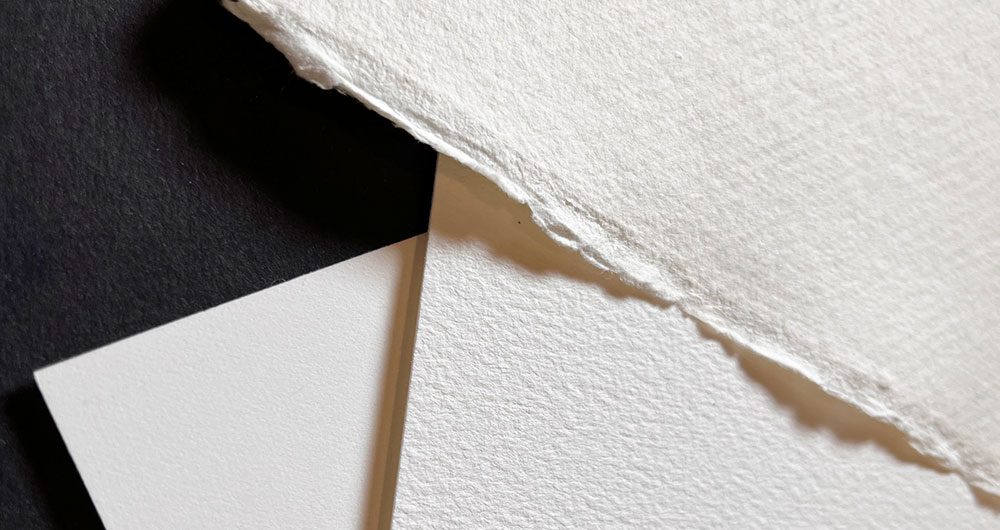
To show you what I mean, let’s compare how brush marks behave on two different types of paper…
Artist vs. Student Grade Paper
Now… Not all watercolor paper is created equal. In fact, watercolor paper generally falls into two categories:
- Artist grade
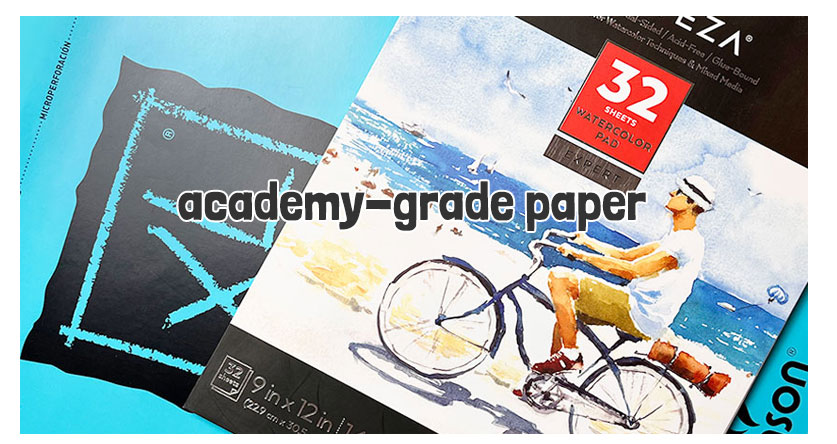
- Or student grade
Artist-grade paper is made from 100% cotton, while student-grade paper contains cheaper wood pulp.
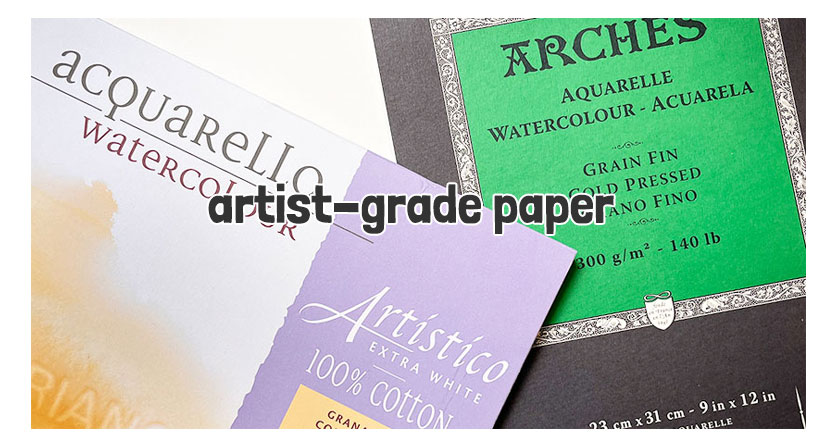
Cotton paper is stronger, more stable when wet, and absorbs water evenly – but it’s also more expensive and not as widely available. And the quality of its sizing is carefully balanced for watercolor painting.
Student-grade paper, on the other hand, is made from cheaper wood pulp and usually has inconsistent sizing… which means the water pretty much does whatever it wants! 😕
These differences in materials have a pretty big impact on how the paper handles water.
Let me show you what this actually looks like.
First, I tested Arches 100% cotton artist-grade paper. Then, I did the same on a popular student-grade, wood-based paper from Canson. To keep things fair, I mixed up the same puddle of paint to test on both.

First, I wet the Arches paper with clean water and painted the brush mark above. You can see how the pigment disperses smoothly, spreading in an even, and fairly controlled way.
Then I did the same thing on the student-grade paper. Right away, you’ll notice the difference. The paint doesn’t spread so evenly – it sits on the surface for longer, creating spidery edges, then suddenly absorbs in an unpredictable way, leaving a patchy appearance:
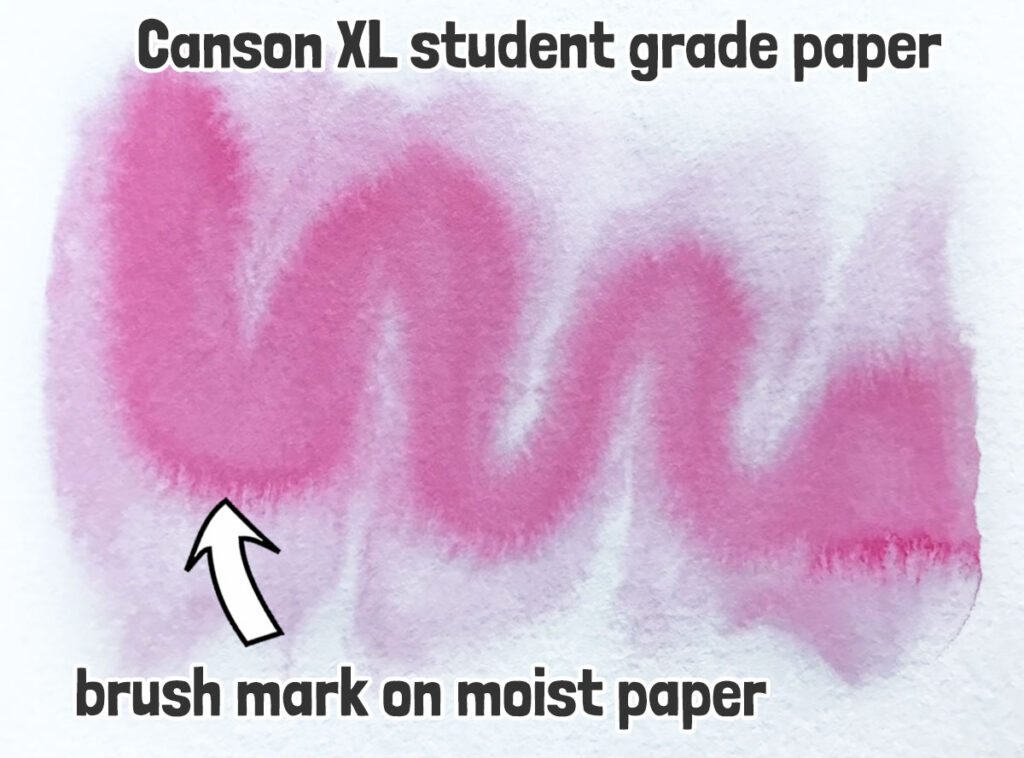
It’s all about how the water is absorbed, which depends on both the sizing and the type of materials in the paper.
Arches has high-quality internal and external sizing that helps paint flow beautifully. The student-grade paper, however, most likely has too much surface sizing or lower-quality ingredients, making it harder to get smooth, even blends with watercolor.
The problem is, artist grade paper can be pretty expensive! But luckily there are a few cheaper 100% cotton papers available on the market. The two that I have tried and like are:
- Ateza cold press 140lb/300 gsm paper
- Meeden watercolor paper
These differences in paper quality are why I only recommend student-grade paper for sketches – not for paintings where you want to learn more control over water and blending.
If you’ve made it this far, you’re either seriously committed… or you really love talking about paper 🙂
This is really just scratching the surface of water control. If you’d like to see how it all fits together, I cover it step by step in my course.
So if you’re ready to stop fighting with your water and start making it your ally, I’d love to see you in the watercolor masterclass!


Very valuable to know.
Thank you. Mary Ireland 🇨🇮
Anthony,
You always have good advice and I enjoy your emails and blog. I’ve been practicing watercolor for a couple of years now and I can absolutely attest that quality 100% cotton paper makes a huge difference. As a beginner I struggled with the idea of “wasting” good/expensive paper. But practicing on poor quality paper did not help me learn. Practicing on poor quality paper created frustration, never allowing me to experience the real magic and beauty of watercolor. I can’t always afford Arches, but I try my best to find affordable 100% cotton. My practice pages are worth it as they help me learn, grow and enjoy the process❣️
budding watercolorists need to realize that “practice” on lousy paper is not indicative of what happens on good 100% cotton paper. I have found that even 100% cotton papers have variable characteristics. The one that I can count on is Arches. I tell my students a 9×12 sheet of Arches is cheaper than a cup of Starbucks, you will enjoy it longer , and actually have something to show for the money spent.
Hi Linda
Love the Starbucks analogy! 🙂
Great article (as per usual)! I’m trying to teach my students the difference between paper types and what each is good for. So far we’ve tested 100% cotton (NY Central), 25% cotton (Fabriano), and Canson wood pulp paper. As you’ve said, they’re all totally different and good for various things
Sounds like a great experiment Nel 🙂
Absolutely love NY Central paper. Discovered it in the painter’s swatch book from Jerry’s Artarama.
Thanks Anthony .very helpful!!
I too found paper to be a concern. I do my practice sessions on Wood based paper and my final paintings on Cotton. There are several good cotton papers that are cheaper than Arches and seem to do about the same for half the price. Best way is to try them.
🙂
I’ve always had trouble getting a good flat was on a largest piece of paper. thanks for the tip I will sacrifice one of my Arches sheets to the cause of trying it out. and eill find a way to use it afterwards.
Great idea! Practicing on Arches will really show you the difference – and you can always reuse the sheet for smaller studies afterwards.
Hi Anthony
I enrolled in your Watercolour Masterclass although progress is slow, there are just so many things to do. I have just finished the tomatoes… The drawing came out very nicely (might be a little bit dark), but I struggled with the painting and I think it is exactly what you are writing about in your e-mail. It is so frustrating and I have been thinking there’s something wrong with me. I have drawn it out again and will try again.
Thank you for the amazing lessons and tips!
Mareta
Well done on finishing the tomatoes, Mareta!
Struggling at this stage is completely normal… Each attempt teaches you something new, so trying again is exactly the right approach.
Sometimes just switching to better paper can make a big difference too. Keep going—you’re doing great!
So true …
Hi Anthony:
This is a really excellent post, thank you. I haven’t painted in several months and am having a bit of trouble getting back into it as an intermediate. I purchased your course quite a while ago and will be reviewing that section of the course on water control again tomorrow. I continue to recommend your master beginners watercolour course to anyone I meet who is starting out with watercolour painting. Your explanations are great and very helpful. Also wanted to say congratulations on your 1-Million viewing. That is quite an accomplishment!
Thank you so much Bonnie!
And thanks for the encouraging comments 🙂
thanks Anthony, I will search for some good quality paper for next time I paint in watercolor, thanks for all the good tips. Please keep them coming.
cheers
Zita
Glad this was useful Zita 🙂