
YOU DON’T NEED MORE WATERCOLOR SUPPLIES
Have you ever found yourself obsessing over watercolor supplies and thinking, “Maybe I just need a better brush… or better paper… and then I’ll finally be able to paint something that actually looks like those beautiful tutorials I keep seeing on Instagram”?
Because when I got back into watercolor painting, I fell straight into that trap.
And the more I looked into it all, the more confused I felt.
So if you’re overthinking your supplies like I was, in this lesson I’m going to show you the three simple supplies that remove that barrier completely. No huge shopping list, just the essentials that actually help you get started.
We’ll look at:
• the one brush that can handle almost everything,
• the small handful of paints that make mixing much simpler,
• the kind of paper that behaves well without costing a fortune,
By the end, you’ll know exactly what to grab – and hopefully you’ll feel ready to stop overthinking and actually pick up your brush 🙂
Why?
I’ve been painting for years now, and over time I’ve learned what actually matters and what really doesn’t. I’ve tried the expensive paints and the fancy brushes… and honestly? You just don’t need most of it!
These days I paint almost everything with a small set of well-chosen colors, one or two reliable brushes, and paper that does the job well. That didn’t happen overnight! It came from years of testing, messing up, and slowly stripping things back until I was left with the few tools that genuinely make a difference.
In the beginning I got so confused about choosing paints that I actually made a spreadsheet comparing everything! There were pigment numbers, lightfastness ratings… the whole thing. I convinced myself that if I found the perfect combination of colors, then I’d finally be “ready” to paint beautiful watercolors the way I imagined in my head.
But looking back, all that ‘research’ was really just another form of procrastination. I was nervous about messing things up, nervous about wasting paint, and nervous that what I painted wouldn’t live up to my hopes!
So I know how much time beginners waste worrying about supplies, because I did it too, and I really want to help you avoid all that.
Progress comes from painting, not from collecting tools…
The one brush that can handle almost everything…
So let’s start with the first thing you actually need… and it’s much simpler than most people expect.
A large round brush is the most versatile brush you can own. It lets you do broad strokes, and even surprisingly fine details.
But what do I mean by “large”?
Well, these days my everyday brush is this Rosemary & Co Kolinsky sable series 33 size 9

It’s about an inch long and roughly a quarter-inch wide at the belly.
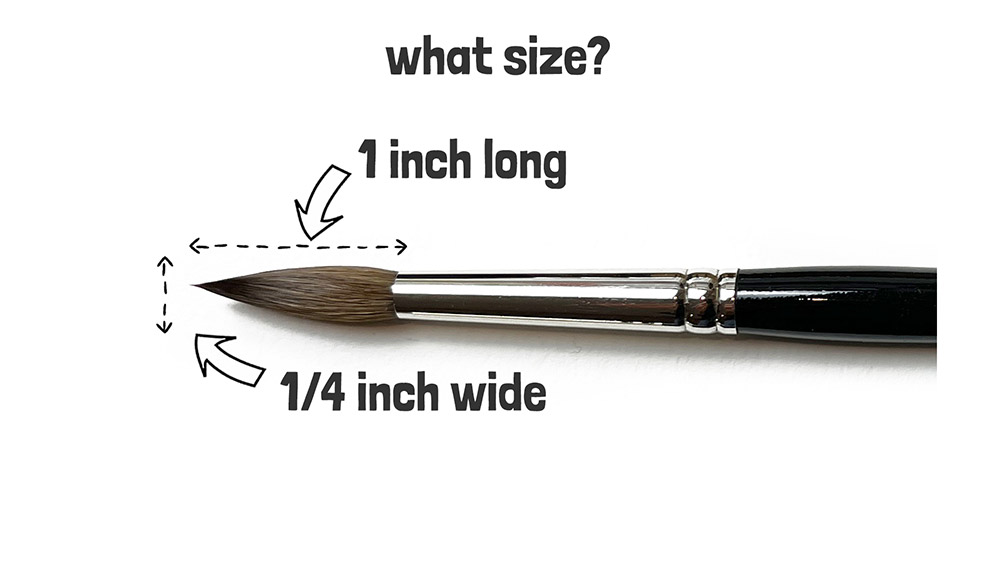
And to get started that’s ALL you need. This single brush will cover about 90% of your painting needs in the beginning.
Now, as you progress, you still don’t need to spend a fortune or collect a whole arsenal of brushes. You can easily do any kind of watercolor techniques with just three:
- So a large round brush is your go-to tool for almost everything.
- Next, a small round brush with a good pointed tip is great for adding fine little details.
- And finally a “wash” brush (like a mop for example) is perfect when you want to cover big areas such as skies, backgrounds, or larger shapes.

And then comes the question everyone asks: “But what TYPE of brush should I actually buy?”
Well… some of the “best” watercolor brushes are made from natural hair. They hold more water and make it easy to produce long flowing brush strokes.
But these are also the most expensive!
So if you can’t “splash out” for a sable brush – or you prefer a vegan option – these days modern synthetic brushes are designed to mimic the handling properties and characteristics of natural hair brushes. and they’re great for beginners especially if you’re on a budget.
I’ll pop links for all three types of brushes in the description below.
Brush Product Links:
For your large round brush, you’ve basically got two routes:
• Natural hair, for example the Rosemary & Co Kolinsky sable series 33 size 9
• Or synthetic, like the Rosemary & Co Red Dot Pointed round size 10 or the Princeton Aqua Elite Round size 10, which are affordable, reliable, and nice and springy for beginners.
For your small round brush, it’s the same idea.
• Natural, such as a Kolinsky sable size 4, if you want a super-fine point and smooth detail work.
• Or synthetic, like the Red Dot Pointed round size 4 or Aqua Elite Round size 4 , which are perfect for details.
And for your mop brush – the one that soaks up water for big washes – again, two choices:
• Natural, like the Da Vinci squirrel mop
• Or synthetic, such as the Raphaël Soft Aqua series 805 size 4, which gives you plenty of capacity without the higher price.
And if you take care of them well, they’ll last a long time 🙂Note: Unfortunately Rosemary & Co are difficult to find in the US. After chatting with Rosemary, she recommended a couple of USA Distributors for people buying from the US. The first is: windriverarts.com . Another great distributor is Studio Pintura – the folks who run it, Armando and Lois, are both experienced artists and really do go the extra mile to take care of their customers: studiopintura.com/rosemary-brushes .
The small handful of paints that make mixing much simpler…
When you’re just starting out, it’s easy to think you need fifty different tubes of paint to mix every color under the sun! I used to stand in art shops staring at the wall of yellows wondering why there were so many versions of the same color.
It took me a while to realize you don’t actually need that many.
In fact, a simple set of six paints is all you need to get going. And it will also make your life so much easier.
Let me explain…
Six paints – including a warm and cool version of each primary color – is more than enough:
- warm yellow + cool yellow
- warm red + cool red
- warm blue + cool blue
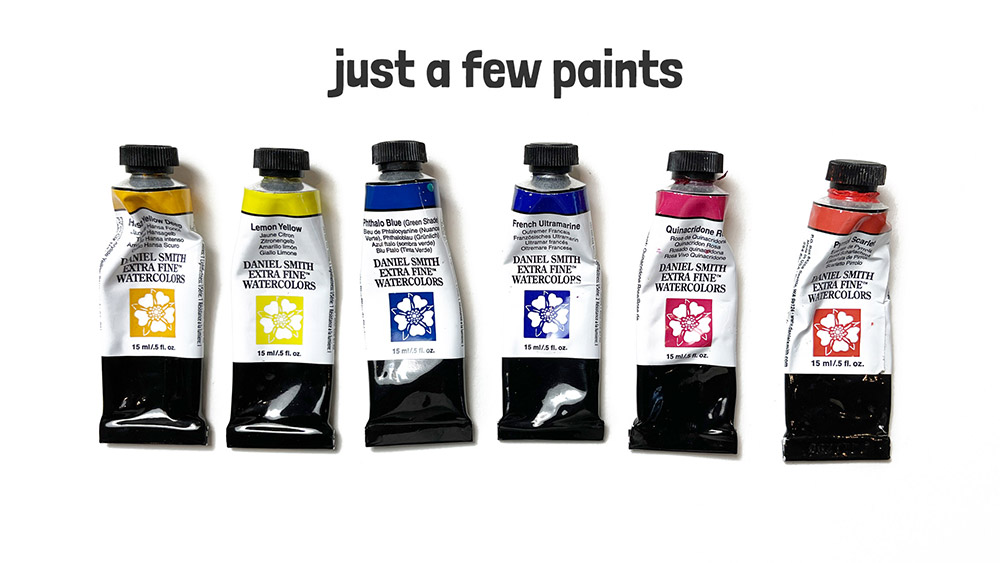
That’s it. Just six colors. And they make your life easier for a few reasons:
1) You spend less.
You don’t need to spend a lot of money on a vast selection of paints to mix just about any color you want.
2) You learn faster.
With fewer colors in your palette, you get to know how each one behaves quicker. It’s much easier to understand mixing when you’re not juggling twenty different options.
3) You can mix almost anything.
Bright colors, earthy tones, greys, greens – you can get all of it from this little set once you get the hang of it.
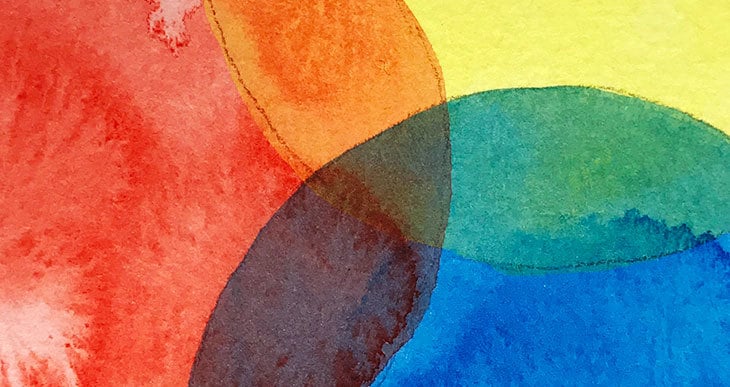
The reason this small set of paints works so well is because warm and cool versions of each color behave differently when you mix them. Warm colors are those that tend to lean towards reds, oranges, yellows. Cool colors lean towards blues, greens, purples.
When you start mixing them, you’ll see why this matters.
A warm blue mixed with a warm yellow gives you a completely different green than a cool blue mixed with a cool yellow. Some greens come out bright and spring-like, others soft and muted.
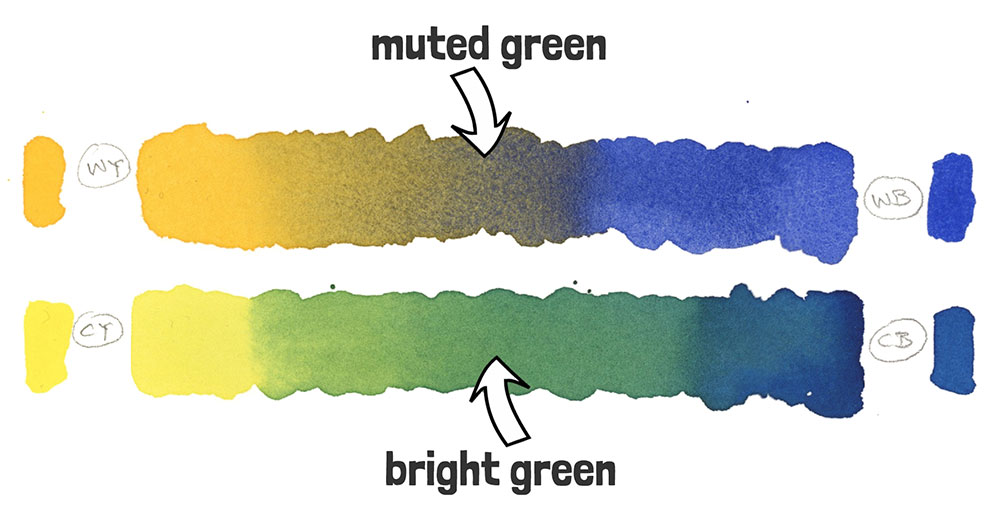
Once you start using this limited palette you’ll notice these differences straight away (like you can see in this mixing chart). And before long, you’ll find it much easier to mix the colors you want without feeling overwhelmed by too many choices.Much simpler than the ridiculous spreadsheet I spent way too long building!
The kind of paper that behaves well without costing a fortune…
Here’s where things get tricky!
Paper can be a bit confusing when you’re new, because everyone online seems to rave about the really pricey cotton stuff. And yes, cotton paper does handle beautifully.
“Artist grade” 100% cotton paper is considered best because it handles wet-on-wet painting techniques so well. Pigment dispersion and water control is a lot easier on this kind of paper.
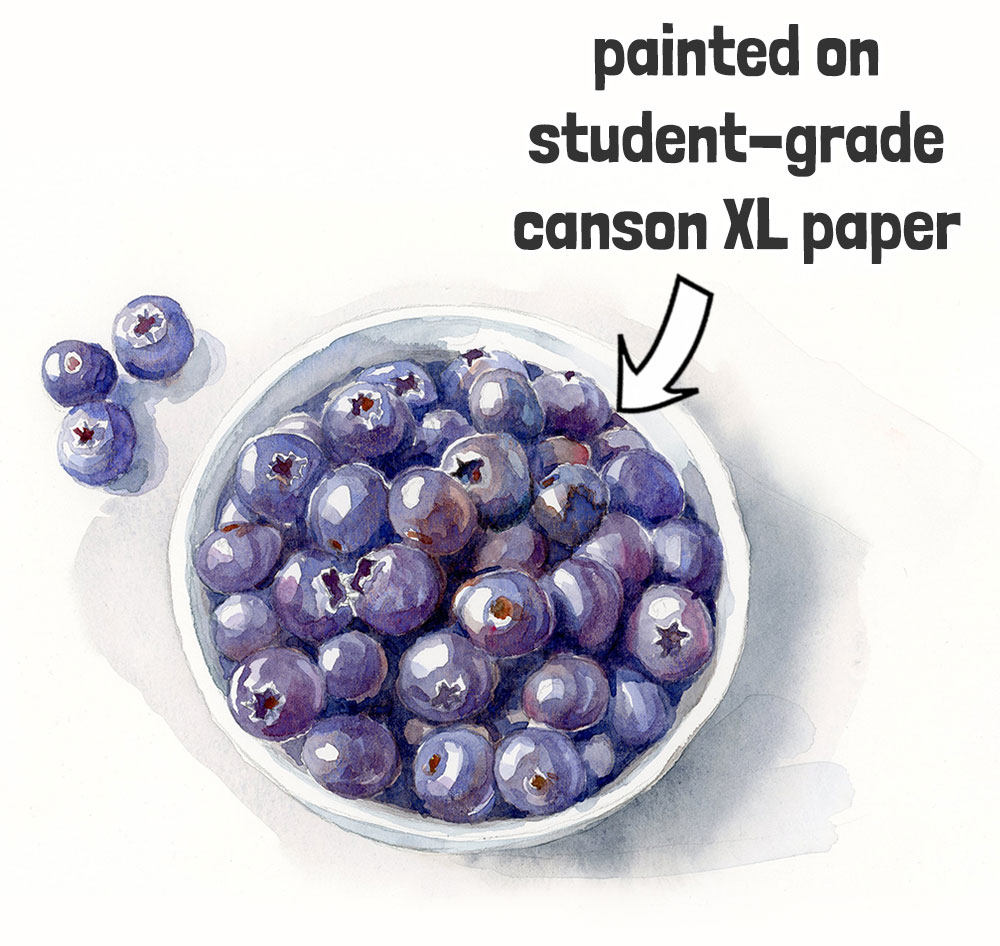
The more economical version of watercolor paper is called “student grade.” Admittedly, it doesn’t handle quite as well as artist grade, but wet-on-dry techniques like glazing work perfectly fine on most student-grade papers.
So if you’re curious about trying cotton without spending a lot, Meeden 100% cotton cold press is a really good “budget cotton” option. I’ve been using this a lot recently and honestly it feels like a higher-end paper but at a more beginner-friendly price.
If you want something that handles wet-on-wet a bit better without jumping to the premium price range, Arteza cold press is one of the nicer student-grade papers that I’ve tried. The paint spreads pretty well, and it’s more forgiving than most cheaper versions. But it does lift easily, so just go gently when glazing. But for learning, it’s honestly a solid choice.
Finally if you’re on a tight budget, Canson XL is a great everyday option. It’s perfect for sketching, experimenting, color mixing, and anything wet-on-dry. It’s not the best for big wet-on-wet washes! It doesn’t handle pigment dispersion well. but for regular practice without feeling guilty about “using up the good paper,” it’s a good choice.
Again, you’ll find some quick links in the description below.
Paper to get started
- Meeden 100% cotton – a budget-friendly step up if you want to try cotton.
- Arteza – affordable student-grade paper that handles wet-on-wet surprisingly well.
- Canson XL – great for practice, quick sketches, glazing, and wet-on-dry work.
So remember, you don’t need the perfect brush, a million paints, or fancy paper to start. With a few basics like this you can pick up your brush, and just paint! That’s how progress actually happens. 🙂


Thank you for detailed understandable info on brushes and paper !
Happy to help Margo 🙂
Thank you for simplifying this. I’ve been looking for a good pair of yellows that lack Cadmium, and appreciate the pointers.
I’ve also been able to get Rosemary & Co from The Merri Artist up in Portland – https://merriartist.com/collections/rosemary-short-handled-red-dot-synthetic-sable-brushes
Thanks for the tip Curt!