
Stop Guessing Every Brushstroke: A Clear Step-by-Step Process
Do you ever start a watercolor painting knowing what you want to paint… but then get stuck not knowing what to do next? Maybe you’re not quite sure which technique to use… so you start guessing, moving paint around, or trying to fix things as you go. And before you know it, you end up overworking the painting?
In watercolor, problems rarely come from the first layer. They happen when you’re not quite sure what the next step should be.
If that sounds familiar, this lesson is about trying to help you stop the guesswork.
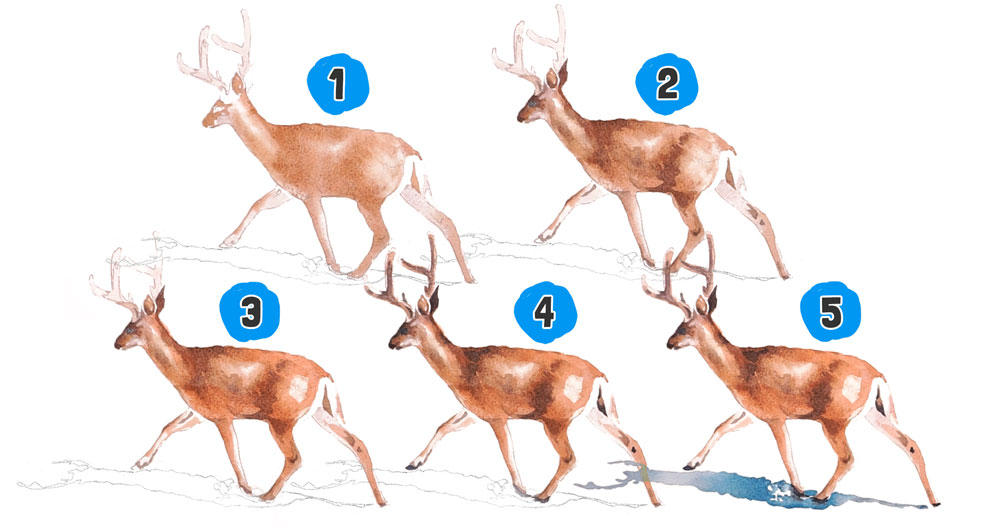
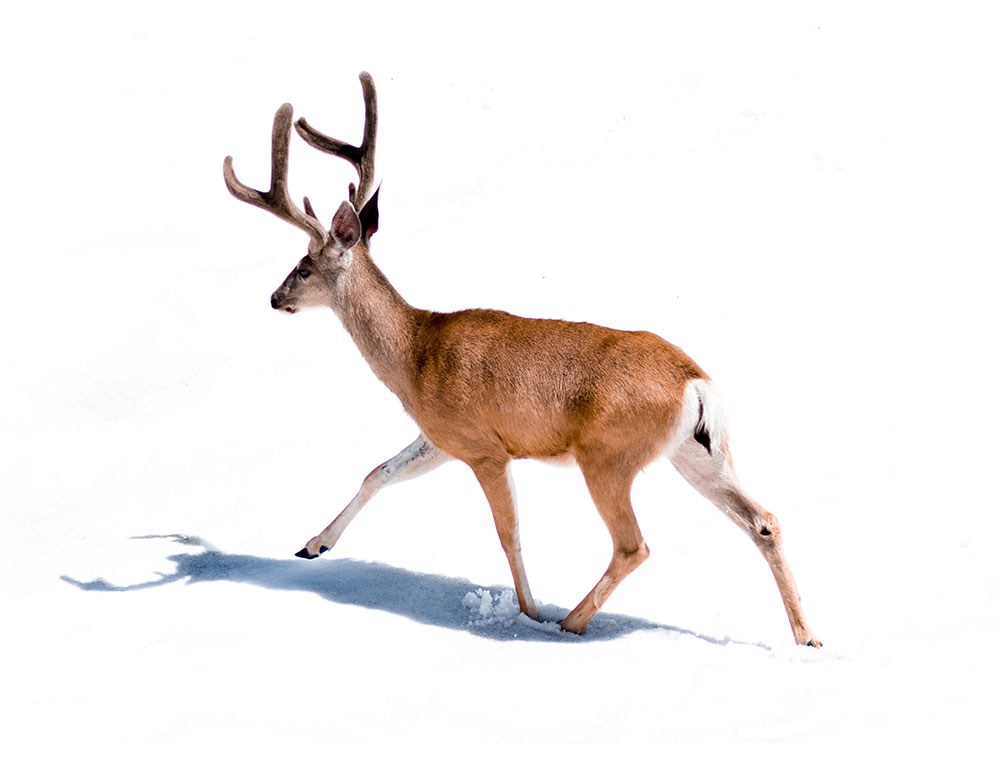
In this step by step painting of a deer walking in the snow, I’ll show you a clear way to plan and build a watercolor painting – using things like value studies, controlling moisture, and painting in logical stages – so you’re not just guessing and hoping for the best!
And if you’d like to follow along and try this painting for yourself, you’ll find a link below where you can download the reference images and an outline sketch for tracing to help you get started.
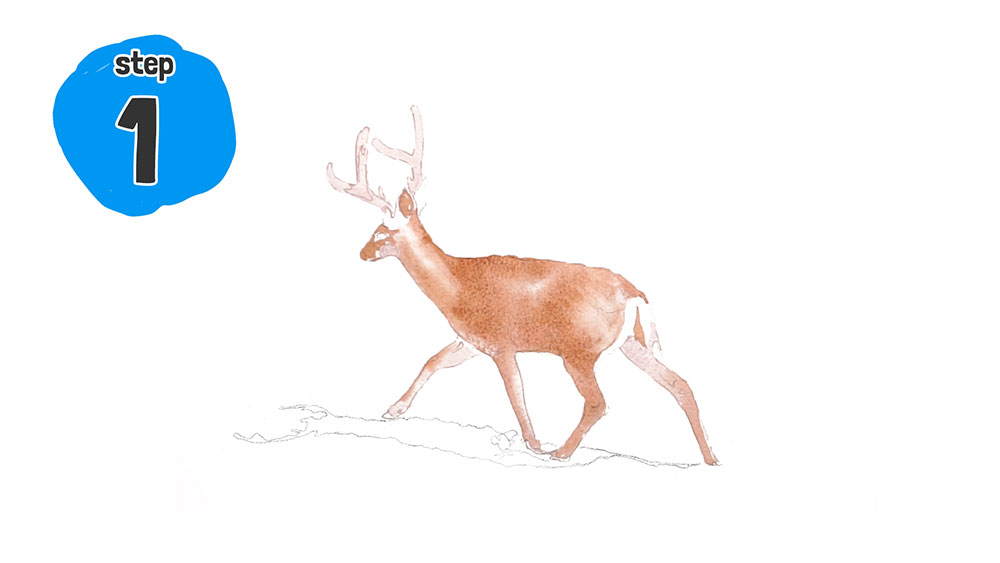
Step 1 – Establishing the light foundation and color variation
So to begin with, I trace the outline of the deer onto my watercolor paper and tape everything down onto a flat board. And because the deer is quite a small subject with a fair amount of detail, I’m using a smaller brush right from the start.
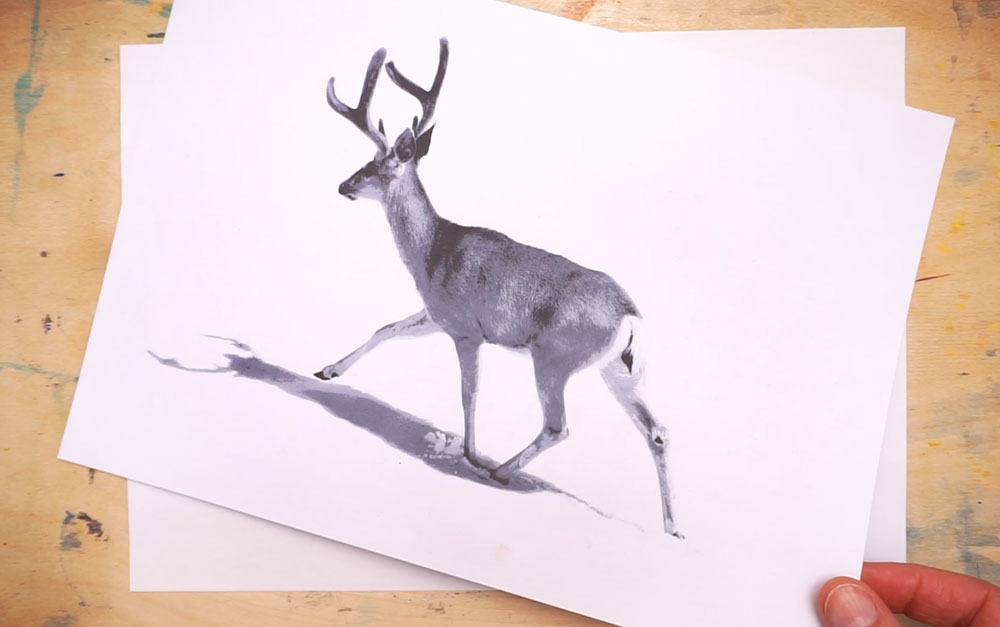
Before painting, I also created a black and white value study from the reference photo. This is really helpful, especially for beginners, because it lets you focus on light and dark without worrying about color.
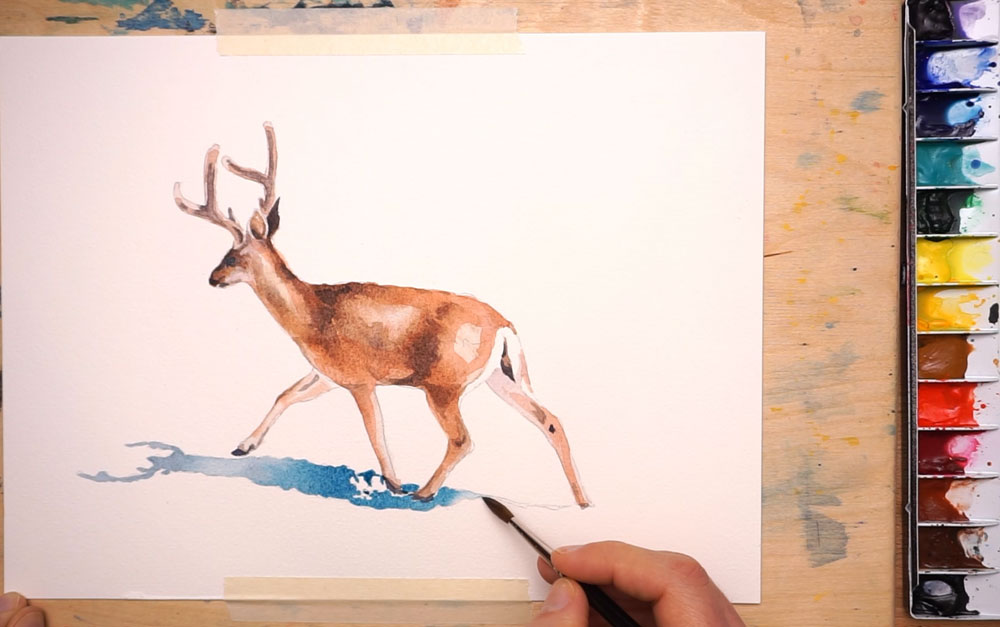
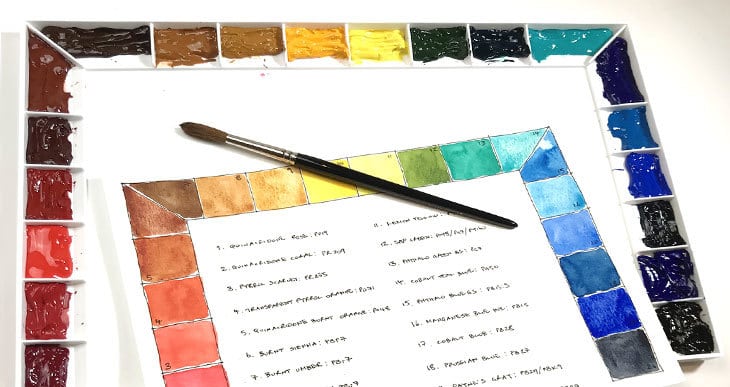
And for the paint colors, I’m mainly using earthy browns — burnt sienna and burnt umber — along with French ultramarine and a bit of Phthalo blue. I also used small amounts of quinacridone rose and pyrrol scarlet for warmth, and right at the end, just a tiny bit of Payne’s gray.
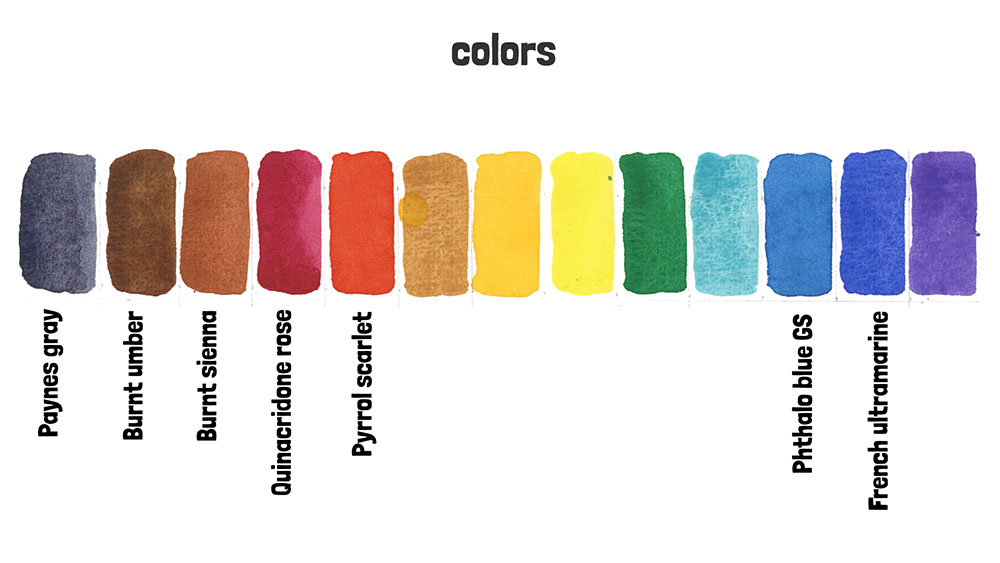
- Phthalo blue GS – Pigment number: PB15:3
- French ultramarine – Pigment number: PB29
- Quinacridone rose – Pigment number: PV19
- Pyrrol scarlet – Pigment number: PR255
- Burnt sienna – Pigment number: PBr7
- Burnt umber – Pigment number: PBr7
- Paynes gray – Pigment number: Pb29/PBk9
For the first layer, I’m just laying down the basic foundation colors.
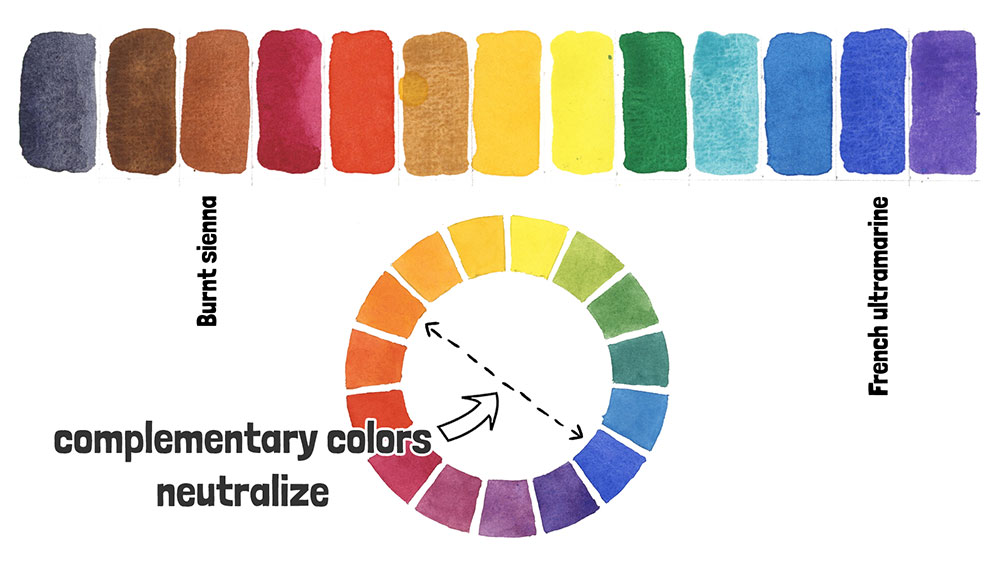
I start by mixing burnt sienna with a little French ultramarine and plenty of water to create a very light, diluted brown. Blue and orange are opposites on the color wheel (what we call complementary colors) and when you mix them together, they neutralize each other. I use that here to get a natural, muted brown rather than something too bright.
I’m working wet-on-wet for this first layer. Wet-on-wet simply means I’m painting onto paper that’s already moist, which allows the colors to spread softly and blend on their own.
Using this approach, I paint most of the deer with that light, desaturated brown, making sure to leave the white highlights untouched – for example around the tail and along the flank.
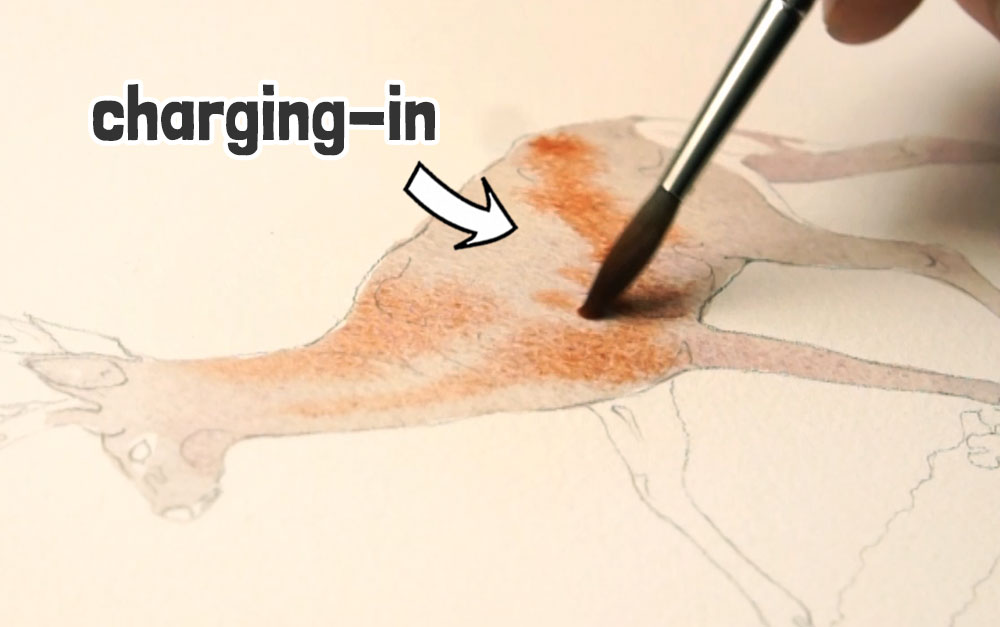
I mixed a bit of quinacridone rose, and while the paper’s still wet, I dab it in where the reference shows pinkish colors. Checking the photo up close helps me look for those small variations in color. (by the way dabbing in paint to a moist surface like this is a technique called “charging-in”)
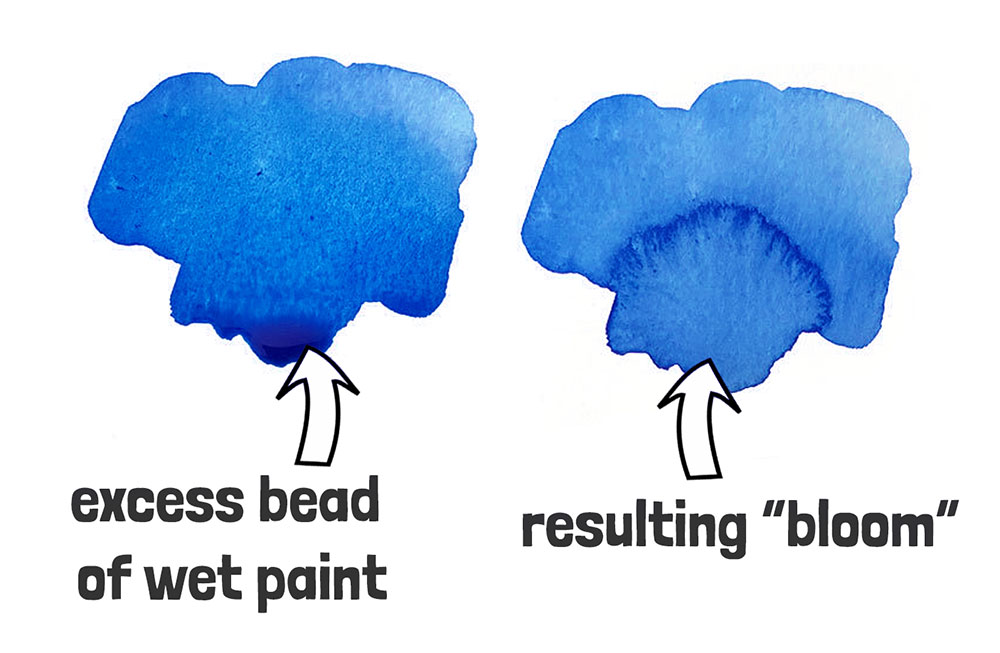
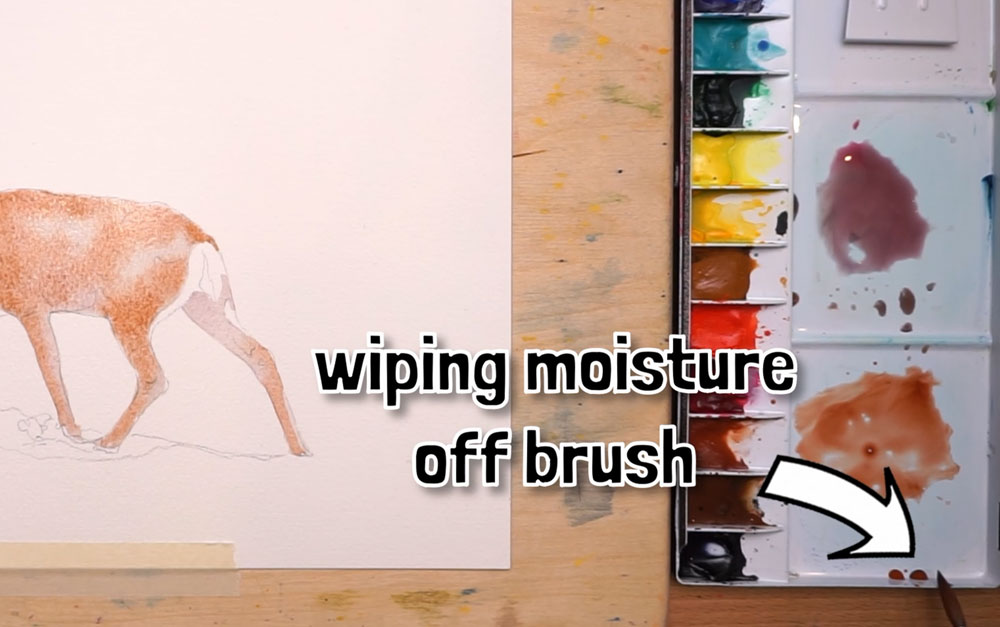
Still working wet-on-wet, I then dab in some burnt sienna in a few selected areas. The key here is controlling how wet your brush is: If there’s too much moisture, the paint can flood the surface and create blooms. (A bloom happens when very wet paint flows into an area that’s starting to dry, creating those cauliflower-like shapes we usually want to avoid).
That’s why you’ll see me wipe excess moisture off the brush on the edge of my palette before touching the paper.
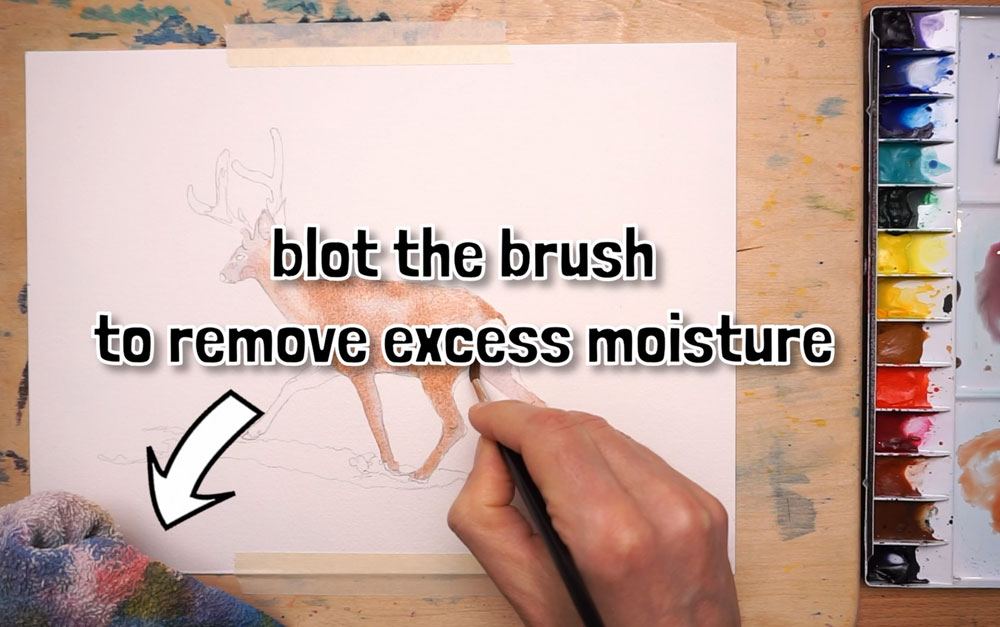
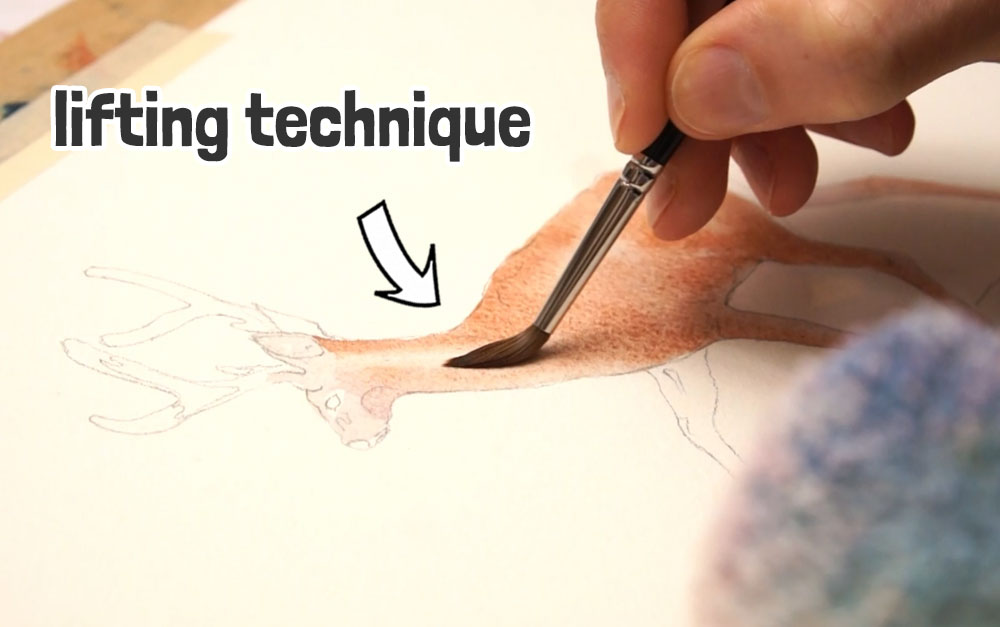
If an area becomes too dark, I remove some paint using a clean, blotted brush. Because the paper is still damp, the pigment hasn’t fully settled yet, so the brush can gently pull color off the surface (in watercolor this technique is known as “lifting”). I do this on the neck and back legs to keep those areas lighter.
While the surface is still moist, I mix a slightly darker brown using burnt umber and gently dab it into areas where I want more depth, using the value study as a guide.
At this stage, I also added a few small details to the tail, face, and ears. These are painted wet-on-dry, meaning the paper is dry, so the brush marks have sharper edges and are more controlled. I also add a very light, diluted wash to the antlers.
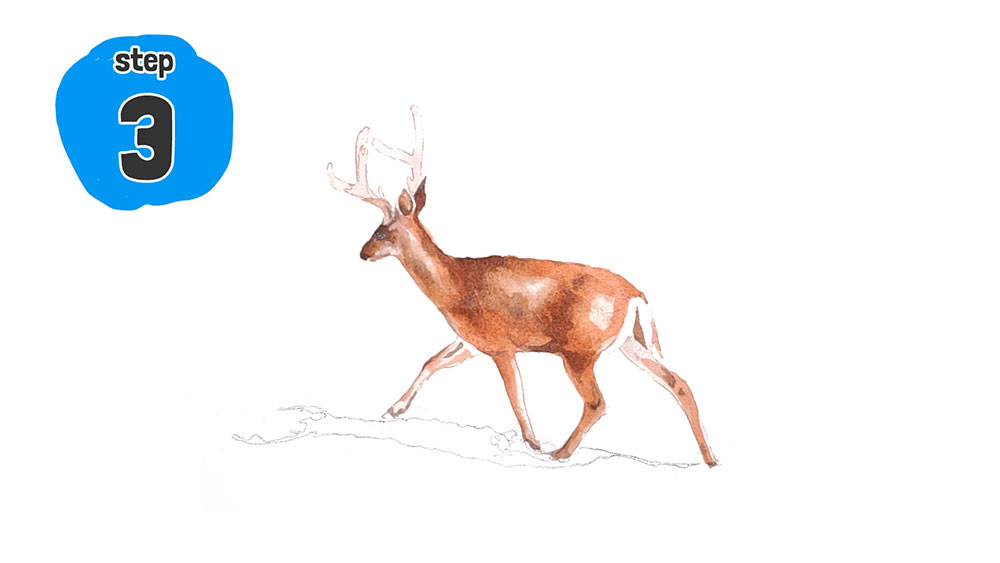
And that completes the first layer. Leave everything to dry before moving on… this first step sets the overall colors and the basic light and dark shapes for the rest of the painting.
Step 2 – Building form with darker mid-tones
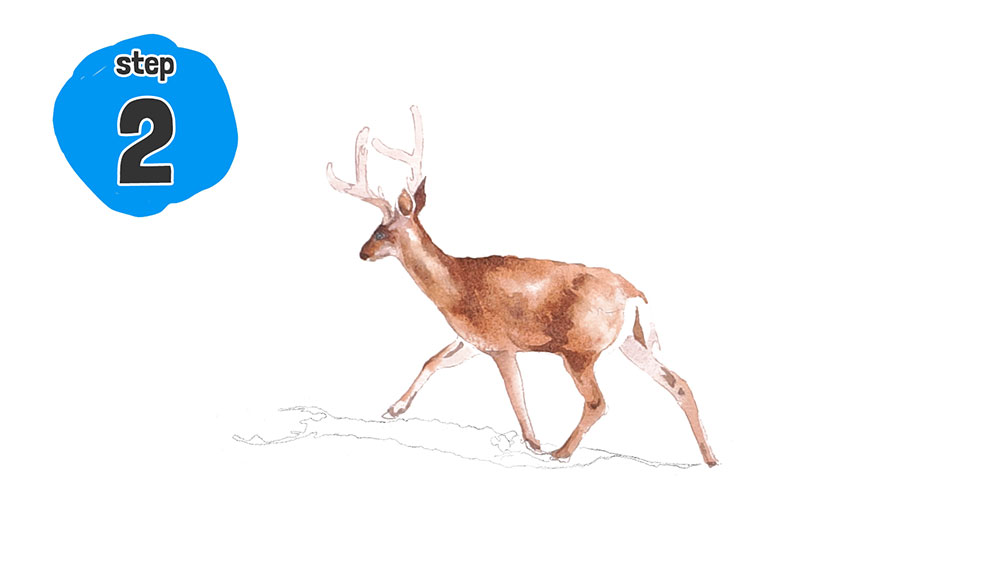
The goal for the next step is to start adding darker mid-tone shapes to help describe the three-dimensional form of the deer.
I mix up a darker brown by adding French ultramarine into burnt umber.
Again, because blue and orange are complementary colors adding blue darkens and neutralizes the brown without making it muddy.
Looking at the reference photo, I paint wet-on-dry shapes where the fur appears darker along the neck and body. These initial brush marks have fairly sharp edges. So before the paint dries, I rinse my brush, blot it on a cloth, and gently soften the edges. Using a dryer brush like this blends the darker paint into the lighter layer underneath without causing those blotchy blooms!
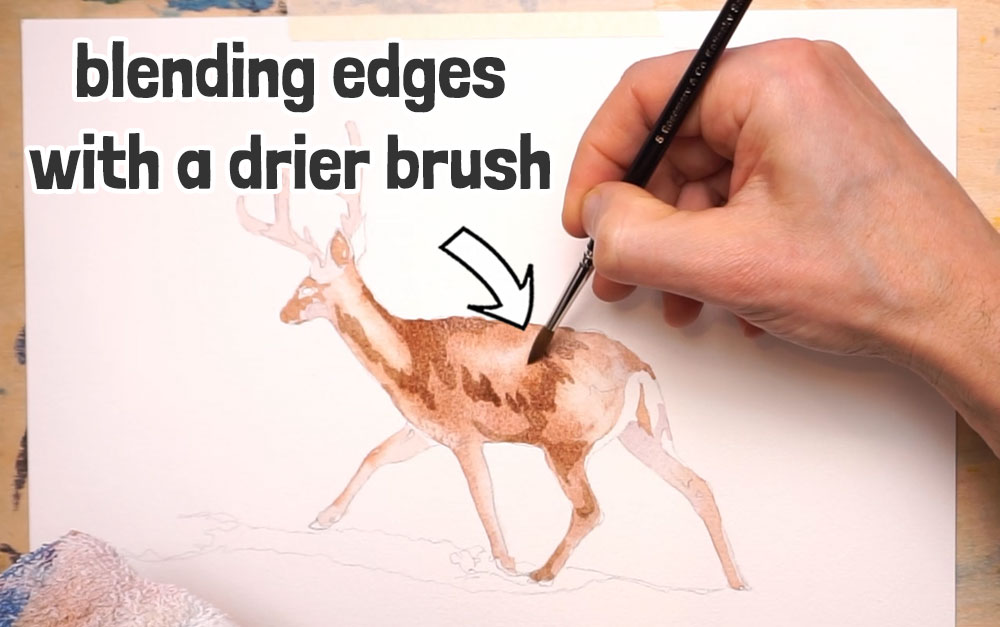
The surface is now slightly damp, so I mixed up an even darker brown and charged it into some of these areas. The paint spreads naturally and creates soft dark shapes without hard edges.
I then focus on the head, painting small features like the eye, nose, and ears. And before those shapes dry completely I soften the edges so they don’t feel too harsh. Then I dab in a warmer brown color while the area is still moist, using burnt sienna to keep the colors varied and interesting.
That completes step two.
Step 3 – Warming the overall color with a glaze
The goal in this step is to warm up the overall color of the deer.
At this point, the painting feels a bit uniformly brown, or maybe a little bit muted compared to the reference, (which if you look closely has some nice warm orange colors).
So I mix a transparent orange using burnt sienna with a little pyrrol scarlet, keeping it nicely diluted. I added this color using a “glazing technique” – this is simply a transparent layer painted over dry paper, so the layers underneath still show through.
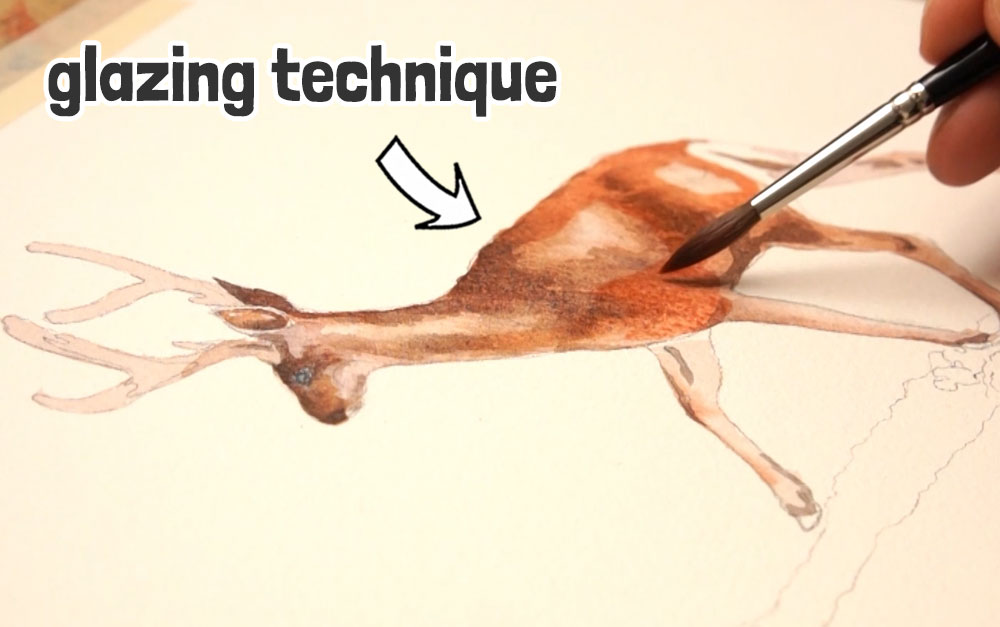
You can see I apply this glaze over a few parts of the body – but not everywhere – deliberately leaving out lighter or more neutral areas. And I’m keeping an eye on the reference photo to guide where these warmer tones belong.
Notice that I left these brush marks mostly unblended, with hard edges. But because the paint is transparent, the edges don’t feel harsh, and they visually blend into the painting while adding a bit of color variation and interest.
Step 4 – Adding the darkest details and final structure

Now it’s time for the darkest values.
I mixed up a much darker gray-brown color by adding more French ultramarine into a puddle of burnt umber. With this, I add strong dark details to the head — including the ears, eye, nose, and top of the head — along with a few small marks around the mouth. All of these details are painted wet-on-dry – which allows you more control.
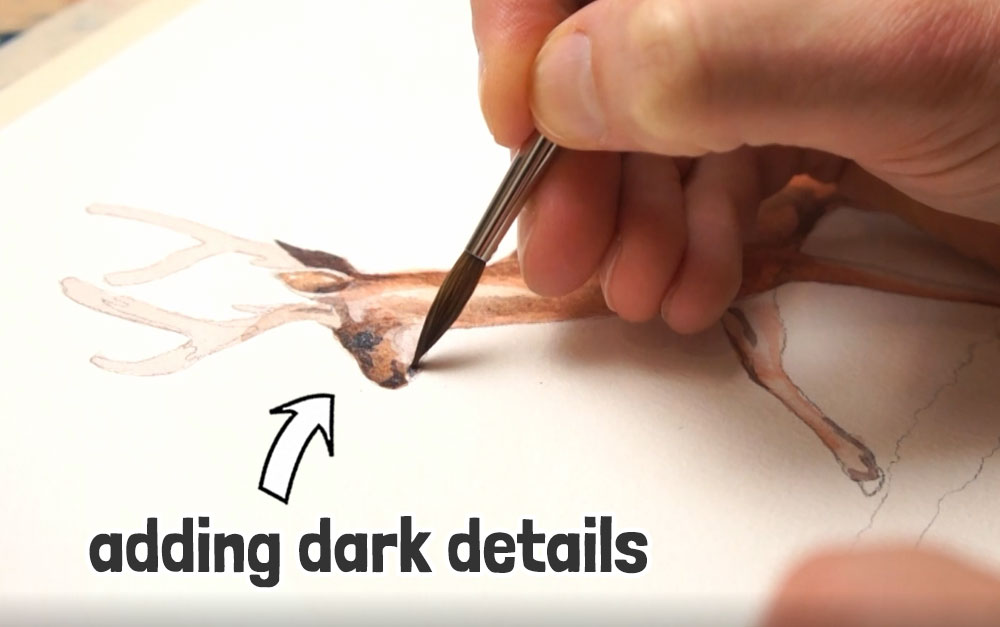
I also added small dark shapes to the tail and hooves, then moved on to the antlers. Once again the value study is very handy here.
Using the same dark mixture, I also added the final dark accents to the neck, shoulders, and under the back legs. These small, carefully placed darks make a big difference and really enhance the three-dimensional feel of the painting.
And to finish this step, I added a warm orange-brown glaze over the antlers to tie them visually back with the rest of the body.
Step 5 – Painting the shadow on the snow
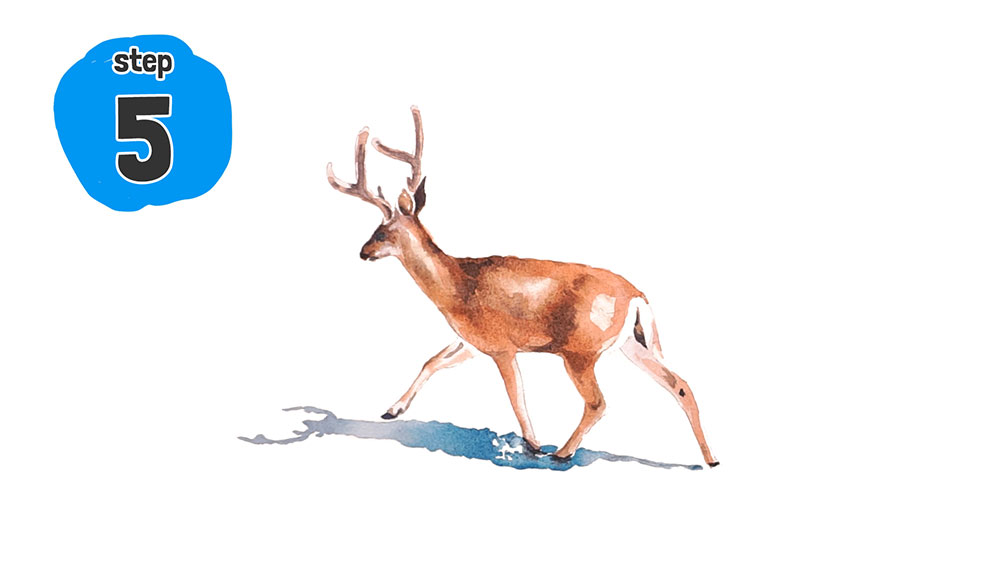
The final step is painting the shadow.
In the reference photo, you can see the shadow leans toward blue. Snow shadows often appear blue because they reflect the color of the sky, so I mix French ultramarine and phthalo blue with a bit of burnt umber to create a soft blue-gray color.
I want the shadow to have a bit of variation, and not just paint one uniform color across the whole shape. So I started painting the shadow on one side, then I rinsed my brush and gradually pulled the color outward using clean water. This creates a gentle transition from dark to light.
The shadow is strong directly where the deer’s feet meet the snow: so while the paint is still damp, I add a little more phthalo blue to the mixture and keep painting. Working wet on wet keeps everything soft and blended, and the slightly stronger blue adds some variation.
As a final touch, I added a small amount of Payne’s gray where the hooves meet the shadow. This softens the edge and helps visually anchor the deer to the ground.
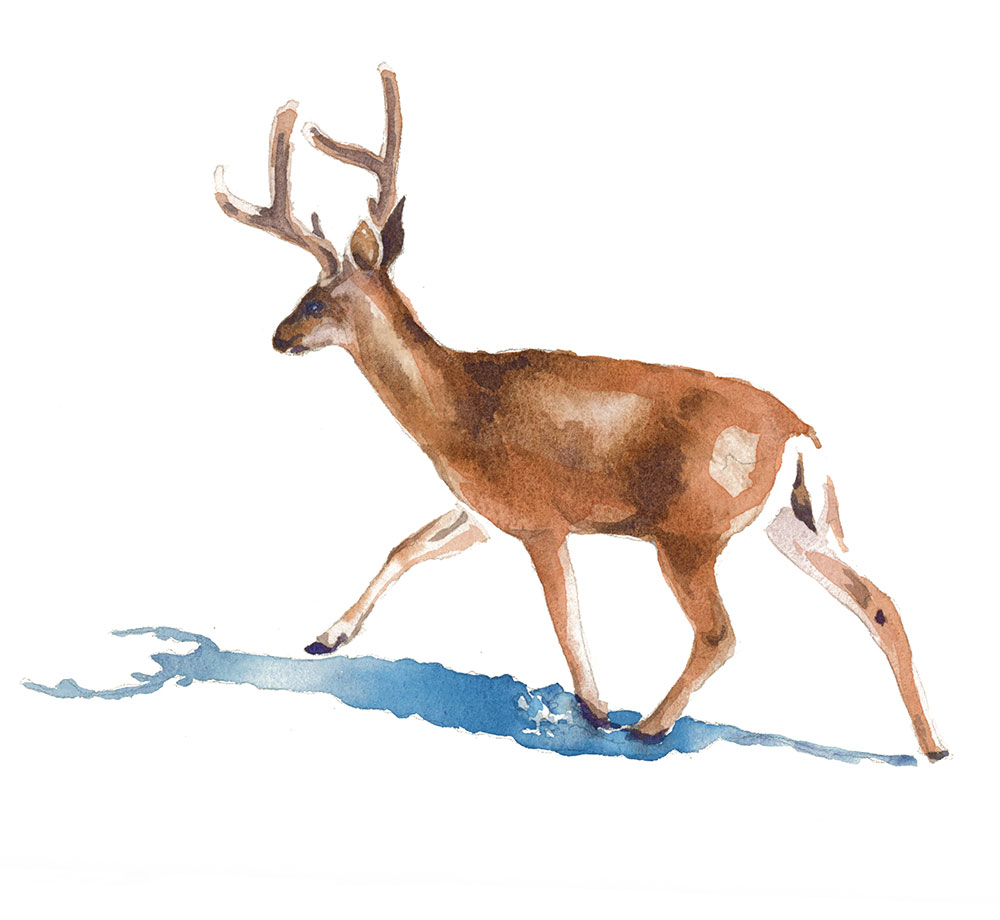
And with that, the painting is finished!

Thanks for the color mixing instruction.
Hi Anthony and thank you again for your great instructions. I’m looking forward to painting this deer. Best wishes Patricia.
Have fun Patricia
This is great! I have trouble watching videos due to health issues , so a text version of lessons like these are wonderful. Thanks so much 🙂
Happy to help Felicia
This is a great project to add into the Masterclass (I think). It shows all the foundational steps very well.
Glad you liked it Justin 🙂
Great Anthony, you are ever the best!
🙂