
This 3-Step Shading Secret Changed My Watercolors!
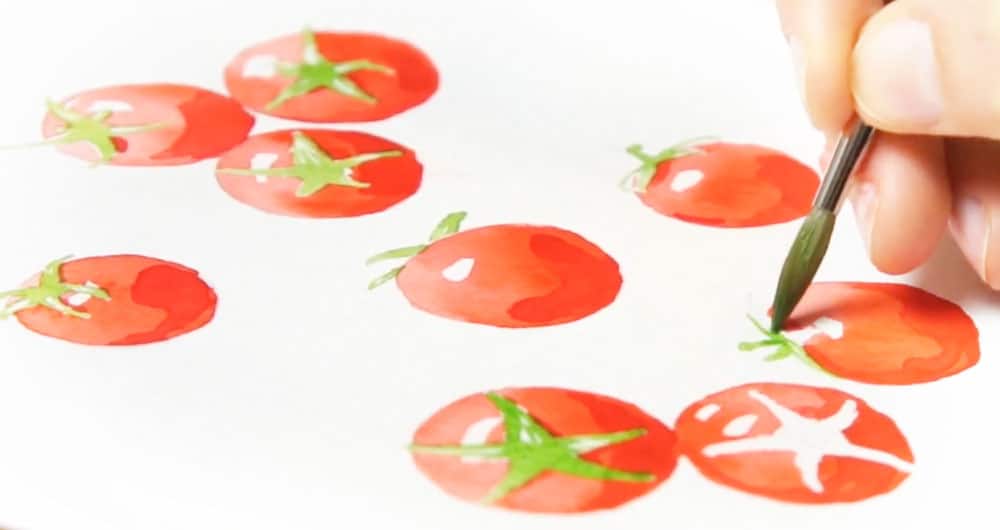
Have you ever found a photo you’d love to paint and then just sat there not really knowing where to begin?
Or maybe it’s the other way round. You can follow along with a tutorial and get a decent result, but when you try it with one of your own photos it comes out looking flat.
Both of those usually come down to the same thing: Looking at a photo and working out how to paint the shading – how do you interpret which parts are in light, and which parts are in shadow.
Because when you get the shading wrong the painting looks flat no matter how carefully you paint it.
So in this lesson I want to show you a way of simplifying all the shading in a photo. I call this a ‘three-value’ approach – and once you can see a subject that way, you should be able to break almost any subject into a few simple shapes you can actually paint.
Painting Tomatoes in Watercolor (Realism & Depth)
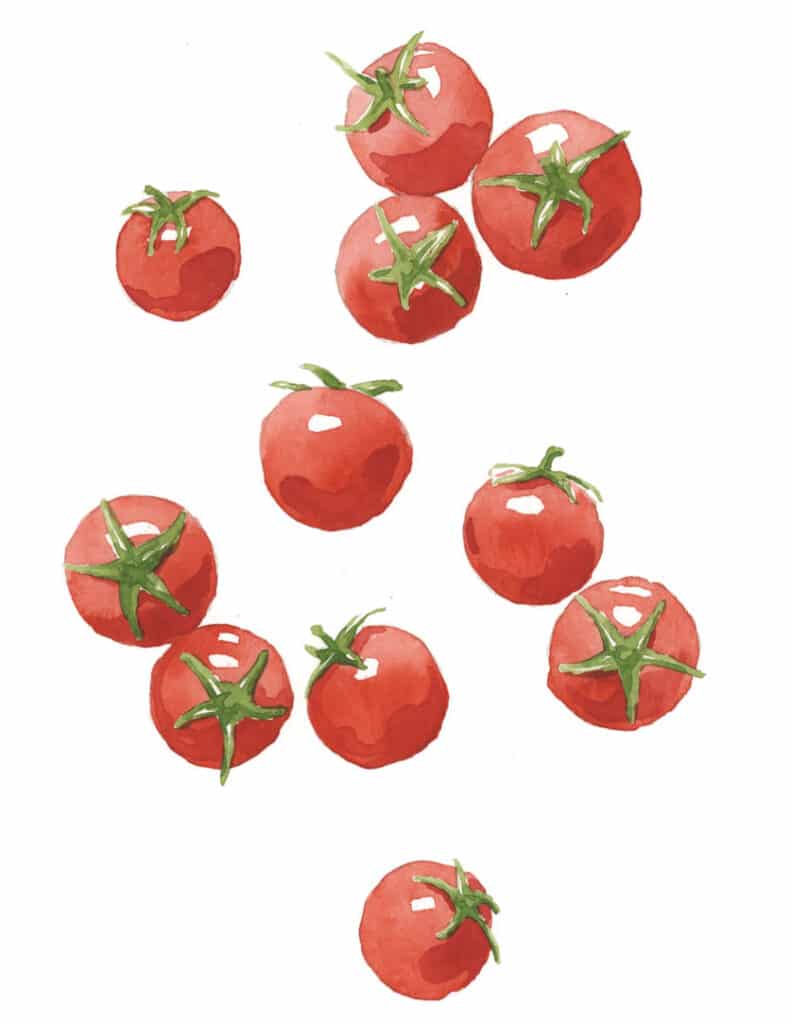
If you want to practice this painting with me, the full lesson, including all reference images, is available on my Patreon
It’s part of my ‘purposeful painting’ series, where each lesson focuses on one specific skill or idea so you can improve one step at a time. New lessons are free for the first few days
I spend a lot of time trying to simplify the subjects that I paint. It helps me visualize the painting process better. And I believe this helps artists like yourself understand the process too…
Painting is all about interpretation!
We interpret the subject we want to paint into a series of shapes on the paper. And to add depth and realism, artists rely on “values”.

Values is just a fancy way of identifying the range of tones from light to dark that an artist uses to create depth, and contrast in a work of art.
Trying to identify every subtle shade of light and dark in a reference image can be very challenging. In real life the range of tonal values can be pretty overwhelming.
This watercolor painting that I’m going to show you is based on a simplified use of values.
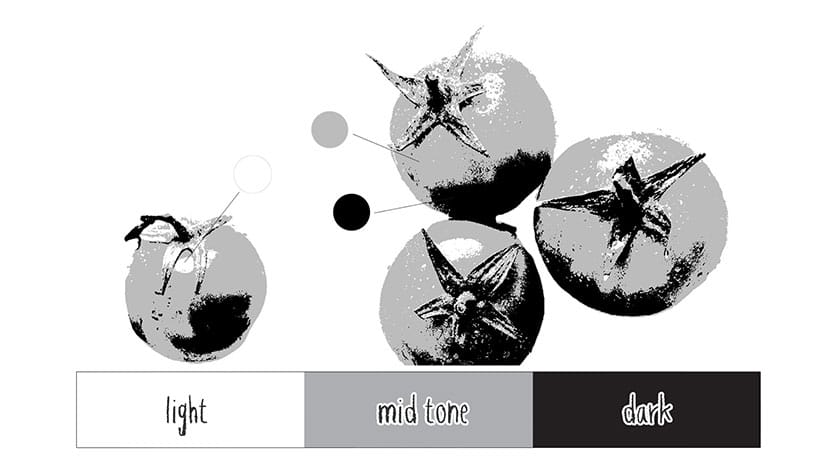
In other words I will break down the values into just three components:
- Light
- Mid-tones
- And darks
And to be honest, this is all you need to start creating depth and realism in a painting!
Watercolor Tomatoes Step by Step Process
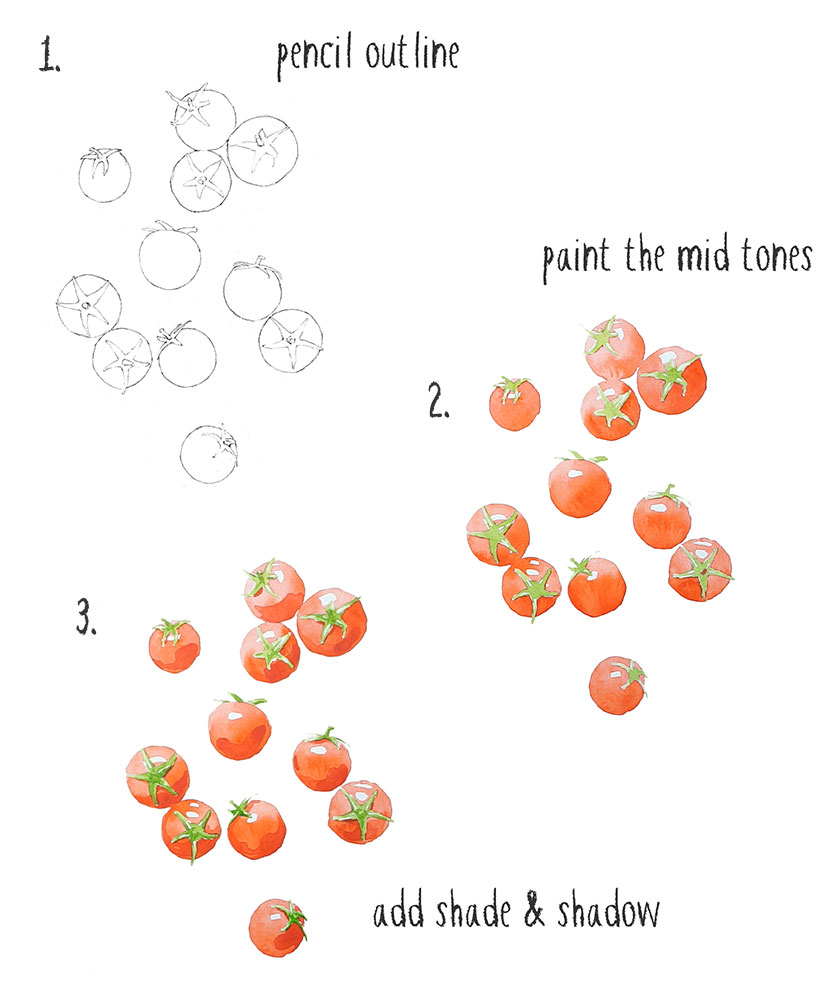
So before we begin, here are the basic steps to this painting:
- Draw the pencil outline
- Paint the midtones, leaving the white paper blank to show the highlights
- Then add the darker shades on the shadow areas of the tomatoes.
And that’s it!
Step 1
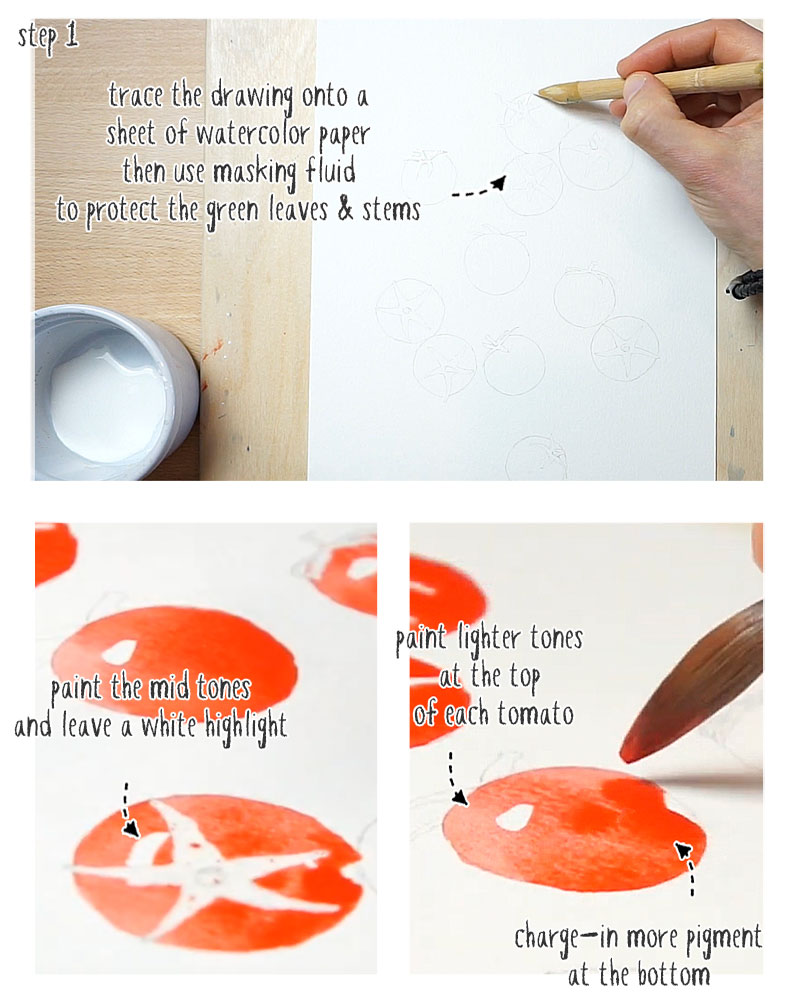
Begin by tracing the outline of the subject onto a sheet of watercolor paper, then tape it down onto a board.
I’m going to start by painting the red tomatoes. To simplify this step I used masking fluid to protect the green stems and leaves. This just makes the process easier because you don’t have to paint around the detailed shapes of the stems. You’ll be able to paint the tomato shapes quicker and more freely.
When the masking fluid is dry, the first step is to paint the mid-tones! At the same time you’ll be painting the highlights by leaving the white paper untouched in a few chosen places.
Before painting the tomato shapes, think about where the light is coming from. In this example the tomatoes are lit from above. This means I need to leave a sharp white highlight at the top of each tomato.
Also notice that I’m not simply treating each mid-tone shape as one uniform color!
Because I know the light is shining from above, I’m using this idea to paint a lighter toned color at the top, and charging-in more pigment towards the bottom of each tomato. This variation in tone across the shape helps suggest light and dark shading and a better feeling of three-dimensional depth.
Paint the other tomato shapes using the same method, and remember to leave a small white highlight.
You need to leave the paint to dry before moving on. If you’re impatient, like me, you can use a hairdryer to speed things up!
Step 2
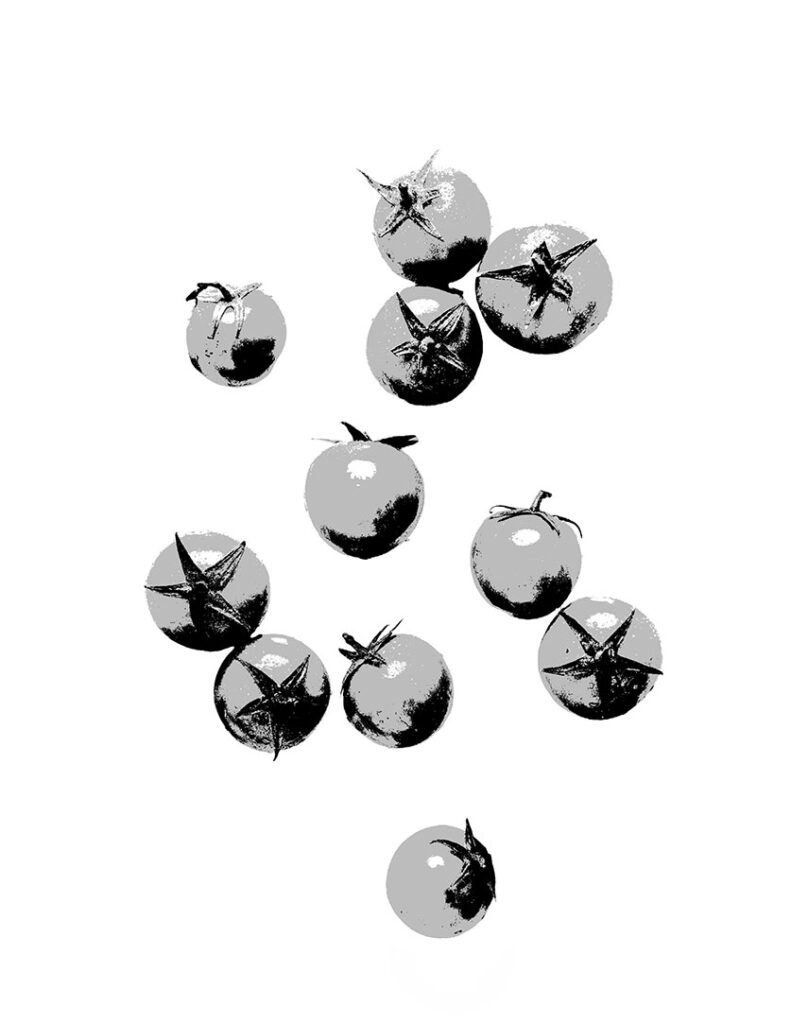
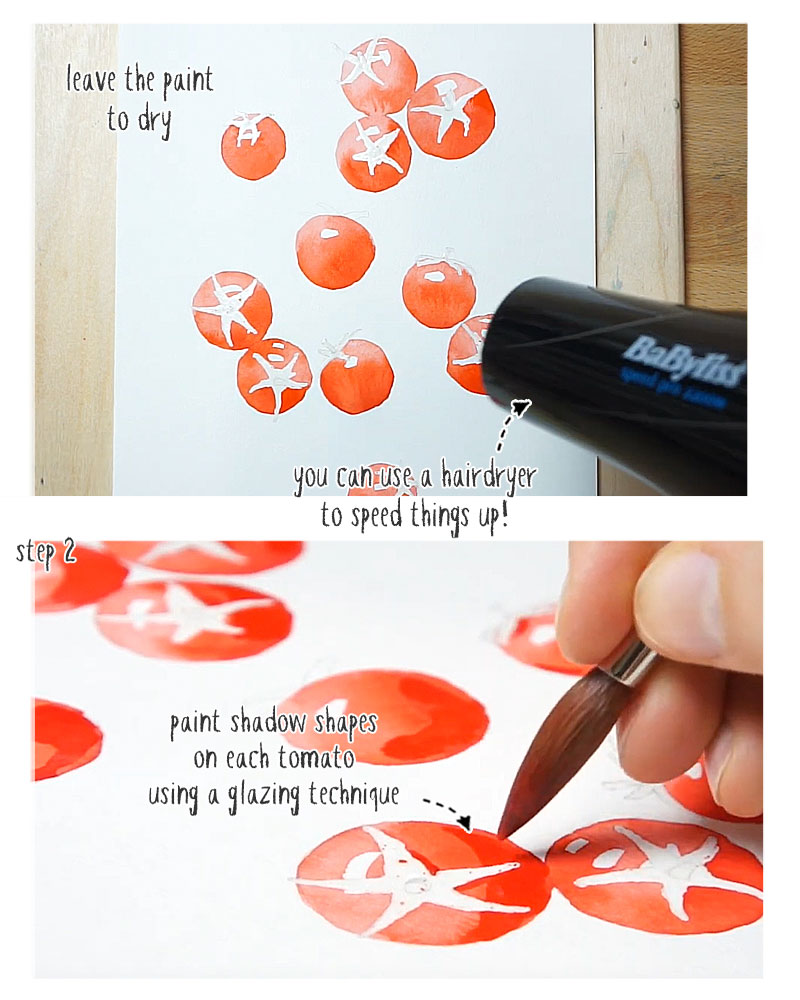
The next step is to paint darker shapes to represent the form shadows on the tomatoes. You can see these rough shapes here in this monotone value image. (All of the reference images and studies are available on my Patreon page).
Painting onto a dry surface like this is a glazing technique. The new layer of brush marks will naturally darken the color appearance making shadow shapes on the tomatoes. Also, don’t worry about blending out the edges to get a smooth transition from light to dark. Painting hard-edged shapes like this is enough to suggest shade and shadow.
You can also see me add a small shadow underneath the leaves and stems.
Continue painting an approximate shadow on each of the tomatoes, then leave the paint to dry again.
Step 3
Now we can move on to painting the green leaves and stems.
Start by removing the masking fluid. The best tools for this are a rubber cement eraser like the one I’m using here (see photo), or a standard kneaded eraser.
To paint the stems and leaves we’ll use exactly the same method as before. In other words, this first layer of paint represents the mid-tones. And you can leave small shapes of white paper to represent the bright highlights. You might also want to change to a smaller brush for this part of the painting.
Paint all the leaves and stems then leave the surface to dry.
All that’s left now is to paint a few darker brush marks to represent the shadow shapes on the leaves. Again, follow the principle that the light source is coming from above the subject.
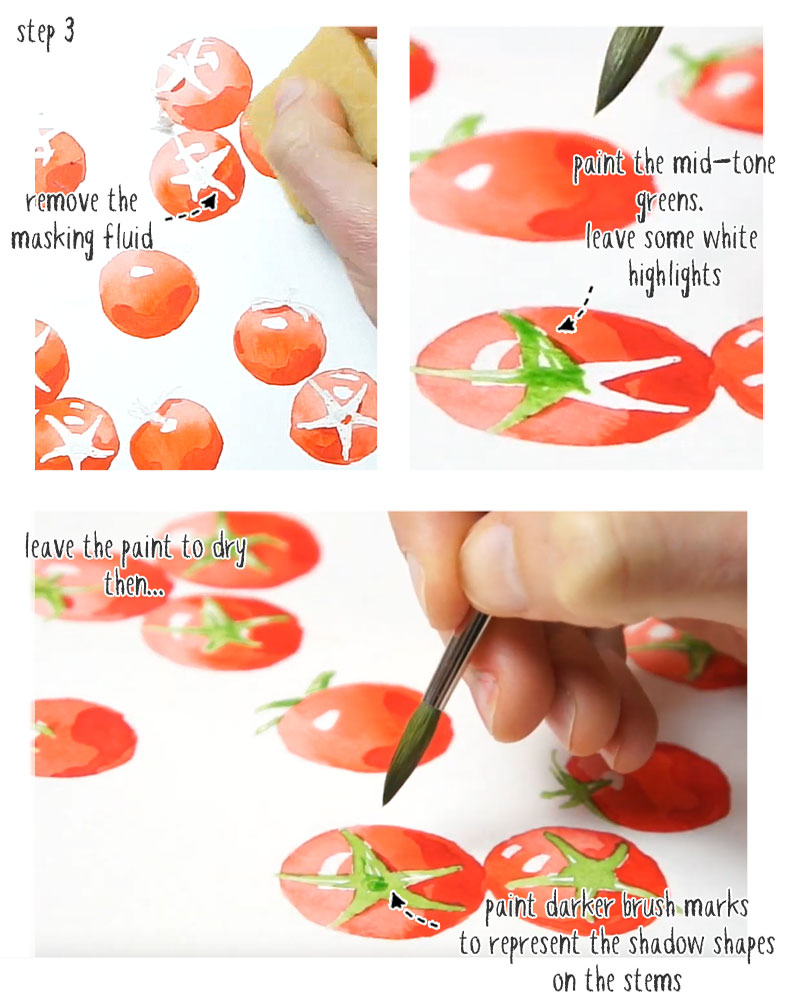
This painting involved just three simplified values: lights, mid-values, and darks. And I didn’t have to judge every bit of shading in the photo, just decide which of the three each part belonged to. And I think the tomatoes still look pretty good!
Which leaves the obvious question:
How do you work out those three value shapes on a photo of your own?
The old-fashioned answer is to use a ‘value-finder’. This is a printed card with a strip of grays running from white to black, and each gray has a little hole punched in it. You hold it over one part of your photo and move it around until one of the grays matches. Looking at a small part of the reference on its own like this, makes it much easier to judge how dark something really is.
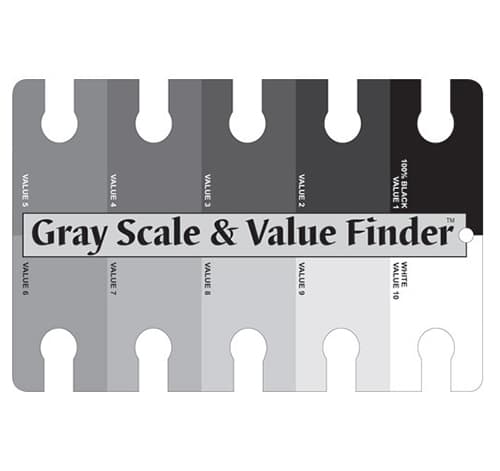
However, this tool can still feel quite difficult with complex photos.
These days, you can also use your phone. There are apps that turn a photo into black and white and then reduce it down to just a few values, so you can see the light and dark shapes without color getting in the way. The ‘See Value’ and ‘Value Study’ apps are the two I use.

And for those of you in my masterclass, I’ve built a Tonal Value Study Generator, which does the same job on a computer. You upload a photo, and there’s a slider to set how many shades you want.
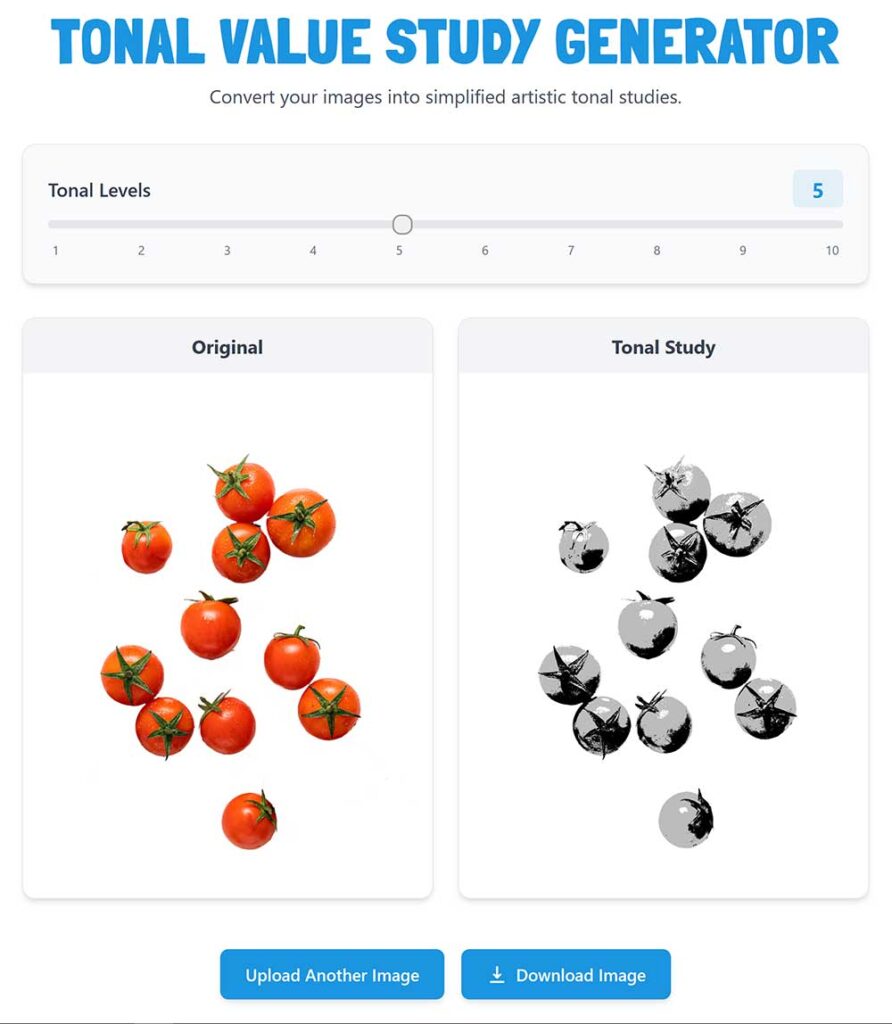
That’s all a value study is. A way of seeing the highlights, mid-tones and shadows before you’ve got a brush in your hand, instead of trying to work them out while you paint.
And the more complicated the photo, the more it’s worth making one first 🙂
You can watch the full step-by-step video lesson plus download all the references on my Patreon:
Paints used:
Hansa Yellow Deep – https://tidd.ly/4uz4y1q *
Pyrrol scarlet – https://tidd.ly/4e8KSg6 *
Phthalo Green Blue Shade – https://tidd.ly/43A4MdS *
Other supplies:
Schmincke Aqua masking fluid (I prefer an odorless version like this one) – https://tidd.ly/4gb6aeb
Rubber cement frisket remover – https://tidd.ly/4qxbL1R
Bamboo reed pen – https://tidd.ly/4cluSGr
Meeden 100% cotton paper – https://amzn.to/40Nc8uc *


I have purchased your Watercolor Masterclass but am yet to receive the login information which according to the receipt should have arrived within 10 minutes. The email is definitely not in my junk folder. my invoice is 000003001. I have sent 2 previous emails for the same information. I realize it is the weekend but a digital product should be available immediately. Please respond.
Mike
Hi Mike
I’ve sent you a couple of email replies – can you confirm that you’re getting them?
Cheers