Day 3 Challenge: Putting it all Together
Welcome to Day 3!
So far, you’ve been getting to grips with transparency – through techniques like glazing and negative painting.
Today, we’re going to take things a step further by focusing on watercolor’s other key characteristic:
- how it moves and flows because of water
Water control is one of the trickiest parts of watercolor painting, especially for beginners. It’s also the reason why “wet-on-wet” techniques were developed. This simply means adding wet paint onto a wet surface – either pre-wetted paper, or paint that’s still damp.
Techniques like this allow colors to flow, and create beautiful soft blends.
So in this lesson, we’ll take a look at a few essential wet-on-wet techniques to help you gain more confidence during the tricky “wet stage” of painting.
For example, these include:
- Graduated washes (blending smoothly from light to dark)
- Charging in (dropping in color while the surface is still wet for soft transitions)
In this lesson you’ll see how in the early stage of a painting you typically block in the big shapes using wet-on-wet blends of color – creating a kind of foundation, or “underpainting,” that you can build on later. Once that’s dry, we’ll switch to wet-on-dry techniques for adding sharper edges and detail.
To bring this all together, I’ll be showing you how to paint this delicious-looking macaron. It might look a bit complicated, but I promise it’s a fun, beginner-friendly subject 🙂
So grab your brushes to make your own “macaron masterpiece” in just a few easy steps.
The colors I used for the painting were as follows:
- Burnt umber
- Burnt sienna
- French ultramarine
- Payne’s grey
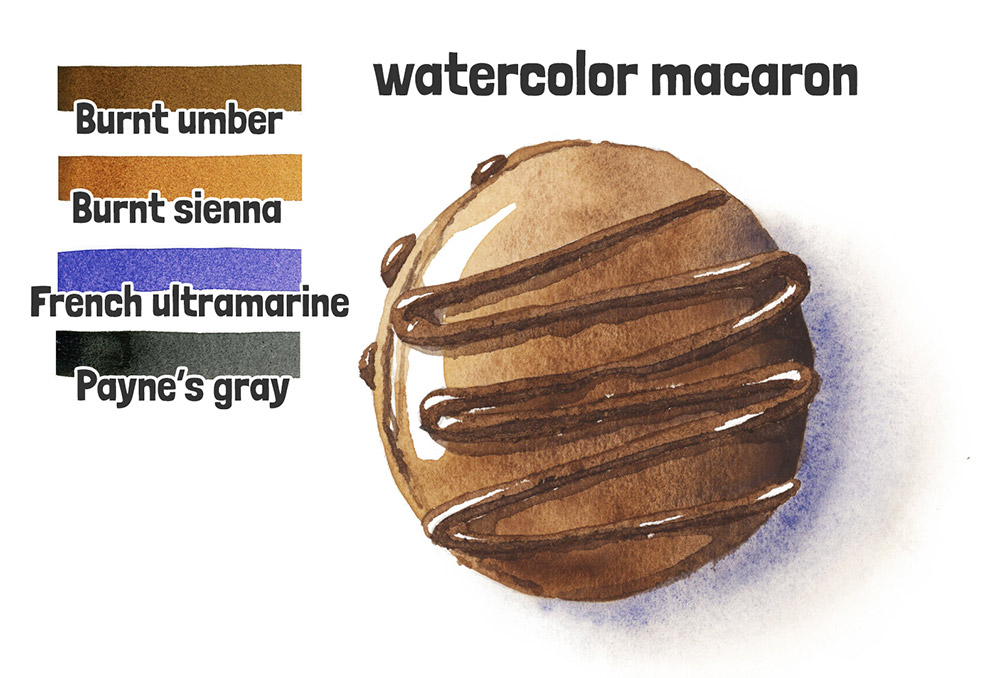
And for best results, you’ll also need some masking fluid.
Step 1 – Getting Started
Begin by sketching the outline of the macaron onto a sheet of watercolor paper.
When you’ve completed the sketch, tape the sheet onto a flat board with some low-tack masking tape. Before painting the first brush stroke you need to protect the wavy line that represents the icing using masking fluid.
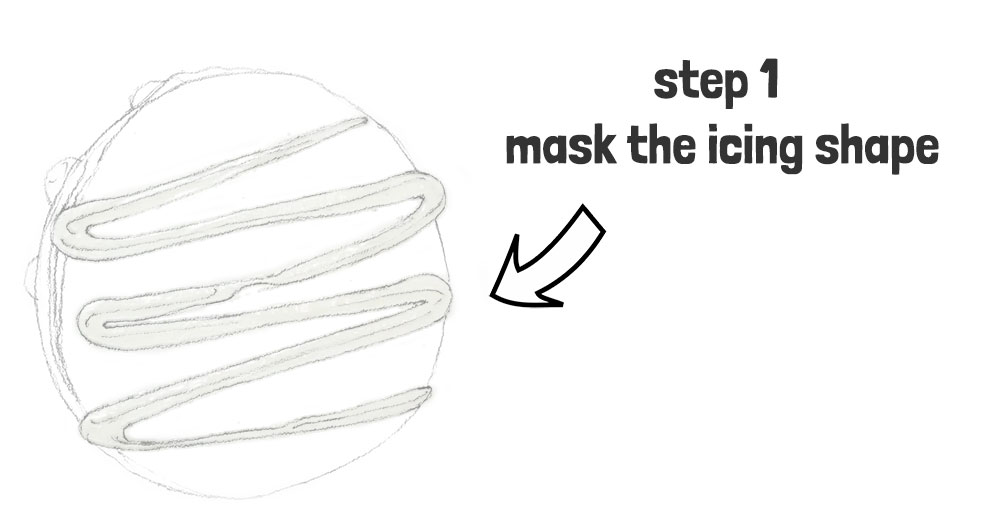
Doing this will make the painting process much easier, and it will let you paint the whole macaron shape with uninterrupted brush strokes, giving you a much smoother result.
I used a bamboo quill pen to apply the masking, and a hair dryer to speed up the drying process!
Step 2 – First Wash: A Soft Gradient
Next we’re going to apply the foundation layer of paint, by painting the whole macaron shape in one go.
To do this I mixed up a puddle of brown paint using burnt umber. I then start to fill in the shape. But I’m being careful to leave a fairly big white highlight in the top left corner of the macaron.
Note that in the reference I’m using, the light is coming from the upper left – this will influence the way you shade and shadow the macaron.
My first brush strokes use a pretty diluted mix of brown. And as I progress from the upper left to the lower right hand portion of the shape, I’m adding more and more paint into the mixture, making a more intense color. In this way I’m suggesting the direction of the lighting, and making a more convincing three-dimensional effect.
💡 This soft shift from light to dark is called a graduated wash — this is a classic wet watercolor technique that uses the flow of water to blend the paint naturally. Watch how the water and pigment interact — this is something quite magical, and unique to watercolor painting!
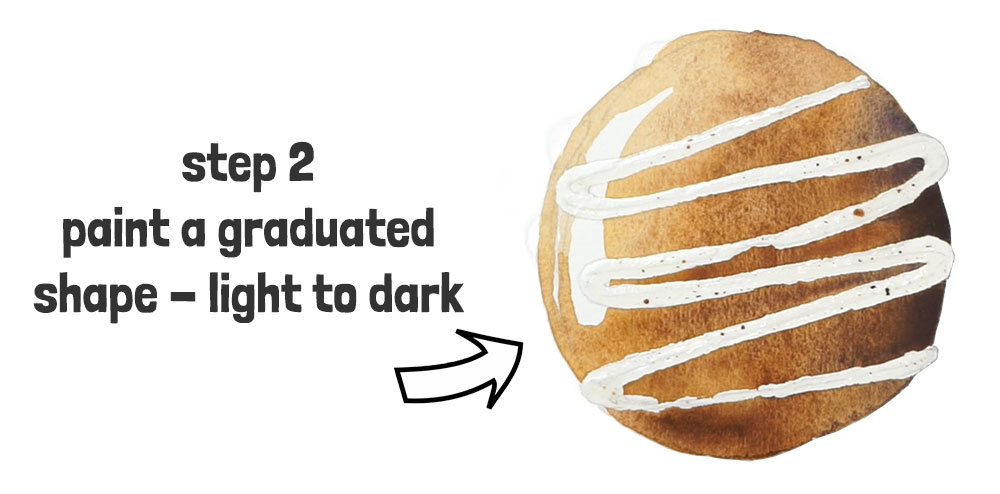
To make the shaded side of the macaron even darker, you can add some french ultramarine blue into the mixture. Mixing with a complementary color like this is a good way to neutralize a color.
Step 3 – Shading & shadows
Leave the first layer to dry then in the next stage we’ll add some shading and shadows.
💡 Doing this is essential for glazing — if the previous layer is still moist, you can end up with unwanted watery blotches.
Begin by adding a cast shadow on the lower right of the macaron. I started with an extremely diluted puddle of Payne’s grey, which I blended out to almost nothing. After I had defined this shadow shape, I charged in a more intense mix of grey into the damp wash, adding a stronger color close to the edge of the macaron.
💡 This technique — applying wet paint into a wet area — is called charging in, and as you can see it creates beautiful soft edges and blending.
Leave the cast shadow to dry so you don’t smudge the paint while painting…
Next I used a mid-toned brown color to add a cast shadow to the curvy icing.
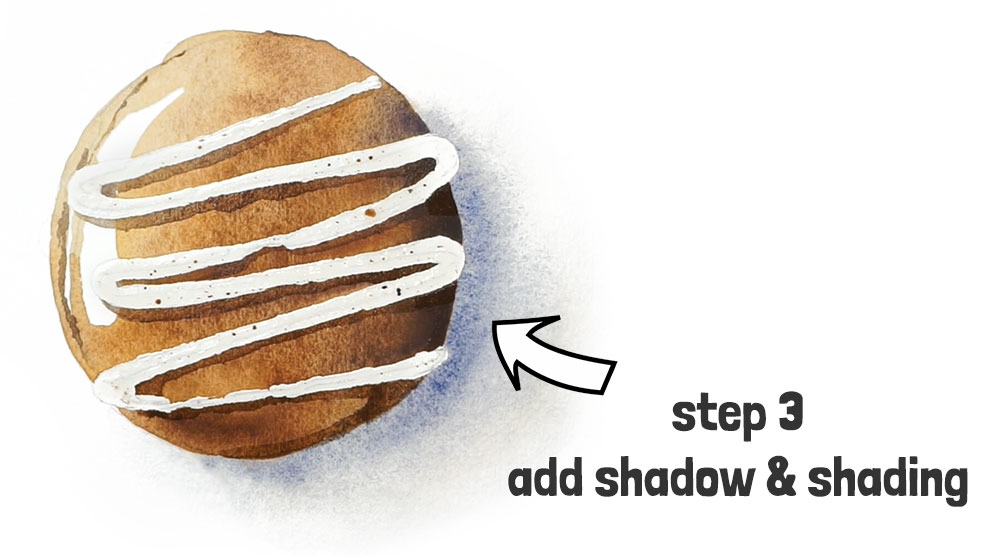
Do to this, think about the direction of the light and add brush strokes to the shadow side of icing all the way down to the bottom. Notice we’re building up layers to add more detail and a three-dimensional effect.
I’ll let you follow along in the video so you can see the brush marks I used to paint these shapes.
Finish off with a few lines of darker detail where the two sides of the macaron are sandwiched together.
💡 Notice how you’re slowly building color from light to dark — and letting layers dry between steps. That’s glazing in action again!
Step 4 – Remove the masking
Before continuing with the rest of the painting, it’s time to remove the masking fluid. You can use a rubber cement pickup tool or just an ordinary eraser. This reveals the lovely clean white paper underneath!
Step 5 – Paint the “icing on the cake”
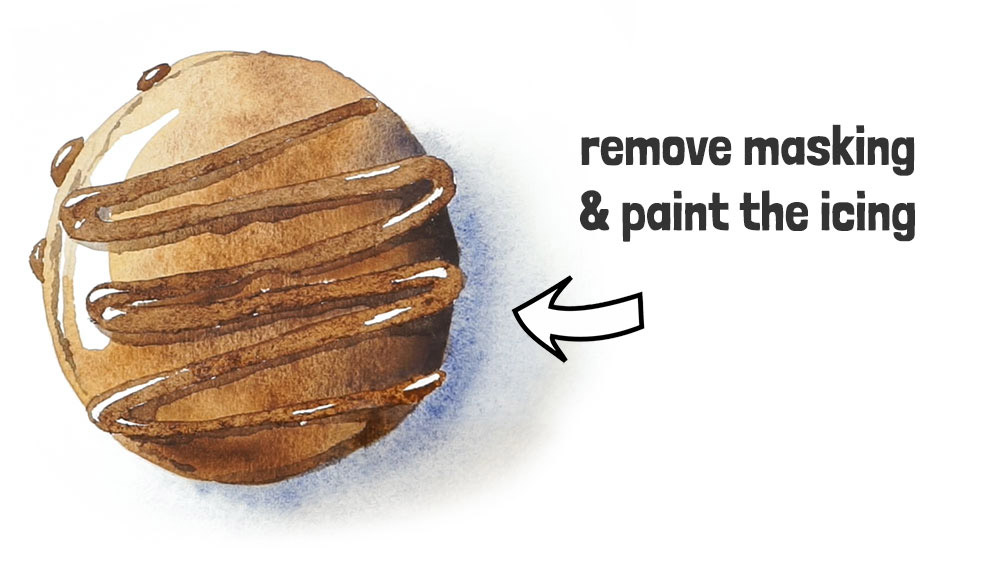
Now we can fill in the shapes of the icing. I’m using a mid-strength mixture of brown paint for this.
I began with the small blobs of icing protruding from the underside of the macaron. And since we’re now painting the details, I also swapped to a small pointed brush.
The icing shape itself is also quite shiny, so I’m being careful to leave some small white highlights on the parts of the icing shape that are turned towards the light.
💡 Remember — you’re still doing negative painting here. By leaving little white highlights within the icing, you’re letting the paper do the work – Adding contrast like this is what gives the icing a bit of sparkle!
Add a few more lines of color along the separation between the two parts of the macaron.
When the icing shape is complete, leave the paint to dry completely.
Step 6 – Final touches
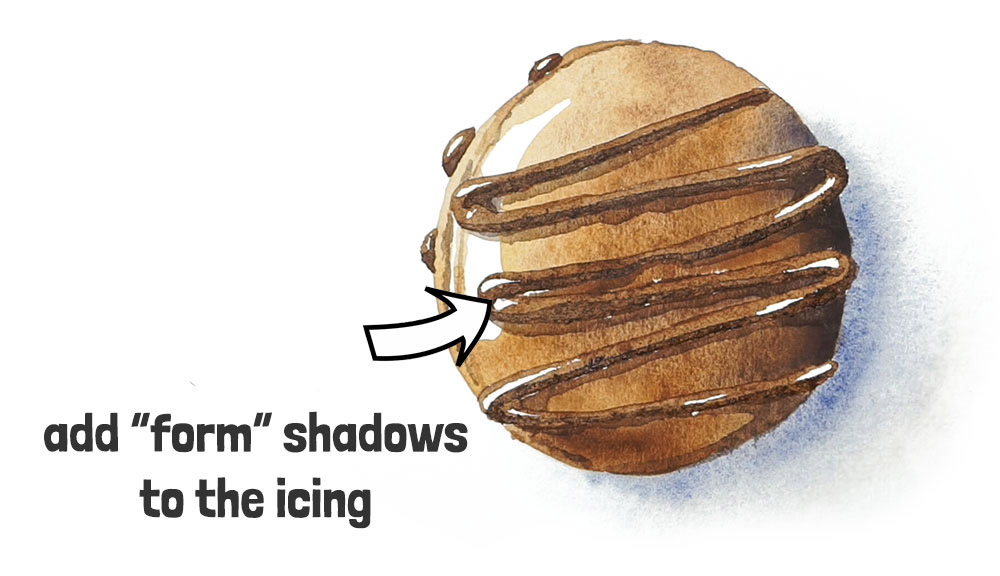
To give a more three-dimensional feel to the icing I’m going to finish off by adding some shading to this wavy shape.
We already painted a cast shadow for the icing earlier on… but the icing itself looks slightly flat. To do this I added a few brush marks to the shaded underside of the icing. This “shading” is also called the “form shadow”, this is the part of a form that is not directly illuminated by light.
Adding this adds depth to your artwork and makes it seem less flat 🙂
Anthony
Tell me how you got on with this painting… Or you can tell me about your watercolor struggles or what’s holding you back in the comments below and I’ll personally give you some guidance 🙂
Want to Learn More about Watercolors?
If you’re enjoying this and want to dive a bit deeper, I’ve got more step-by-step courses designed to help you grow your watercolor skills:
- The Watercolor Masterclass for Beginners – A flexible, self-paced course that helps you paint beautiful watercolors – without wasting years on trial and error.
- Successful Color Mixing – the guide to effortless color mixing with watercolors.
- Secrets to Water Control – Struggling with water control? There’s a method behind the magic!

Hi Anthony today with my cup of tea have time to write. I was traveling along Patagónia with my dog for the last 20 days.That to say I will return my practice with you, that I enjoy a lot and each time start a new lesson at the end for me I have clear that Mastered the technique a little bit more. Many thanks,Marcelo
Hi Marcelo, that sounds like an incredible trip!
I’m so glad you’re back to painting and enjoying the lessons…