Easy Summer Watercolor Idea for Beginners
Summer is slowly creeping up on us. Perhaps you’re looking forward to lying on a sunny beach underneath a parasol, listening to the wind and the waves…
After all this time being stuck inside, I know I am !
In this tutorial I’m going to show you the step by step process for this really easy summer watercolor painting.
This composition is designed to be extremely simple, so any beginner can give this a try. At the same time you’ll get to practice a whole bunch of different watercolor techniques such as:
- Graduated washes
- Lifting techniques
- Glazing
- Detailed brush control
And I’ll also throw in a handful of other tips & tricks along the way!
OK… But before we get started – can someone please pass me the suntan lotion?
Summer Watercolor Painting Idea
This is the reference photo for this painting. As you can see it has a nicely balanced composition with the parasol on one half of the diagonal and the sky on the other. But another thing I liked about this is the complementary colors.

In color theory, complementary colors are any two hues that are on opposite sides of the color wheel. This orange and blue combination has a high level of color contrast and sets up a nice dynamic color harmony.
Summer Watercolor Step by Step Tutorial

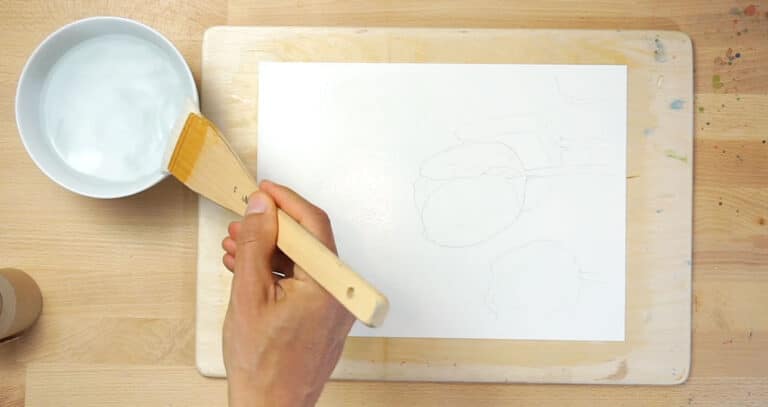
After you’ve transferred the outline sketch onto a sheet of watercolor paper, tape it down around all the edges with some masking tape. I’m going to be painting the whole of the paper surface with some big washes of color, so doing this will help keep the paper flat while you work.
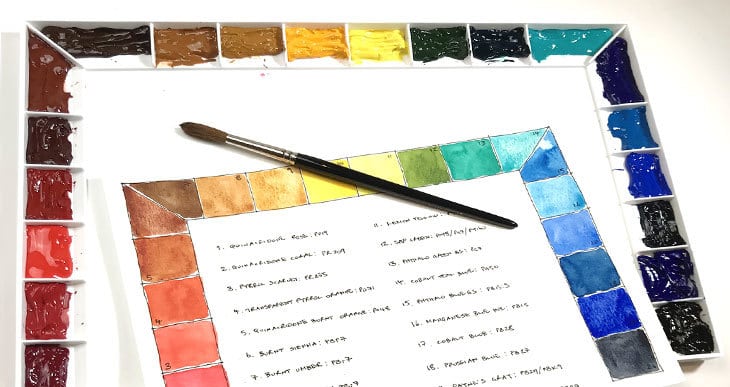
By the way, you can download the sketch outline and reference photo for this project below. – plus, here’s a list of the paints used for this painting:
- Phthalo Green BS – Pigment number: PG7
- Phthalo blue GS – Pigment number: PB15:3
- Hansa Yellow Deep – Pigment number: PY65
- Pyrrol scarlet – Pigment number: PR255
Try this painting for yourself ! Click the button below to download the worksheet for this painting.
The first step is to paint the blue sky. To produce this turquoise blue color appearance I used a mixture of Phthalo blue with a touch of Phthalo green.
Make sure you mix up a big puddle of paint to be able to cover the whole of the sky shape. If you run out of paint in the middle of painting, you’ll end up with a dried streak in your wash.
You can see that I’m pulling the brush along the edge of the parasol to get a clean controlled line. At the same time I’m leaving a very thin gap of white paper. This is a way to suggest the halo of light that you can see at the edge of the parasol in the reference photo.

As you’re painting the sky, make sure your first brush marks don’t start to dry. If necessary go back along the edge to keep it moist. Otherwise you can end up with watermarks where the paint edge begins to dry and settle into the paper.
When you’ve finished painting along the edge you can now work more quickly. The objective is to paint the sky shape with a lighter color along the parasol edge and a darker color in the corner. This is to simulate the graded sky color that you can see in the reference photo.

To do this I gradually added some more Phthalo blue to my paint mixture as I worked the wash outwards towards the corner. You should end up with a more intense color in the bottom corner. This is a typical technique for painting a graduated wash.
Now you can turn your attention to painting the orange parasol.
Because I’m right handed you can probably see that painting an accurate edge to the parasol from this position is going to be tricky. So to make this process easier I turned the sheet upside down.
This is one of the advantages of fixing your paper onto a board of some kind. Don’t hesitate to move your painting to get a more comfortable brush handling position.
Mix up a nice bright orange color and paint the whole of the parasol shape with a smooth flat wash. Remember to mix up plenty of paint. Keep your brush loaded with paint and pull out the wet wash until you reach the corner. And don’t forget to leave the white highlight along the outer edge of the parasol.
In the reference photo you can clearly see a glow of bright light where the sun is radiating through the fabric of the parasol.

To create this effect, while the paint is still wet, we’re going to use a lifting technique to blot up some of the color from the paper.
Rinse your brush, then blot it on a cloth so that it’s just slightly damp. Use the head of your brush to soak up some of the orange paint from the damp wash. You can do this several times, rinsing then blotting until you’re happy.
If the orange paint begins to dry then stop lifting. You may find that you get a textured effect spreading out from the area where you lifted the paint. In watercolors, this kind of pattern is known as a “bloom” or a “blossom”.
You can improve this by letting the paint dry completely then continuing to lift the paint. I find that a stiff-haired bristle brush, like this hog-hair brush, is good for this kind of thing.
Dip the brush in clear water, then wipe off the excess moisture. Use the slightly damp brush to rework the painted surface. This helps to blend the textured edges so you get a smoother gradient.
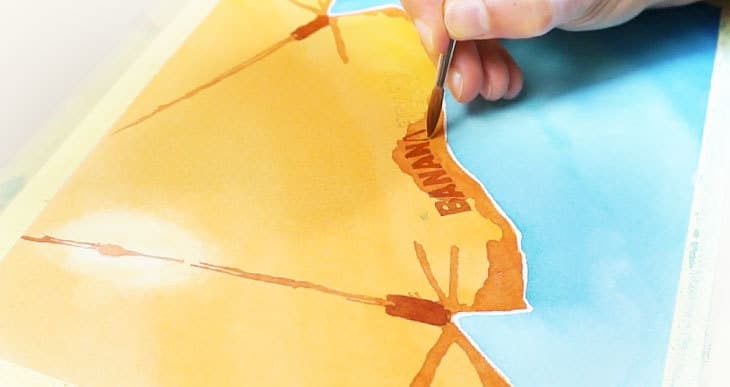
Turn the board around again so you can work on the finishing touches. Now that the paint is completely dry you can start working on the final details. Using an orange-brown mixture, start painting the spokes of the parasol. Then add some shapes to represent the shading at the outer edges of the fabric.
Painting hard-lined shapes like this over the top of an existing dry wash of color is known as a glazing technique. The underlying wash needs to be dry, otherwise the new brush marks will bleed into the underlying wash.
When you’ve finished adding these details, let the paint dry again.
As a final step, using the same color of paint, add some details to the ends of the spokes, then paint the words on the fringe of the parasol.
Now all you have to do is sit back and imagine yourself lying on the beach, sipping a delicious cocktail 🙂


This sounds great! I like your fast fresh bright style! Not that there aren’t lessons in there! Thanks!
Anthony, thank you for continuing to help us learn to paint with watercolors & understand what we are doing. You are great- artist, teacher & encouraging coach. Hoping you give us a “part 2” class option. Thank you again
Hi Kathi
Part 2 on the way 🙂
Hi Anthony,
Your lessons are really helpful and much appreciated, thank you.
And the icing on the cake is your enthusiasm for painting and teaching!
Thank you for sharing your talents with all of us.
Thanks Carl !
Have fun with your painting 🙂